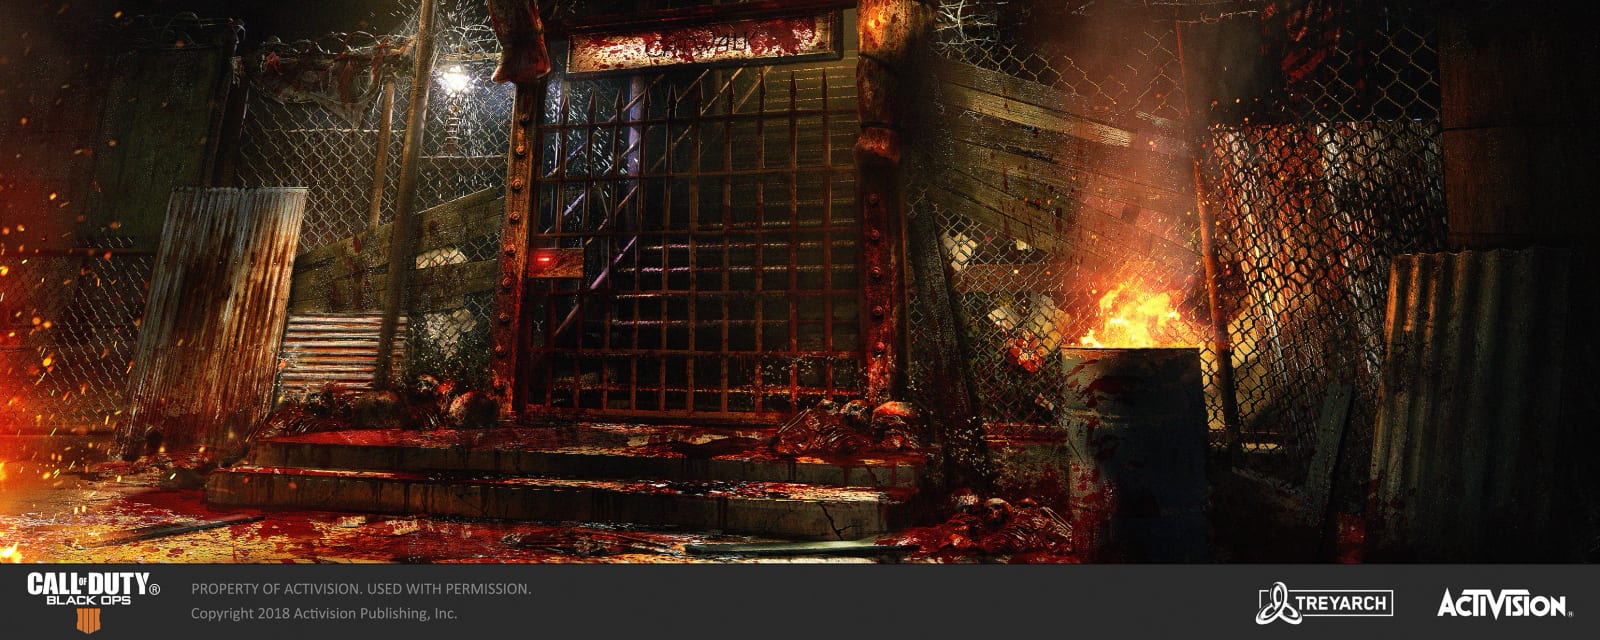
Blood of the Dead
The Aether reimagining of Mob of the Dead — Alcatraz reborn. Primis Richtofen is now the prisoner, and the mob's old death-loop has become a spectral prison run by the Warden. Build the Spectral Shield, feed the hellhounds for Hell's Retriever, chase the Kronorium-stealing seagull, clear five red-stone challenges, then break the Dark Mechanism to free Richtofen in the Most Escape Alive main quest. Fully solo-capable; only the very last handoff differs in co-op.
Open questions we're tracking
We publish what is confirmed. These are the things this guide is not certain of — listed here rather than quietly left out, so you can weigh them yourself.
- “Unverified specifics: the commonly cited method is to rack up a large number of Retriever-only kills (reported around 40 in a single round) and then retrieve the Redeemer from the lava-tunnel alcove; exact counts vary by source and patch, so confirm live.” Hell's Redeemer
Quick answers
How do you complete the Blood of the Dead Easter egg?
- Turn on West + East power (East spawns the first Warden → Warden's Key)
- Build the Spectral Shield (3 parts) and charge it; open mobile Pack-a-Punch
- Feed 3 hellhounds → Hell's Retriever; grab it during fast travel
- Get the Spoon (read 3 numbers → keypad → crane net → Retriever the arm)
- Scratch the Warden's House wall; bait a Warden slam → ritual room → red stone #1
- Bird hunt: spirit-blast the seagull 3 rounds, then code 872 + Retriever the Kronorium
- Read the Kronorium page code → lighthouse points to each red orb
- Clear Docks, Showers, Michigan Avenue, Power House, New Industries → 5 red stones
What is the Wonder Weapon on Blood of the Dead?
Who is the boss on Blood of the Dead?
How long does the Blood of the Dead Easter egg take?
Can you do the Blood of the Dead Easter egg solo?
What are the main areas on Blood of the Dead?
How many side Easter eggs are on Blood of the Dead?
When was Blood of the Dead released?
Map & Key areas
The map layout first, then the areas worth knowing by name. Map imagery © Activision, self-hosted.
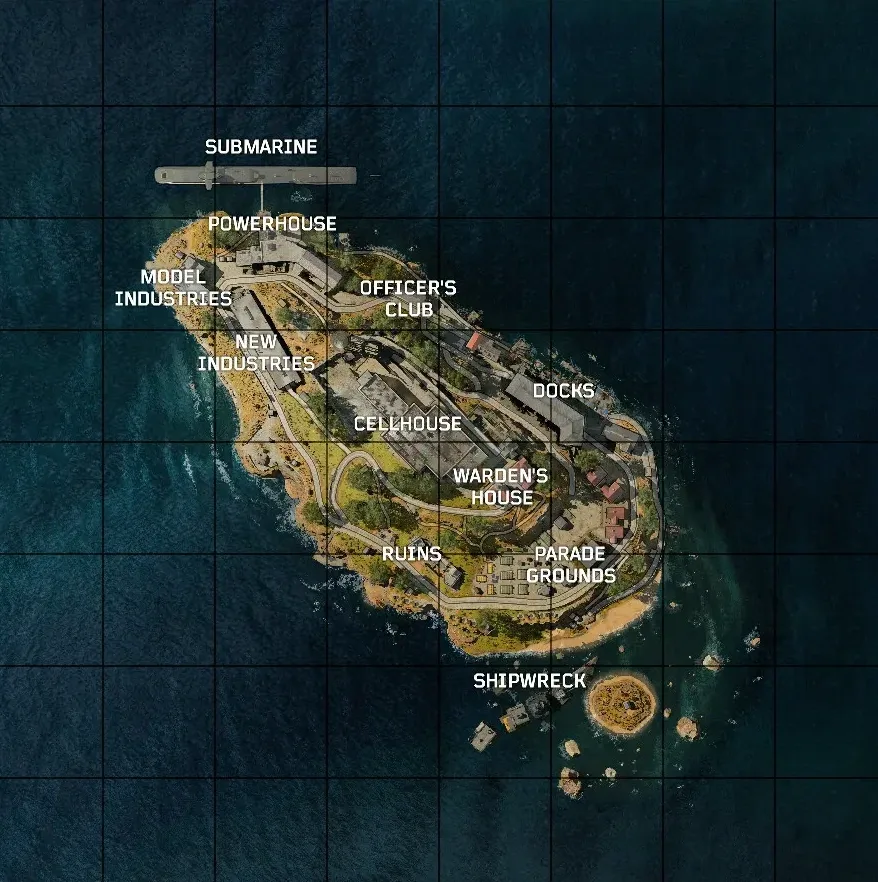
West Grounds / Spawn / Recreation Yard
Starting cells and the Catwalk crossing. Early wall-buys, the route toward West power, and the Michigan Avenue / Cell Block escort lanes.
Power House / Cell Blocks / Library
West power switch (by Brew), Cell Block 3rd Floor shield bench, the Library, and one of the Michigan Avenue escort exits.
Roof / Infirmary / Cafeteria
The rooftop voltmeter (mobile Pack-a-Punch anchor), the Spoon tub in the Infirmary, the third hellhound head, and the Showers/banjo challenge.
Citadel Tunnels / Showers
The all-important Citadel keypad (all codes go here), a fast-travel gondola point, the spirit-essence pool, and the Showers challenge orb.
Docks / Building 64
East power (Building 64 levers), the crane and net for the Spoon, the Morse-code Docks challenge, and the first Warden spawn.
Warden's House / Richtofen's Laboratory
The scratched ritual wall + Titan wall-buy, the electric-chair ritual room, and the laboratory map that holds the five red stones and the descent to the Dark Mechanism.
Steps at a glance
- Turn on West + East power (East spawns the first Warden → Warden's Key)
- Build the Spectral Shield (3 parts) and charge it; open mobile Pack-a-Punch
- Feed 3 hellhounds → Hell's Retriever; grab it during fast travel
- Get the Spoon (read 3 numbers → keypad → crane net → Retriever the arm)
- Scratch the Warden's House wall; bait a Warden slam → ritual room → red stone #1
- Bird hunt: spirit-blast the seagull 3 rounds, then code 872 + Retriever the Kronorium
- Read the Kronorium page code → lighthouse points to each red orb
- Clear Docks, Showers, Michigan Avenue, Power House, New Industries → 5 red stones
- Place all 5 stones, gear up, descend past the metal door (point of no return)
- Three Dark Mechanism cycles → Richtofen enters the machine
- Survive the invulnerable Warden, then finish it as Richtofen → ending cutscene
Before you start
What to have in hand before step 1 — from the loadout notes, from the walkthrough itself, and from the map's own quest documentation where the gate is never stated in a step.
- Cross the Catwalk early while enemy health is still low — whichever comes first, East power or that crossing, drops the first Warden's Key you need for the shield build. — step 1
- Roll the box until the Lock appears, shock it with the Warden's Key, then throw Hell's Retriever at it for the Attuned Spectral Shield — in co-op, every Retriever-holder throwing at the same moment all receive the upgrade. — step 2
- Enter 666 on the Citadel keypad for a once-per-match Warden (or wait for a natural round-18+ one) — ordinary melee and gunfire will not open the scratched wall, only a Warden's slam will. — step 5
- Fully gear up before the Laboratory's metal door — Pack-a-Punch, repair the shield, refill both spirit blasts, buy every perk — it is the point of no return into the Warden boss. — step 9
- Solo, you play the Richtofen finish yourself; in co-op the Richtofen player carries that final sequence while teammates hold the arena. — step 10
Set aside 60–95 min · 1–4 (solo-capable) · the full loadout is further down this page
Where your run will differ
Gathered here so you meet them before they cost you a run rather than after — quoted word for word from the guide below, or researched from the map's own quest documentation.
What changes with your player count. The rest of the guide is the same either way.
- “In co-op, every Retriever-holder who throws at the same moment all receive the upgrade.” step 2
- “Solo vs co-op: identical solo; in co-op one player reads the numbers while another covers the keypad.” step 4
- “Co-op only eases crowd control on the escorts (Michigan Avenue and New Industries especially)…” step 8
- “Solo, you play the Richtofen finish yourself; in co-op the Richtofen player carries that final sequence while teammates hold the arena.” step 10
Full walkthrough
The quest in the order this guide runs it — tap any step to jump to it, and it fills in as you tick steps off.
Turn on West and East power
Flip the West switch in the Power House (near the Brew/Bratwurst area), then cross to Building 64 on the Docks for East power. Two of Building 64's three levers are already thrown — flip the remaining one. The East switch spawns the first Warden (Brutus); kill him and take the Warden's Key he drops (needed for the shield build and several unlocks).
Route tip: cross the Catwalk early while enemy health is still low — the first catwalk crossing into the prison can itself spawn the first Warden, so whichever comes first (East power or the crossing) drops the Warden's Key. Then double back to collect shield parts and feed hellhounds so you are not backtracking later.
Build and charge the Spectral Shield, open Pack-a-Punch
Gather three parts, then build at any shield bench — Transverse Tunnel, Cell Block 3rd Floor, or the Docks. Charge it by killing zombies with the shield key melee: 3 souls = 1 spirit blast, and the base shield stores 2. Hitting a sparking power box gives one free refill per round. Then aim a spirit blast at the voltmeter on the Roof to open the mobile Pack-a-Punch — after that it rotates between Roof, Power House and Building 64.
Attuned Spectral Shield (core finale prep): roll the Mystery Box until the Lock appears in it, shock the Lock with the Warden's Key until it glows blue-white, then throw Hell's Retriever at it. In co-op, every Retriever-holder who throws at the same moment all receive the upgrade.
- Spirit essence — randomised between the Library, Times Square, or the Michigan Avenue pool. Search all three; it glows in shield vision.
- Door / frame — randomised between the Citadel Tunnels or China Alley.
- Warden's Key — dropped by the first Warden after East power (Step 1); one is enough to build.
Feed the hellhounds for Hell's Retriever
Find the three mounted hellhound heads and get close kills in front of each until it disappears (roughly six per head). With all three fed, use fast travel from the Showers or Warden's House and grab the floating Hell's Retriever as you pass through the lava tunnel. It is a returning one-hit tomahawk with no ammo cost — and the tool you will throw at the Kronorium later.
Tip: the third head is in the Cafeteria/Infirmary wing; feed heads on the same loop you use to collect shield parts.
Obtain the Spoon
In the Warden's Office, use shield vision to read the three shield-visible numbers (near-to-far order — this is a per-match code). Spirit-blast the Citadel keypad and enter them. Then spirit-blast the Docks voltmeter, wait for the crane net to stop swinging, throw Hell's Retriever at the net, and take the Spoon from the arm that drops.
Solo vs co-op: identical solo; in co-op one player reads the numbers while another covers the keypad. The Spoon can be upgraded to the Golden Spork (see side EEs) but the plain Spoon is all the quest requires.
Open the Warden's Ritual Room
In the Warden's House, melee the wall left of the Titan wall-buy at the top of the stairs with the Spoon — a visible scratch confirms the right panel. Now spawn a Warden: enter 666 on the Citadel keypad for the once-per-match Warden, or wait for a natural round-18+ electric Warden. Throw a Monkey Bomb directly beneath the scratched wall and move away so the Warden targets the decoy and ground-slams the wall — ordinary melee and gunfire will not open it. Inside, flip the switch beside the electric chair, take the red stone from the table, and place it on the wall map in Richtofen's Laboratory.
Tip: if the Warden dies before slamming the wall, spawn another on a later round (natural Wardens keep coming). Monkey Bombs make the slam position far more reliable than baiting by body-blocking.
Chase the Kronorium bird (four rounds)
Interact with the Kronorium on the laboratory floor; a seagull steals it and lands on a shield-visible perch. Aim through the Spectral Shield, listen for squawking, and spirit-blast the bird once per round. It only moves after a valid blast cue — do not end a round until it vanishes. Repeat on the next two rounds. On the fourth round a crying man is added to the audio and the perch shows as a pulsing white light: spirit-blast the keypad, enter 872 for Zombie Blood, then at the white light peek through the shield only until the book renders, lower the shield, and throw Hell's Retriever at it to drop the Kronorium at your feet.
- Sweep these grouped areas for each perch: Docks / Building 64; Warden's House / Citadel; Cell Blocks / Library; Roof / Infirmary; Cafeteria / Showers; Recreation Yard / Catwalk; and West Grounds.
- The bird draws from a very large fixed spawn pool and only re-rolls after a successful blast + round change — there is no single fixed route.
- Fourth-round white light appears at one of the restricted “orange-list” locations; the Temporal Gift elixir widens the short reveal window.
Read the Kronorium code and follow the lighthouse
Return the Kronorium to the laboratory and place it on the dead body / reading stand, then interact to stop the pages. Use shield vision to read the four-symbol page code (per-match) and enter it at the Citadel keypad. A valid code lights the lighthouse beam, which points to one of five red orbs. Go to the lit orb and interact to begin that challenge; after each recovered stone, re-read the book for the next code and the beam points to the next challenge. The challenge order is book-determined and changes per match.
Tip: do the easiest challenges first and save New Industries for last, once you have a strong loadout, an upgraded shield and Undead Man Walking.
Clear the five red-stone challenges
Each lit orb starts one challenge; complete it, recover its red stone, and return to the lighthouse for the next. All five must be done. Every challenge is escort- or shield-dependent, so keep spirit blasts charged and clear the route before you commit.
Solo vs co-op: all five are solo-completable. Co-op only eases crowd control on the escorts (Michigan Avenue and New Industries especially); the objectives are identical. Undead Man Walking + Monkey Bombs make the escorts dramatically safer.
- Docks — listen to the lighthouse Morse flashes, convert the groups to a number total (per-match) and enter it on the telegraph, then escort the ghost from the Infirmary toward the Docks. Fails on a wrong Morse sum or a lost ghost.
- Showers — carry the spectral banjo into the blue spirit circle and earn kills until it completes, returning the banjo before its damage/timeout turns lethal; repeat the circles for the stone.
- Michigan Avenue — escort a ghost from the Cafeteria through D-Block / Library / Cell Block; kill attackers before they touch it. Fails if the ghost takes too much damage.
- Power House — a five-round Simon Says: record the three lit Building 64 panels, translate the sticky-note symbols via the punch-card / monitor reference (per-match mapping), then spirit-blast the ghost exactly as it reaches each matching lever. Fails on a wrong symbol or blast timing.
- New Industries — start with full shield charges; use the shield key and spirit blasts to force the ghost through its route and turn it red WITHOUT letting it kill the other spirit, then finish it at the Spin Trap. Hardest of the five; save for last.
Place all five stones and descend
With all five red stones on the laboratory wall map, the hidden staircase / metal door opens. Fully gear up first — Pack-a-Punch your weapons, repair the shield, refill both spirit blasts, buy every perk, and set your equipment. The metal laboratory door is the point of no return. All players descend and interact as prompted, then stand clear of the central machinery until the first Warden cycle begins.
Do not descend with a nearly broken shield — the boss demands repeated spirit blasts and gives few chances to rebuild. An Attuned (upgraded) shield with four blasts is a large advantage here.
Dark Mechanism and the Warden boss
Three identical cycles: kill adds to gain shield-key souls, step into the active red cylinder around the large Warden and use the shield to survive the pressure, shoot the three red orbs on the mechanism, then spirit-blast the white orb that rises above it to advance one cycle. Avoid the lethal red floor circles. After the third cycle, Richtofen interacts with the machine and a cutscene pulls him away.
Survive the handoff: the remaining players now face an invulnerable Warden and endless adds — do NOT waste ammo on him. Kite, revive and use specialist/equipment until Richtofen re-enters. Then, as Richtofen, use the returned power/weapon sequence to make the Warden vulnerable and finish him.
Side Easter Eggs & extras
Everything beyond the main quest. Tap any entry to open the full how-and-where breakdown.
“Where Are We Going”
Malukah, with new parts by Jack Wall and lyrics by Cindy Shapiro — a remix of the Mob of the Dead track. Spirit-blast the Citadel keypad and enter 935 (a nod to Group 935), separate from the quest codes, once per match. Cannot be triggered on Casual difficulty.
Spectral Shield & the Attuned upgrade
The shield is mandatory (Step 2) — it is your spirit-blast tool for every keypad, voltmeter, bird and boss orb. The optional Attuned Spectral Shield upgrade adds extra health and two more spirit blasts (four total); highly recommended before the laboratory descent and the Warden fight.
Blundergat → Magmagat / Acidgat
Pull the Blundergat from the Mystery Box, then either build the Acid Gat kit for the Acidgat or feed it into Pack-a-Punch for the Magmagat — molten area denial that trivialises the escort challenges and the Dark Mechanism adds. Not required for the quest, but the strongest crowd tool on the map.
Hell's Redeemer
The upgraded, infinite version of Hell's Retriever — a one-hit returning tomahawk with no ammo cost.
Unverified specifics: the commonly cited method is to rack up a large number of Retriever-only kills (reported around 40 in a single round) and then retrieve the Redeemer from the lava-tunnel alcove; exact counts vary by source and patch, so confirm live.
- Earn the Hell's Retriever first (feed all three Cerberus heads)
- Get a round's worth of kills using only the Retriever
- Fly to the Golden Gate Bridge and throw the Retriever into the fiery pit — leave it there
- Return to Alcatraz; next round, collect the Hell's Redeemer at the Cerberus head — faster, stronger, longer range
Golden Spork (Spoon upgrade)
An optional one-hit melee upgrade of the Spoon, echoing Mob of the Dead: acquire the Spoon (Step 4), get a run of Acid Gat / Magmagat kills in the Showers, and return the Spoon to the Infirmary blood tub to claim the Golden Spork. Not needed for the main quest.
Purgatory (Afterlife) & self-revive
The BO4 reimagining of Mob of the Dead's Afterlife: there is no Quick Revive machine on standard — when you go down you enter Purgatory with a spectral pistol and must earn souls to self-revive. It is also how downed players stay useful. Keep your shield charged so you are rarely relying on it.
The Warden (Brutus)
The recurring mini-boss. East power spawns the first one (dropping the Warden's Key), code 666 spawns the once-per-match Warden for the ritual-room slam, and natural electric Wardens return from round 18+. He locks equipment/benches until paid off or killed — focus his helmet to speed the kill.
Recommended loadouts
Three strong picks for this map — the map's Wonder Weapon plus reliable box/wall options. These are pre-augment-era games, so the setup is the gun plus Pack-a-Punch and perk synergy.
Magmagat / Acidgat (Blundergat PaP)
Wonder weaponPull the Blundergat from the box, then build the Acid Gat kit or Pack-a-Punch it into the Magmagat. Molten pools shred the escort challenges and the Dark Mechanism adds; pair with Dying Wish and Winter's Wail for survivability.
Hell's Redeemer
Infinite meleeUpgrade Hell's Retriever (see side EEs) — a returning one-hit tomahawk with no ammo cost. Ideal for the Kronorium retrieval throws and safe kills while your shield recharges.
Titan (Pack-a-Punched)
Wall-buy workhorseThe Warden's House Titan LMG wall-buy, PaP'd, is the reliable bullet gun for the long four-round bird hunt and the boss cycles; Stamin-Up + a Max Ammo elixir keep it fed.
Recommended elixirs & talismans
Black Ops 4 has no GobbleGums — equip 4 Elixirs per class and one passive Talisman from match start. Weapons and Hell's Retriever/Redeemer are in Recommended loadouts above.
Perkaholic
EpicAll loadout perks plus 6 random ones — worth it for this long, tough quest.
Perk Up
Legendary+4 random non-loadout perks.
Cache Back
LegendaryDrops a Max Ammo.
Kill Joy
RareDrops an Insta-Kill to reset the Warden.
Free Fire
LegendaryNo ammo consumed for 30s.
Phoenix Up
EpicRevive all downed team-mates, loadout perks kept.
Near Death Experience
EpicProximity revive (10 min / 5 revives).
Suit Up
EpicFull armor for you and nearby players.
Join the Party
EpicSpectators spawn in and downed players are revived.
Glowing Phylactery
EpicAn extra self-revive — Blood of the Dead is one of BO4's hardest quests.
Grand Amulet (perk of choice)
LegendaryThat perk is never lost, even when downed.
Charm of the Miser
CommonCheaper Pack-a-Punch.
Elixir reference (Black Ops 4)
All 51 Black Ops 4 Elixirs — you equip 4 per class. Classic and Whimsical are unlimited; Common → Epic are consumable, brewed with Nebulium Plasma. These are Elixirs, not GobbleGums. Filter by tier.
Always Done Swiftly
ClassicFaster ADS walk/aim for 5 min.

Anywhere But Here
ClassicRandom teleport with a blast.
Burned Out
ClassicAttackers ignite nearby zombies (3 hits).
Equip Mint
ClassicRefresh your equipment cooldowns.
Head Scan
ClassicHeadshot instakill chance for 2 min.
Temporal Gift
ClassicLonger power-ups for 5 min.
Aftertaste
ClassicKeep perks on revive (5 min / 1 down).
Point Drops
ClassicDrop 500 of your points as a power-up.
Anti-Entrapment
ClassicTrap-damage immunity for 30s.
Nowhere But There
ClassicTeleport to a downed player.

Now You See Me
ClassicAll zombies chase you for 15s.
Arsenal Accelerator
ClassicFaster special-weapon charge for 2 min.
Pop Shocks
ClassicMelee electrostatic discharge (5).
Stock Option
ClassicAmmo drawn from your stockpile for 2 min.
Bullet Boost
CommonApply or re-roll an Alternate Ammo Type.
Ctrl-Z
CommonTurn up to 2 nearby zombies into allies (30s).
Dead of Nuclear Winter
CommonDrops a Nuke.
In Plain Sight
CommonZombies ignore you for 10s.
Licensed Contractor
CommonDrops a Carpenter.
Phantom Reload
Common30% chance of a free-magazine reload for 4 min.
Sword Flay
CommonMelee instakills basics / 5× for 1 min.
Who's Keeping Score?
CommonDrops Double Points.
Alchemical Antithesis
RareEvery 10 points becomes 1 reserve ammo (1 min).
Blood Debt
RareLose points instead of health for 1 min.
Extra Credit
RareA personal 1,250-point drop.
Immolation Liquidation
RareDrops a Fire Sale.
Kill Joy
RareDrops an Insta-Kill.
Shields Up
RareGrants a new shield.
Talkin' Bout Regeneration
RareConstant health regen while moving for 4 min.
Shopping Free
EpicFree purchases for 1 min.
Head Drama
EpicBody shots register as head shots for 5 min.
Secret Shopper
EpicAny wall-buy discounts ammo for any gun (10 min).
Reign Drops
EpicOne of each of the 9 core power-ups.
Power Vacuum
EpicMore drops with the cap ignored for 5 min.
Near Death Experience
EpicProximity revive (10 min / 5).
Phoenix Up
EpicRevive all downed players, loadout perks kept.
Conflagration Liquidation
EpicDrops a Bonfire Sale.
Join the Party
EpicSpectators spawn in and downed players are revived.
Perkaholic
EpicAll loadout perks plus 6 random ones.
Refresh Mint
EpicRefresh equipment, special and perk cooldowns for all.
Suit Up
EpicFull armor for you and nearby players.
Wall Power
EpicYour next wall-buy comes Pack-a-Punched.
Cache Back
LegendaryDrops a Max Ammo.
Dividend Yield
LegendaryBonus shared points for 5 min.
Free Fire
LegendaryNo ammo consumed for 30s.
Perk Up
Legendary+4 random non-loadout perks.
Power Keg
LegendaryDrops a Full Power power-up.
Wall to Wall Clearance
LegendaryA wall-buy Fire Sale for 30s.
Undead Man Walking
LegendaryZombies move at shambling speed for 1 min.
Newtonian Negation · Quacknarok
Whimsical2 cosmetic-only elixirs.
Dark Ops & mastery cards (Black Ops 4)
Black Ops 4's Zombies ‘Dark Ops’ challenge cards (the full set is a known community gap). Filter by category.
Put to the Quest
Dark OpsComplete the main Easter eggs on all three launch maps (IX, Voyage of Despair, Blood of the Dead).

Dodgy Devil
Dark OpsReach Round 20 on classic Zombies without taking a hit.

Perk Maestro
Dark OpsActivate every perk modifier.
Zombie Dark Ops Master
MasteryComplete all Zombies Dark Ops challenges.
When it isn't working
The stalls that actually cost people runs on this map, and what to do about each.
No Warden's Key after East power
Shield parts won't show up
The Warden won't slam the scratched wall
The Kronorium bird won't move
A red-stone challenge keeps failing
Common Blood of the Dead questions
Direct answers to the specific things players look up mid-game — part locations, puzzle steps and more.
Why do the codes never match the guides?
What is the one thing that never changes?
Is the shield upgrade worth doing?
Where is the power on Blood of the Dead?
Why is there no Quick Revive?
How do I get the Magmagat?
How do I get the Golden Spork here?
How do I get Hell's Redeemer?
How do I play the song?
How do I handle the Warden?
Visual guides & sources
Screenshots and exact part locations live in these — open one on a second screen.
Map discussion
A shared community board for Blood of the Dead — posts are public, saved on the server and visible to everyone across devices. Handy for strategies, spawn variations you've noticed, or steps to double-check. Please keep it civil and on-topic.