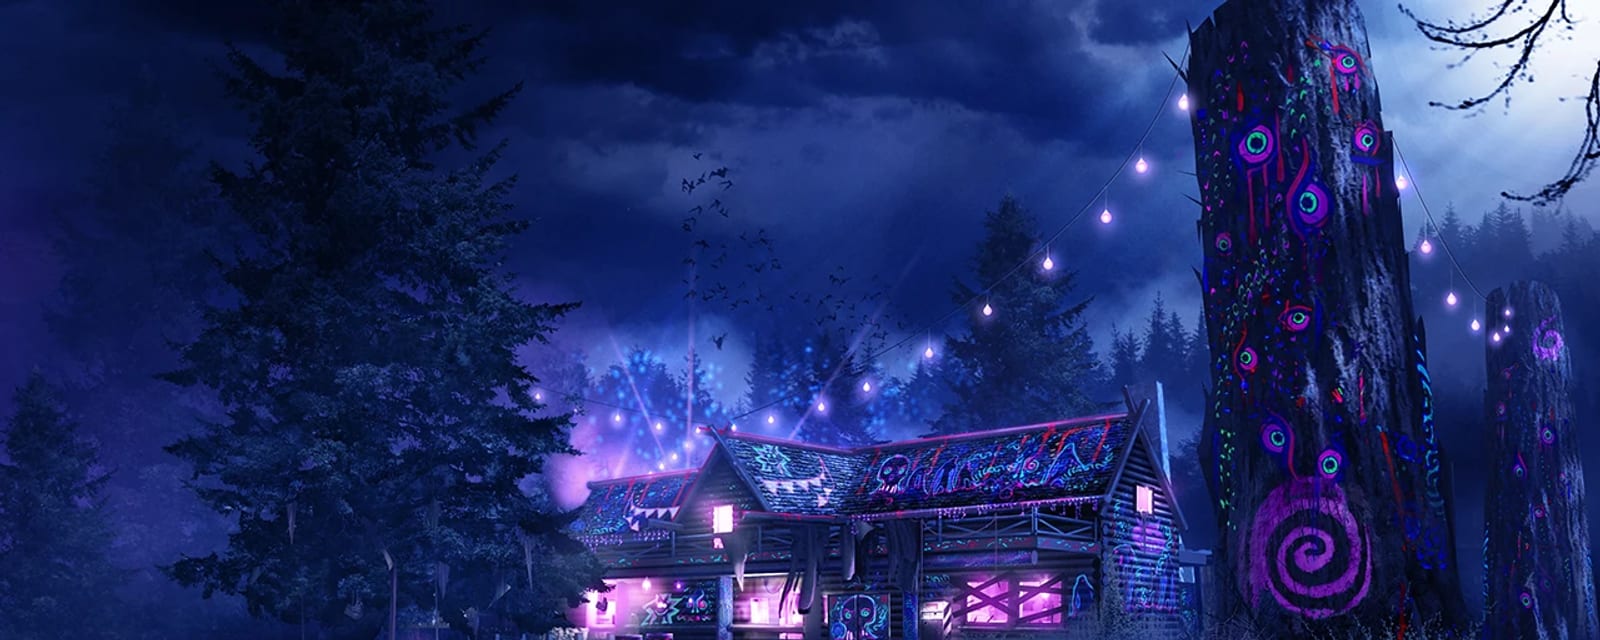
Rave in the Redwoods
A 1990s summer-camp forest rave inside Willard Wyler's movie world. Four teen-flick archetypes face zombies and a machete-wielding Slasher, blending a bonfire-ritual quest (the main Easter egg is called Locksmith) with a neon Rave Mode gimmick.
Quick answers
How do you complete the Rave in the Redwoods Easter egg?
- Restore power in the Old Mine basement (down through the Mines)
- Collect Handle, Engine & Propeller → build the boat at the Docks Boathouse
- Grab both film reels → repair the Turtle Island projector → open Pack-a-Punch
- Talk to Kevin Smith in the Turtle Island attic
- Ritual 1 — shoot off 10 arms at the Amphitheatre bonfire, kill the Slasher
- Ritual 2 — remove 10 legs at Quickies, kill the Slasher
- Ritual 3 — 10 headshots at the Beach (Slappy Taffy), kill the Slasher
- Fully prepare (point of no return), then synchronise the unlit basement buttons
What is the Wonder Weapon on Rave in the Redwoods?
Who is the boss on Rave in the Redwoods?
How long does the Rave in the Redwoods Easter egg take?
Can you do the Rave in the Redwoods Easter egg solo?
What are the main areas on Rave in the Redwoods?
How many side Easter eggs are on Rave in the Redwoods?
When was Rave in the Redwoods released?
Map & Key areas
The map layout first, then the areas worth knowing by name. Map imagery © Activision, self-hosted.
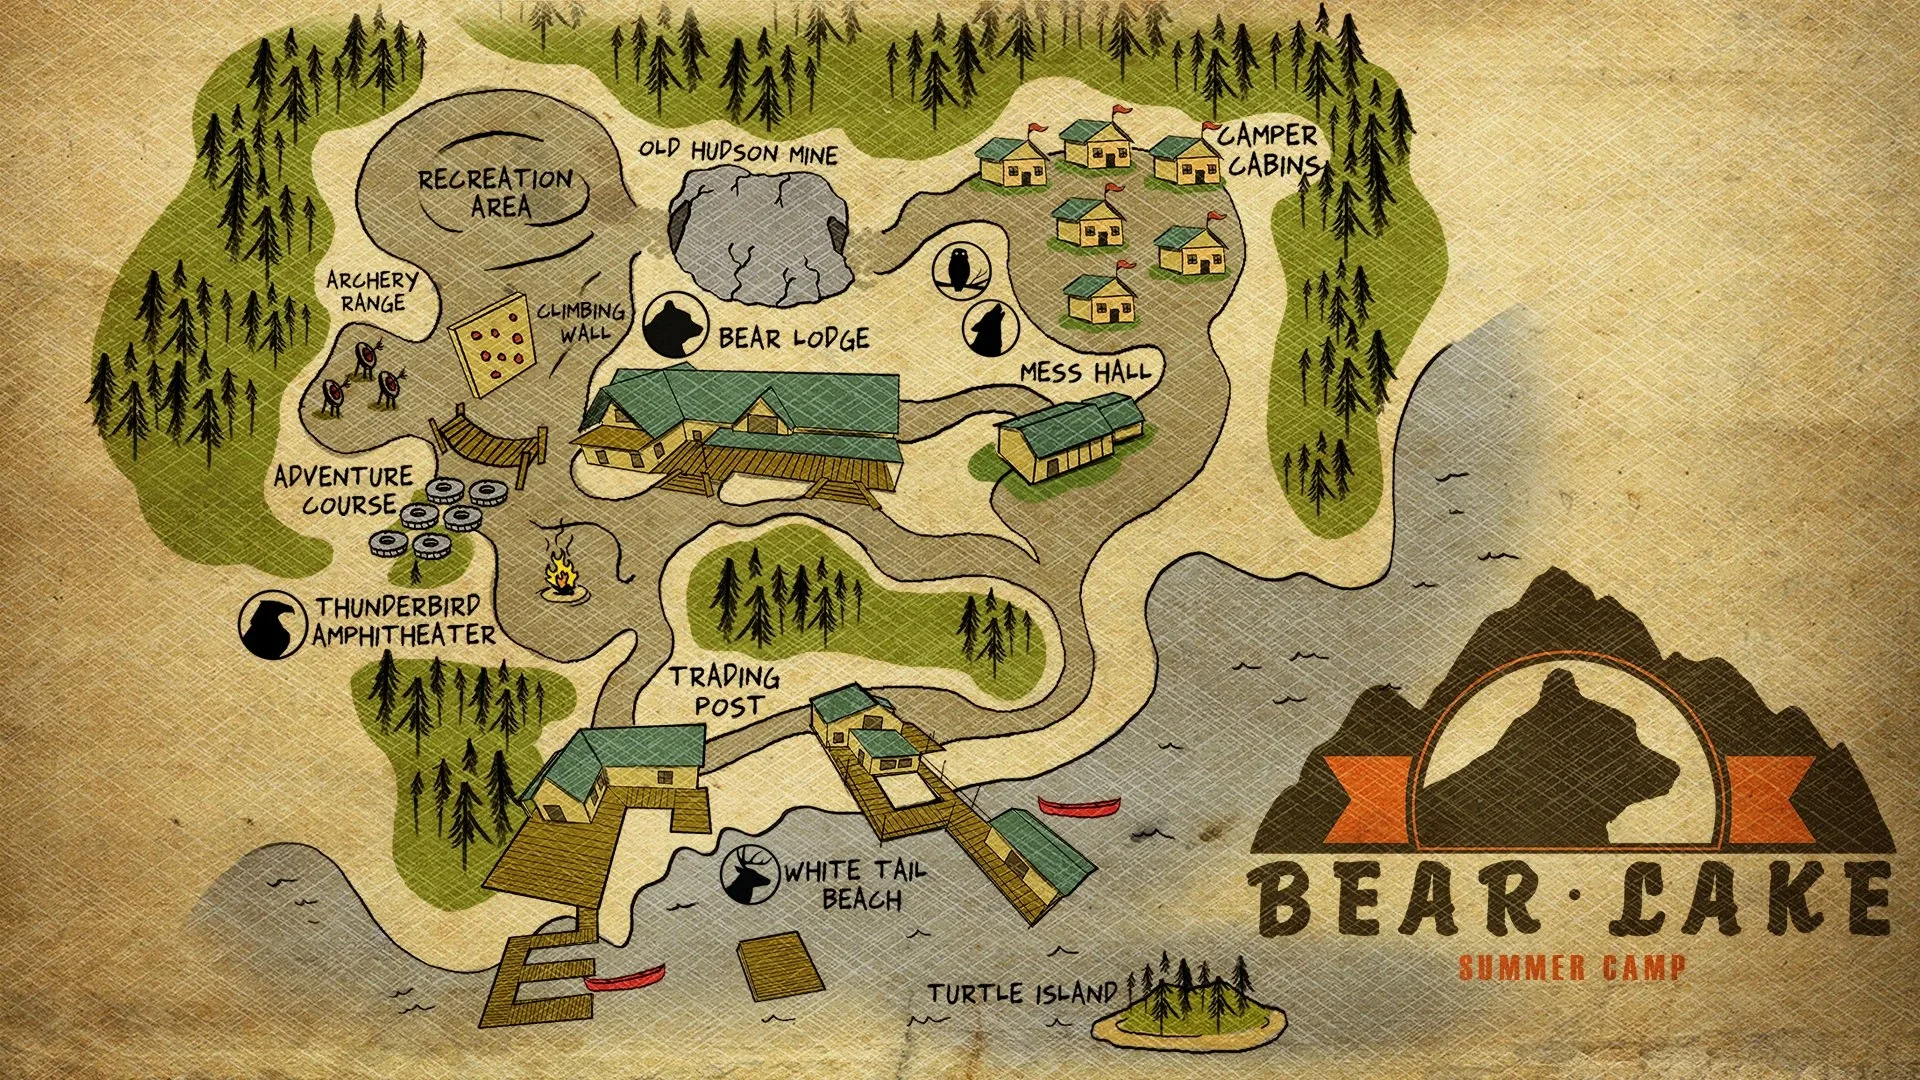
Spawn Lodge (Bear Lodge)
Starting cabin — the lobby front desk, the upstairs perk balcony, and the 10 song wisps.
Thunderbird Amphitheater
Early door from spawn; the stage is used in a ritual.
Recreation / Rave Area
Central open rave with the giant carved statue and the DJ decks.
Old Mine
Basement holds the power switch (a zombie lashed to a wheel) and a bone pile.
Bear Lake / Docks
Waterfront by Slappy Taffy; the repaired boat departs for Turtle Island here.
Turtle Island
Across the lake — Kevin Smith's radio, the Pack-a-Punch projector and the boss arena.
Steps at a glance
- Restore power in the Old Mine basement (down through the Mines)
- Collect Handle, Engine & Propeller → build the boat at the Docks Boathouse
- Grab both film reels → repair the Turtle Island projector → open Pack-a-Punch
- Talk to Kevin Smith in the Turtle Island attic
- Ritual 1 — shoot off 10 arms at the Amphitheatre bonfire, kill the Slasher
- Ritual 2 — remove 10 legs at Quickies, kill the Slasher
- Ritual 3 — 10 headshots at the Beach (Slappy Taffy), kill the Slasher
- Fully prepare (point of no return), then synchronise the unlit basement buttons
- Board the boat together → the Super Slasher arena
- Three damage cycles: charge skulls → expose the waist → body symbols → survive the wind
- Kill the Super Slasher → collect the Soul Key
Before you start
What to have in hand before step 1 — from the loadout notes, from the walkthrough itself, and from the map's own quest documentation where the gate is never stated in a step.
- Buy the Banshee near the Lodge only when you can spare the points — it is needed for the three rituals later, not immediately. — step 1
- Keep one slow zombie alive while gathering the three boat parts and buying perks, so a round does not end mid-errand. — step 2
- Equip a weak dismemberment weapon (an unupgraded Banshee is standard) for the arm and leg rituals — a powerful or explosive gun kills the zombie before the limb detaches. — step 6
- Each ritual gives you about 70 seconds in Rave Mode — don't stop at a manual count of ten, wait for the photo or skull to visibly glow, or the timer expiring costs you a random perk. — step 6
- Finish every weapon upgrade, perk, Fate card and ammo purchase before syncing the basement buttons — it redirects the boat to the boss arena and cuts off ordinary Pack-a-Punch. — step 9
- Solo uses a single unlit basement button; co-op needs one player per required button, interacting at nearly the same moment on a countdown. — step 9
Set aside 50–80 min · 1–4 (solo-capable)
Where your run will differ
Gathered here so you meet them before they cost you a run rather than after — quoted word for word from the guide below, or researched from the map's own quest documentation.
What changes with your player count. The rest of the guide is the same either way.
- “Phase A — charge every skull: locate the hovering skull sites ( two are active in solo; co-op spawns more — count the visible skull beams in your lobby, not a fixed number).” step 10
Full walkthrough
The quest in the order this guide runs it — tap any step to jump to it, and it fills in as you tick steps off.
Restore power (Old Mine basement)
The Bear Lodge (spawn) is the hub — learn the loop between the Lodge, Mines, Mess Hall, Docks and Rave Area early, since nearly every quest trip runs through it. Open out of the Lodge toward the Mines and follow them down into the room directly beneath spawn. The single power switch is on the basement wall opposite the stairs (a zombie is lashed to a wooden wheel here). Flip it once — the room lights and every perk machine powers up.
This basement is also the late-game button room. While it's quiet, note the Magic Wheel, the stairs, the three-button wall to the right of the stairs and the lone button to the left of the wheel — you'll synchronise those at the point of no return. Buy the Banshee by the Lodge only when you can spare the points; it's needed for the rituals later, not immediately.
Collect the three boat parts
Three parts sit on fixed spots — grab all three:
- Handle / Paddle — Rave Area, leaning against the structure right next to the Quickies perk machine.
- Engine — Mess Hall, leaning against the central support pillar in the middle of the room.
- Propeller — Bear Lodge upper floor, inside the Tuff 'Nuff room above the spawn floor.
Keep one slow zombie alive while you gather parts and buy perks so a round doesn't end mid-errand.
Build the boat & grab film reel 1
Take all three parts to the unfinished boat at the Boathouse on the Docks and interact to build it. Before boarding, pick up the first film reel lying on the docks just outside the boat area — boarding without it only forces an unnecessary return trip.
Cross to Turtle Island, reel 2 & open Pack-a-Punch
Ride the repaired boat across the lake. Before entering the cabin, walk around its exterior and collect the second film reel just outside the cabin's back door (near the rear campfire approach, not inside the attic). Inside, with both reels held, interact with the broken projector — a portal opens on the wall. Step through to the projector room to reach Pack-a-Punch. You have about 30 seconds inside before automatic ejection, then a roughly one-minute cooldown before you can re-enter.
Talk to Kevin Smith
With the projector repaired, go up to the cabin attic and interact with Kevin Smith. Let his full dialogue finish — this unlocks the first ritual photo back in the Rave Area.
If the first photo never appears, his line probably didn't complete: return, wait for any current dialogue to end, and interact with him again.
Ritual 1 — 10 arms at the Amphitheatre
Collect the first photo piece from the ground directly behind the large Burning Man structure in the Rave Area. Equip a weak dismemberment weapon (an unupgraded Banshee is the standard choice) and aim at arms, not centre mass — powerful or explosive guns kill the zombie before the limb detaches and waste targets. Place the photo on the ground in front of the enormous central bonfire; Rave Mode begins and the timer starts at once. Shoot off 10 zombie arms in about 70 seconds. When the photo glows, interact with it, kill the ritual Slasher that spawns using your normal weapon, then take the Max Ammo and pick up the cleansed photo.
Don't leave just because your manual count hit ten — the photo must visibly glow. If the timer expires you lose one random perk; rebuy it and interact with the photo to retry (the piece stays in place, so you don't recollect it).
Ritual 2 — 10 legs at Quickies
Ride back and speak to Kevin in the attic again; wait for the line to finish. The second photo piece is at the Bear Lodge — upstairs in the Tuff 'Nuff room, on the floor by the doorway. Place it in front of the Quickies machine in the Rave Area. In Rave Mode, use the same weak weapon and aim below the knee to remove 10 legs in ~70 seconds (a crawler still counts once the leg is off). Wait for the glow, interact, kill the second Slasher, take the Max Ammo and collect the photo.
Shooting too high kills through the torso and doesn't count — back off, aim at the ankles and fire one controlled shot at a time. Avoid perks or weapon effects that cause automatic explosive kills.
Ritual 3 — 10 headshots at the Beach
Return the second photo to Kevin, wait for his line, then go to the Bear Lodge basement and pick up the skull on the floor to the left of the Magic Wheel. Carry it to the Beach and set it on the ground in front of the Slappy Taffy machine; Rave Mode and the final timed task begin immediately. Score 10 confirmed headshot kills with a stable bullet weapon in ~70 seconds. Interact with the glowing skull, kill the third Slasher, take the Max Ammo and pick up the completed skull — this arms the basement button trigger.
Head removal without an actual headshot kill can be unreliable; watch for the skull itself to glow rather than trusting hit-markers.
Point of no return: buttons & board together
Finish everything first. Synchronising the buttons redirects the boat to the boss arena and cuts off ordinary Pack-a-Punch, so complete all weapon upgrades, perks, Fate cards and ammo before pressing anything. In the basement, inspect the four wall buttons: three on the wall to the right of the stairs and one to the left of the Magic Wheel. Only the buttons whose indicator lights are currently dark/unlit are part of the trigger.
- Solo — interact with the required unlit control.
- Co-op — assign one player per required button and, on a clear countdown, have everyone interact at nearly the same moment.
An alarm confirms a good sync; if none plays, reset positions and retry (don't assume one delayed press registered). Then move to the Boathouse and have all players board within the same window — Kevin appears on the ride and the boat stops at the boss version of Turtle Island.
A missing or late player can break the transition, so count down the boarding interaction as well.
Boss — charge the skulls & expose the waist
The fight is three repeated damage cycles; the team is held in scripted Rave Mode for the charging portions. Phase A — charge every skull: locate the hovering skull sites (two are active in solo; co-op spawns more — count the visible skull beams in your lobby, not a fixed number). Kill zombies inside each skull's capture radius to feed souls (~30 per skull is commonly reported); a full skull shines a tall vertical beam. A full skull soon starts to descend — nearby kills top it back up, but if it bottoms out it resets to empty, so assign someone to watch charged skulls while the last one fills. The phase is ready only when all active skulls merge into one glowing circle on the ground. Phase B — expose the boss: bait the Super Slasher to walk or ground-slam onto the merged circle so his lower torso/waist glows, then focus fire the glowing waist until the scripted transition drops Rave Mode. If the glow fades before the transition, reposition him over the circle and try again — don't dump ammo into non-glowing armour.
Saw blades track players on the ground during transitions — keep moving and don't stack on teammates. Skeletons here are much tougher than ordinary zombies; refill ammo from drops before each charge phase.
Boss — body symbols & windstorm survival
Phase C — destroy the body symbols: after a short delay a bright symbol appears on a random part of the Super Slasher — check legs, arms, back and torso. Shoot the active symbol until it vanishes, then scan for the next. About eight symbols is typical, but the true endpoint is the boss visibly recoiling and pounding his chest — only fire on the lit symbol, as ordinary body damage doesn't advance it. Phase D — windstorm (cycles 1 and 2 only): two saw blades chase players as the Slasher climbs onto the cabin and a windstorm begins. Get every player into a green rock circle (behind the arena rocks) immediately — staying in the open does severe or lethal damage. Hold for ~30 seconds, killing the skeletons that attack the safe area without stepping out. When the storm ends, return to the skull positions for the next cycle; new blocking walls may change your route. The dreamcatchers above the cabin show how many cycles remain.
If the symbol phase won't end, search his rear and lower legs for a symbol hidden by his orientation — continue until the chest-pound confirmation.
Final burn & collect the Soul Key
After the third symbol sequence there is no windstorm — pour all remaining damage into the Super Slasher and kill him conventionally (an upgraded Vlad crossbow shines here). When he dies a Soul Key fragment appears; make sure at least one living player picks it up to trigger the ending.
Side Easter Eggs & extras
Everything beyond the main quest. Tap any entry to open the full how-and-where breakdown.
“Puppet Strings”
Chris Egert. Turn on power, enter Rave Mode, then shoot 10 glowing purple wisps hidden inside the Bear Lodge (spawn cabin). Rewards the Rave On achievement.
- Turn on power, get a rave pouch (zombie drop) and enter Rave Mode
- Shoot 10 glowing purple wisps hidden inside the Bear Lodge (spawn cabin)
- Spawn room — above the fireplace chandelier, and under the front desk
- Upstairs — the leaning painting by the sofa, the Tuff 'Nuff room boxes, and the locker corner
- Kitchen counters, the middle-room table, the balcony door, the roof by Quickies and the cubby shelf
- 'Puppet Strings' by Chris Egert plays — rewards the Rave On achievement
Rave Mode
Toss a zombie-dropped pouch into a fire to enter neon blacklight vision (~1 min) — required to see the deer heads, song wisps and some charms, and used for the Vlad build. Interact with fairy groups to add ~30s each. The three Kevin rituals force Rave Mode automatically, so no pouch is needed for them. From ~round 10 a normal Rave-Mode Slasher also stalks the map that ordinary guns can't kill — don't confuse it with the killable ritual Slashers.
- From early rounds, zombies can drop a Rave Mode pouch — pick it up
- Walk up to a fire (the Bear Lodge fireplace is reliable) and interact to enter Rave Mode (~1 minute)
- Killing zombies shortens it slightly; interact with a group of fairies to add ~30 seconds each (each group works once per activation)
- It's per-player (unless teammates share the activation area) and needs a fresh pouch each time
- Some stick doors can only be seen and opened in Rave Mode, though none are needed for the main route
- The three Kevin rituals force the area into Rave Mode automatically, so you don't need a pouch to begin them
- Note: a normal Rave-Mode Slasher after round 10 can't be killed with ordinary guns — don't confuse it with the killable ritual Slashers
- Required for the Vlad build, several charm quests (Arrowhead, Gold Frog) and other neon secrets
Build the boat
Fixed-spot parts — Handle/Paddle by Quickies (Rave Area), Engine at the Mess Hall central pillar, Propeller in the Tuff 'Nuff room above spawn — installed at the Docks Boathouse to reach Turtle Island.
- Turn on power first, then collect the three parts (each on a fixed spot):
- Handle / Paddle — Rave Area, leaning against the structure right next to the Quickies perk machine
- Engine — Mess Hall, against the central support pillar in the middle of the room
- Propeller — Bear Lodge upper floor, inside the Tuff 'Nuff room above the spawn floor
- Carry all three to the unfinished boat at the Boathouse on the Docks and interact to build it
- Grab the first film reel off the docks just outside the boat area before you board (the second reel is outside the Turtle Island cabin's back door)
- Ride to Turtle Island; the same boat is later redirected to the boss arena after the basement buttons are synchronised
Vlad crossbow
Take the hot dog from the Turtle Island cabin bathroom bucket, throw it at the 3 mounted deer heads in Rave Mode and shoot each floating head, then open the Bear Lodge crossbow cabinet with the three dropped symbols.
- Open Pack-a-Punch first — the hot dog only spawns afterward
- In the Turtle Island cabin bathroom, interact with the bucket to take a throwable hot dog (it replaces your tactical equipment and can be re-thrown after a short cooldown)
- Enter Rave Mode at a fire, then break all three mounted deer heads: throw the hot dog so the head lifts off the wall, then shoot the floating head until it breaks and drops a glowing symbol
- Deer-head spots: Bear Lodge above the couch with the golf club · Mess Hall above the fireplace · an out-of-bounds cabin in Owl Camp (use fairies to extend the Rave timer if needed)
- With all three symbols collected, leave Rave Mode and interact with the locked crossbow cabinet in the Bear Lodge — the lock vanishes and you take the base Vlad (a discarded Vlad returns to this cabinet)
- Upgrade it into an elemental variant next (see the Owl/Wolf/Eagle/Deer entries)
Upgrade the Vlad (shared charging method)
Every element uses the same route: find a small animal statue (nine shared spawn points), charge it on the Quickies speaker stack with ~8 red-mist kills, deliver it to its large totem, then earn ~15-20 close Vlad kills to transform.
- All four elements use the same four-stage route — only the animal statue, its large totem and the effect change.
- 1) Find a small animal statue. Any animal can appear at any of nine shared spawn points: left of the NV4 wall-buy (Adventure course) · opposite the Reaver wall-buy (rock-climbing wall) · left of the Type-2 wall-buy (Rave Area trailer) · halfway up the Mines stairs near Bang Bangs · the Racin' Stripes cabin balcony (Owl Camp) · the picnic table left of the RPR Evo (Wolf Camp) · by the bench near the Volk wall-buy (Wolf-to-Mess path) · a table near the Reaver wall-buy approaching from Mess Hall (Docks) · behind the canoe by storage behind Slappy Taffy (Beach canoe racks)
- 2) Place the small statue on the speaker stack to the left of Quickies in the Rave Area and damage nearby zombies until they burst into red mist rather than dying normally — roughly eight mist kills charge it; a pickup prompt confirms
- 3) Carry the charged statue to its matching large totem (see the element entries below)
- 4) With the UNupgraded Vlad, earn roughly 15-20 close kills around the large totem (an already-upgraded Vlad can't charge another) — when the interaction prompt appears, use the totem to transform the held Vlad
- Both counts are approximate community figures; treat the interaction prompt on the charged statue as the reliable cue
Vlad — Acid Rain (Owl)
The Owl statue upgrade, delivered to the large Owl totem in Owl Camp. Acid Rain controls dense skeleton or zombie groups in the boss fight.
- Use an Owl statue and follow the shared charging method
- Charge the small Owl statue on the speaker stack left of Quickies (~8 red-mist kills)
- Deliver it to the large Owl totem in Owl Camp
- Finish with ~15-20 close unupgraded-Vlad kills at the totem, then use it to transform
- Effect: Acid Rain — strong control of dense skeleton or zombie groups during the Super Slasher fight
Vlad — Ben Franklin (Wolf)
The Wolf statue upgrade, delivered to the large Wolf totem in Wolf Camp — the electric crossbow that chains between enemies, and the variant the Ghosts 'N Skulls 2 quest requires.
- Use a Wolf statue and follow the shared charging method
- Charge the small Wolf statue on the speaker stack left of Quickies (~8 red-mist kills)
- Deliver it to the large Wolf totem in Wolf Camp
- Finish with ~15-20 close unupgraded-Vlad kills at the totem, then use it to transform
- Effect: the Ben Franklin electric crossbow — lightning that chains between enemies; this is the variant the Ghosts 'N Skulls 2 arcade quest requires
Vlad — Trap-o-Matic (Eagle)
The Eagle statue upgrade, delivered to the large Eagle totem in Thunderbird Amphitheatre. Deploys laser traps that cut down groups.
- Use an Eagle statue and follow the shared charging method
- Charge the small Eagle statue on the speaker stack left of Quickies (~8 red-mist kills)
- Deliver it to the large Eagle totem in Thunderbird Amphitheatre
- Finish with ~15-20 close unupgraded-Vlad kills at the totem, then use it to transform
- Effect: Trap-o-Matic — deploys laser traps that cut down groups
Vlad — Whirlwind EF-5 (Deer)
The Deer statue upgrade, delivered to the large Deer totem at the Beach (left of the Fate & Fortune machine) or the Docks. Knocks enemies back for breathing room.
- Use a Deer statue and follow the shared charging method
- Charge the small Deer statue on the speaker stack left of Quickies (~8 red-mist kills)
- Deliver it to the large Deer totem at the Beach (left of the Fate & Fortune machine) or at the Docks
- Finish with ~15-20 close unupgraded-Vlad kills at the totem, then use it to transform
- Effect: Whirlwind EF-5 — knocks enemies back to create breathing room
Double Pack-a-Punch (Alien Fuses)
Optional but makes the boss safer — trigger the Bear Lodge front-desk computer, wait three round transitions, grab the Alien Fuses and insert them at the projector so a once-upgraded weapon can be upgraded again for 10,000.
- Optional — not required for the quest, but it makes the boss safer
- If you have already completed the Zombies in Spaceland main quest on this profile, the Alien Fuses are usually already installed; otherwise:
- Turn on power, then interact with the old computer at the Bear Lodge front desk — dial-up audio confirms the trigger
- Advance three round transitions (some older guides say two full rounds; waiting for the third avoids leaving early)
- Pick up the Alien Fuses that appear behind or beside the computer
- Open Pack-a-Punch and insert the fuses into the projector — a weapon already upgraded once can now be upgraded again for 10,000 points for the rest of the match
Charms (permanent perks)
Find hidden charm items (Binoculars, 8-Ball, Fish, Boots, Pacifier and more) and complete their mini-quests to equip up to 3 weapon charms — e.g. Binoculars = Electric Cherry on reload, Boots = exploding-head headshots.
- Charms are two-part buildables giving a permanent perk-like effect; attach up to 3 to your held weapon
- For each charm, find its two pieces (fixed spots around the map) and carry the assembled charm to its ritual spot
- Complete that charm's mini-quest to charge it, then collect it — the effect lasts the whole match
- Examples: Binoculars = Electric Cherry on reload (shoot 8 eyeballs + 15 headshots by the Fortune Teller); Boots = exploding-head headshots (follow the red footprints across 3 areas); Pacifier = zombies take damage hitting you (~15 kills inside forcefields); Shovel = revives explode (kill ~15 skeletons)
- More: 8-Ball (pool balls, Spawn Lodge), Fish / Gold Frog (water — the lake orb / neon frogs in Rave Mode), Arrowhead & Ring (bow-range targets / lamp beams). Some effects vary by source
Play as Kevin Smith
Completing the main Easter egg unlocks Kevin Smith as a playable character (a pre-game lobby code is also reported).
- Complete the full Rave in the Redwoods main Easter egg first
- The code hint is painted in neon in the restroom (seen in Rave Mode): right, left, left, down, down, right
- Back at the pre-game menu, highlight Rave in the Redwoods and enter Right, Left, Left, Down, Down, Right on the D-pad
- A Kevin Smith icon confirms it — don't open any sub-menu afterward (it clears the icon), then start the match
Ghosts 'N Skulls 2 — permanent perks
Redwoods' spawn arcade quest — collect six skulls and win the minigame for permanent perks (needs Rave Mode and the Ben Franklin crossbow).
- Redwoods' cabinet is in the main spawn area — collect 6 skulls then win the minigame (you'll need Rave Mode and the Ben Franklin electric crossbow)
- Skull 1: activate the four traps to spell 1992 — 1 kill with the Flogger (dock log), 9 with the suction tractor (archery shredder), 9 with the DJ trap, and 2 with the Waterfall trap
- Skull 2: in Rave Mode aim at the green symbol on the machine, then (a round later, from the Turtle Island campfire Rave spot) find the matching green-circle symbol around the map and aim at it
- Skull 3: the next round, at the Power Room play the Zombie Wheel game and knife the green-eyed skull
- Skull 4: in Rave Mode spell SKULL with the symbols (same spot as skull 2), all in one round
- Skull 5: while riding the boat, shoot every skull that rises from the water before it turns red and vanishes
- Skull 6: build the Ben Franklin Crossbow (the electric Vlad upgrade) and shoot the machine with it to unlock the last skull
- Win the minigame: use the Entangler to grab a coloured ghost and shoot it at the same-colour skull across three frames
- Reward: all perks permanently (except Up N Atoms solo)
Recommended loadouts
Three strong picks for this map — the map's Wonder Weapon plus reliable box/wall options. These are pre-augment-era games, so the setup is the gun plus Pack-a-Punch and perk synergy.
FHR-40 or Sentinel Mauler (Pack-a-Punched)
Primary — Slashers & boss symbolsThe community's high-ammo bullet weapon of choice for the ritual Slashers, the headshot ritual and revealing/destroying the Super Slasher's body symbols (RPR Evo and NV4 also work). Pair with Tuff 'Nuff and Bang Bangs; keep it fully loaded before the point of no return.
Vlad crossbow → Acid Rain (Owl) or Whirlwind EF-5 (Deer)
Wonder Weapon — crowd controlBuild the Vlad, then upgrade it: Acid Rain melts dense skeleton/zombie packs and Whirlwind knocks them back for breathing room in the wind phases. Strong support, but it doesn't replace a bullet gun for the body symbols.
Banshee (wall-buy, kept unupgraded)
Ritual tool — arms & legsIts low damage is the point — you can shoot arms and legs off without killing the zombie first, so it's the safest common pick for the two dismemberment rituals. Keep it only until those are done. Add Up 'N Atoms in solo and carry an emergency ammo/revive Fate card.
Calling cards on this map
Cosmetic calling cards you can earn on this map. Global Dark Ops challenge cards are in the reference section below.
Director's Cut completion card
Main EEComplete the Rave in the Redwoods Director's Cut Easter egg and its Soul Key piece.
Exact card name not yet confirmed.
Fate cards reference (Infinite Warfare)
Infinite Warfare's 16 Fate cards — unlimited-use, unlocked as you level. Held in a deck of 5; the Fortune Teller refills twice a match. We uniquely cover IW — no competitor documents these. Per-card rarity isn't officially documented, so none is shown.

Nade Party
Grenades regenerate for 3 waves.

Shop Class
Spawns a Carpenter.
Scorching Skin
Your next 10 attackers burn.
Mana Up
Faster health regen for 15s.

Eagle Eyed
Sniper hits are always critical (50 shots).
Timely Torrent
Melee summons 6 lava torrents (5 charges).
Irish Luck
Spawns a random Fate/Fortune card.
Blood Clot
Longer bleedout.

Scoped Dollars
$300 per sniper kill (×10).
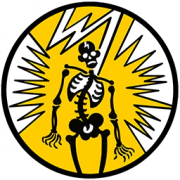
Static Shock
Melee arcs electricity (5 hits).

Med Kit
You're revived faster.
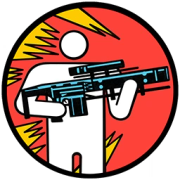
Getting Railed
Ballista EM3 gets infinite ammo for 30s.
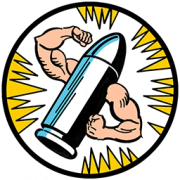
Best for Last
Last 4 bullets deal bonus damage for 3 waves.
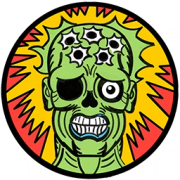
5 Second Muscle
+damage for 5s after a reload (1 wave).

Socialist
Cash is split evenly.

Stimulus
Shots release an ally-healing AoE for 60s.
Fortune cards reference (Infinite Warfare)
Infinite Warfare's Fortune cards — single-use, drawn from Zombie Crates (a selection of the 46; some grouped as compiled). Rarity (Common/Rare/Legendary/Epic) exists in-game but isn't documented per card, so none is asserted here (§ honesty).
Perk Insured
Keep perks on revive.
Reanimated
Auto self-revive (3× solo / 1× co-op).
Get Head
Headshots instakill (15).
Pimp Slap
Melee instakill (1 wave).

Twice the Pain
2× bullet damage for 30s.

Kabooom!
Drops a Nuke.
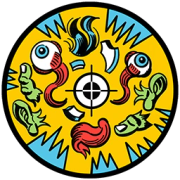
Death's Party
Drops an Instakill.
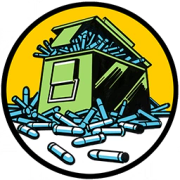
All the Ammos
Drops a Max Ammo.
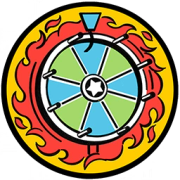
Black Friday
Drops a Fire Sale.
Pay Day · Money Shot · On the Money
Cash-boost cards.

Get Packed
Your next wall-buy comes Pack-a-Punched.
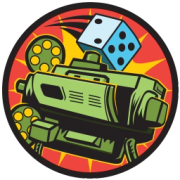
Packin' Heat
A random 2×-upgraded weapon.

Packed Magic
Your next Magic Wheel weapon is upgraded.
Coupon Clipper · Refund Policy
Free / refunded purchases.

Rising Phoenix
Revive all downed players.
Second Wind
Kill nearby zombies when near death (3×).

Raining Bullets
Drops an Infinite Ammo power-up.
Power Play
Higher power-up drop chance for 2 waves.
Turn Coat
The next zombie that hits you turns (3×).
Hide n' Seek
Team invisible for 20s.
Zombie Magnet
All zombies aggro you for 10s.
Escape Route
Teleport to a safe spot.
Evade
A dodge ability for 2 waves.
Explosive Touch
Contact zombies explode for 60s.

Twist of Fate
A roaming killer twister for 60s.
Scratch Post · Atomic Massacre · Dragon Breath · Black Hole Fun
Infinite special-weapon cards (30s each).
Super Minute Man
+1 weapon level for 60s.

Fire Chains
Kill-link to your closest ally for 30s.
Shared Fate
ADS marks zombies for shared damage (60s).
Ammo Crate
A crate refills ammo and the card meter (60s).

Head Reloaded
Headshot kills instant-reload (1 wave).
Restored Losses
Missed bullets refund stock ammo (60s).
Home Remodel
Instant barrier rebuild with a bonus (5).

Slug Butt
Zombies move at their slowest for 30s.

Punching Bag$
$100 per hit taken for 60s.
The 2-Team
Invulnerable while your nearest team-mate has health (30s).

Ego Trip
+headshot damage for 60s.

Temporal Increase
Longer power-ups for 3 waves.
Purify
Heal all players and damage nearby zombies.
Skull Hacker
Activates the Ghosts 'N Skulls machine.
Super-EE cards (Infinite Warfare)
Infinite Warfare's headline animated cards for its cross-map ‘super’ Easter eggs. Per-map Director's Cut cards are listed on each map; Fate & Fortune is a separate system.

Demon Slayer
Super EEComplete every Director's Cut Easter egg (also unlocks the Director's Cut Camo).

Willard's Test
Super EEComplete ‘Sooooul Key’ as Willard Wyler.
When it isn't working
The stalls that actually cost people runs on this map, and what to do about each.
Stuck on step 11 — Boss — body symbols & windstorm survival?
Common Rave in the Redwoods questions
Direct answers to the specific things players look up mid-game — part locations, puzzle steps and more.
Which two guns do I actually need?
Where is the power switch on Rave in the Redwoods?
Where are the three boat parts?
What is Rave Mode and when do I need it?
How do I get the Vlad crossbow?
How do I upgrade the Vlad?
Which Vlad element should I pick?
What is the Double Pack-a-Punch here?
What are the charms?
Where is the song?
Visual guides & sources
Screenshots and exact part locations live in these — open one on a second screen.
Map discussion
A shared community board for Rave in the Redwoods — posts are public, saved on the server and visible to everyone across devices. Handy for strategies, spawn variations you've noticed, or steps to double-check. Please keep it civil and on-topic.