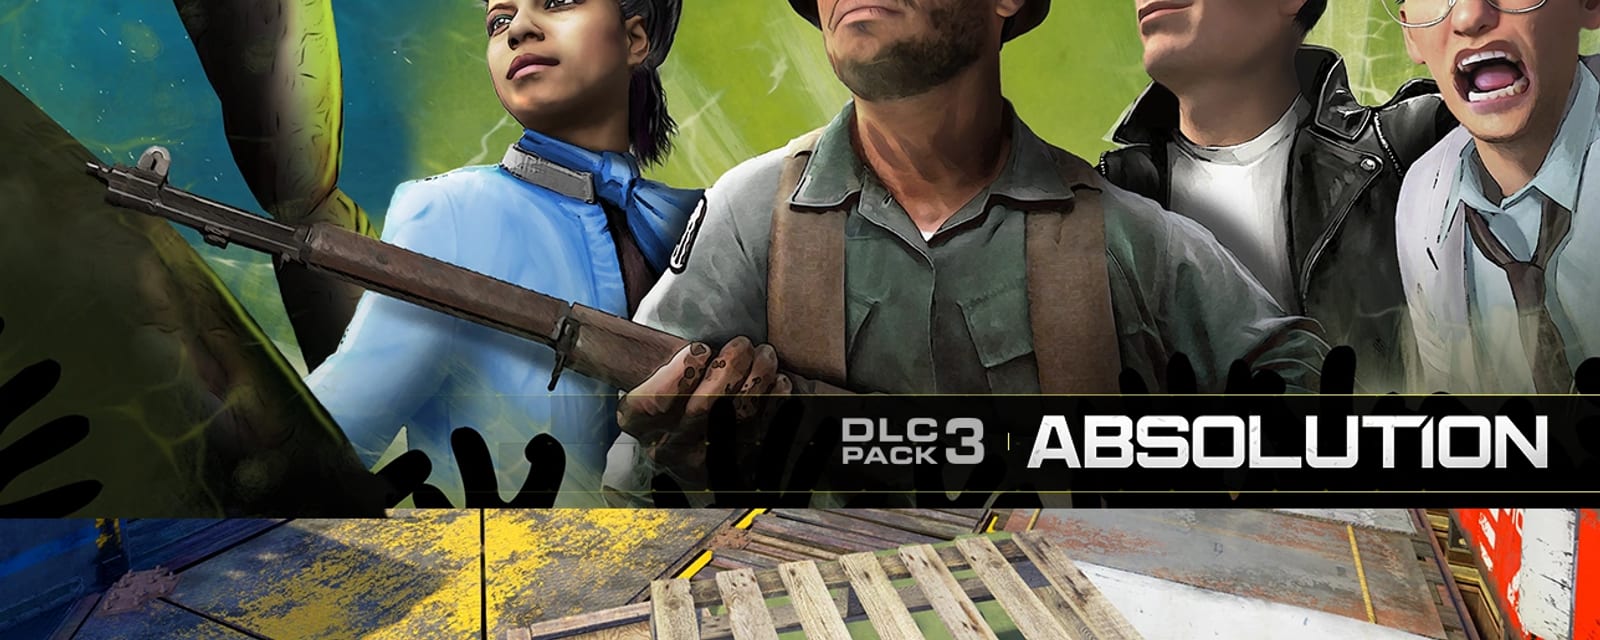
Attack of the Radioactive Thing
A 1950s creature-feature homage in a nuclear-blighted California beach town. Its main quest hangs on one of Zombies' most elaborate randomised puzzles — a chemical formula you decode fresh every match to build the cure and defeat the Radioactive Thing. The main quest is called Soul-Less.
Quick answers
How do you complete the Attack of the Radioactive Thing Easter egg?
- Take the Beach power handle → Power Station box
- Book → Elvira → fill the vial with Cleaver kills → Pack-a-Punch
- Grab the Crowbar & Cleaver; repair the Freezer Trap; build the Seismic Wave Generator
- Collect the six body parts
- Collect the three mirrors → place all nine in Spawn
- Punch card → read the five film reels → forward code → laser → reverse code → garage key
- Open the garage; build the Chemical Station & the nuke
- Read the four desk numbers → set the gauges → take the safe / belly code
What is the Wonder Weapon on Attack of the Radioactive Thing?
Who is the boss on Attack of the Radioactive Thing?
How long does the Attack of the Radioactive Thing Easter egg take?
Can you do the Attack of the Radioactive Thing Easter egg solo?
What are the main areas on Attack of the Radioactive Thing?
How many side Easter eggs are on Attack of the Radioactive Thing?
Are there solvers for the Attack of the Radioactive Thing puzzles?
When was Attack of the Radioactive Thing released?
Key areas
Spawn / Beach laboratory
Starting sands by the OSA wall-buy — the zombie hand holding the power handle, the buried arm, the reconstruction bed & number machine, and the Crog-Zilla cart start.
Ice Cream Parlour / Drive-In
The UDM wall gun, the Skull Hop cabinet, the rear office (Spell Book safe, punch card), the Seismic Wave Generator bench and the drive-in playground parts.
Power Station
Uphill past the drive-in — the power box, a repairable radio by the porta-potty, the electric fence trap (Double Pack-a-Punch) and a pressure gauge.
Beachside Market / Main Street
Deadeye Dewdrops, the Cleaver counter, the liquor & chemical shelves, the Freezer Trap, the safe / desk back office, and Main Street's mirror car.
Gas Station / garage
The garage — unlocked by the reconstruction key — holding the Chemical Station and the nuke; a pressure gauge sits on the rear wall.
TV Studio
Elvira's set — the map-colour control console, the five film reels and the television that shows the M×O colour band.
Motel / RV Park
Bombstoppers and the Crowbar maintenance room, Dr. Bright's Motel radio and the M value, the RV firepit arm, the bathroom mirror and the Snack Shack chemistry parts.
Steps at a glance
- Take the Beach power handle → Power Station box
- Book → Elvira → fill the vial with Cleaver kills → Pack-a-Punch
- Grab the Crowbar & Cleaver; repair the Freezer Trap; build the Seismic Wave Generator
- Collect the six body parts
- Collect the three mirrors → place all nine in Spawn
- Punch card → read the five film reels → forward code → laser → reverse code → garage key
- Open the garage; build the Chemical Station & the nuke
- Read the four desk numbers → set the gauges → take the safe / belly code
- Find M & the true O; M×O → set Elvira's colour filter
- Battery into a radio → identify the 'perfect solution' compound
- Read TOP+LEFT diamonds in the colour → craft the reaction chain → attach to the nuke
- All players charge the nuke → enter the boss
- Escort the cart; death-ray Crog-Zilla's chest; survive radiation & lasers
- Every player enters the belly code → detonate
Before you start
What to have in hand before step 1 — from the loadout notes, from the walkthrough itself, and from the map's own quest documentation where the gate is never stated in a step.
- Grab the Crowbar (Motel maintenance room) and Cleaver (behind the Market counter) early — the Crowbar opens mirrors, the safe desk and gauges, and the Cleaver both fills Elvira's vial and drops the radioactive-soldier leg. — step 3
- Use standard Frag or Cluster grenades on the hanging right-leg body part — C4 and Bio-Spikes often miss the branch. — step 4
- The forward code at the number machine only allows three misses before ejecting you — the accepted prefix is kept, so reconnect and continue rather than restarting. — step 6
- Note the film code pair as FORWARD and REVERSE — it is a different code family from the safe/belly code, never confuse them. — step 6
- Do the colour step (recording M and O) before reading any diamond board — it decides which filter shows the correct chemical numbers. — step 9
- Copy the safe/belly code to a note outside the game the moment you get it — the final belly sequence obstructs the scoreboard view you would otherwise check it on. — step 8
Set aside 60–100 min · 1–4 (solo-capable)
Full walkthrough
The quest in the order this guide runs it — tap any step to jump to it, and it fills in as you tick steps off.
Restore power
Grab the removable switch handle from the zombie hand jutting out of the sand on the Beach, right by the OSA wall-buy. Carry it uphill to the Power Station near the drive-in, interact with the empty power box inside and throw the completed switch. Power is global — this one switch lights the whole map.
Open Pack-a-Punch through Elvira
Four interactions, in order:
- Spell Book — with power on, open the now-unlocked safe in the Ice Cream Parlour back office and take the book.
- Empty vial — give the book to Elvira on the TV Studio set and let her line finish; she hands the team an empty vial (tracked on the scoreboard).
- Fill it — take the Meat Cleaver from behind the Beachside Market counter (by Deadeye Dewdrops) and kill roughly 20 zombies with it (co-op shares the count); watch the vial icon, not a memorised tally.
- Return & escort — give Elvira the full vial, wait out her dialogue, then stand at the closed projector portal just outside the TV Studio and keep her walking route clear until she activates it.
Step through for about 30 seconds of Pack-a-Punch. The portal then moves for the rest of the match: after ~45 seconds it reappears either behind the Ice Cream Parlour or in the centre of the RV Park, marked by a lightning storm overhead — it never returns to the TV Studio.
If Elvira won't open it, re-check the vial is full, let any dialogue end, and stand right on the closed portal with her path clear.
Core tools — Crowbar, Cleaver, Freezer Trap
Three tools gate most of what follows — collect them while Elvira's vial fills:
- Crowbar — inside the Motel maintenance room near Bombstoppers; it opens the mirrors, the safe desk, the gauges and many ingredient containers.
- Cleaver — behind the Market counter (it also fills Elvira's vial and drops the radioactive-soldier leg).
- Freezer Trap — take the freezer part from the boxes on the left side of the Gas Station and install it on the wall inside the Market freezer; it is required for the torso.
Also build the Seismic Wave Generator now (see the side quest below) — it raises the buried arm and is a required boss-phase tool.
Collect the six body parts
The reconstruction needs six body parts (the three mirrors come next). Each has a fixed method:
- Head — press the projector-room wall button; the exit drops you into a locked RV for about six seconds — take the head from the ledge in front of the large window.
- Torso — activate the repaired Market Freezer Trap with the Crowbar and, during or just after the freeze, melee the hanging pig immediately right of the torso, then take the exposed torso.
- Left arm — in the firepit right of the Volk wall-buy in the RV Park.
- Right arm — back at the Beach hand that held the power handle: set the Seismic Wave Generator near the buried arm (not on top), let the slams raise it fully, then interact.
- Left leg — from round 5, kill a Radioactive Soldier zombie with the Cleaver; the first qualifying Cleaver kill is the guaranteed drop (search the ground if it seems not to drop).
- Right leg — on the Snack Shack-to-TV-Studio path, look in the last tree on the left by the TV perimeter fence and cook a Frag or Cluster Grenade at the hanging leg; pick it up when it falls.
Use standard Frags or Clusters on the leg — C4 and Bio-Spikes often miss the branch. Every part shows on the scoreboard, so check there if a prompt is missing.
Collect the three mirrors & place all nine in Spawn
Three reflective pieces feed the reconstruction laser:
- Elvira's mirror — after you return the full vial and Elvira eventually despawns, take the mirror on the TV Studio couch (only when the prompt says she is not there).
- Bathroom shard — Crowbar the intact mirror in the RV Park bathroom; a shard falls into the sink — take it from the basin.
- Car side mirror — on Main Street, Crowbar the right-side mirror off the white car that still has its roof and grab it from the ground.
Carry all nine items to Spawn: the six body parts on the upright examination bed right of the tunnel exit; the bathroom shard on the pill-bottle table left of the body; Elvira's mirror on the crates right of the zombie spawn; the car mirror on the large crate across from Up 'N Atoms.
Order doesn't matter, but the laser stage isn't reliable until all nine placements are visibly done — verify on the scoreboard.
Film reels → forward & reverse codes → garage key
Take the punch card from the desk in the Ice Cream Parlour back office and insert it into the small number machine just right of the car-mirror crate in Spawn. Then read the code off the five film reels in the TV Studio: four sit on the shelf by the map-colour console and one lies on the floor — read them left to right, treating the floor reel as position three. The digits are a random permutation of 3, 4, 5, 6 and 8 (no repeats). Each reel is a film whose title maps to a fixed digit — Mayday = 3, Awakening = 4, Point of Contact = 5, Nightfall = 6, Exodus = 8 — so if a reel is hard to read, its title tells you the number, and a code that isn't a clean permutation of 3/4/5/6/8 means you misread one.
- Forward code — at the machine, ten lights show digits 0-9; interact as the light for each required digit is lit. Three misses (or taking a hit) eject you, but the accepted prefix is kept — reconnect and continue.
- Fire the laser — interact again; the beam bounces between the mirrors and rebuilds the body. Keep the area clear until the animation finishes.
- Reverse code — use the machine once more and enter the same five digits in exact reverse, then interact again. The rebuilt zombie turns into a key — collect it from the bed.
Carry the key to the closed Gas Station garage on Main Street and open it to reach the chemistry table and the nuke.
Note this pair as FILM FORWARD and FILM REVERSE — it is a different code family from the safe / belly code and must never be confused with it.
Build the Chemical Station & the nuke
Two builds inside the opened garage. The Chemical Station takes three parts:
- Tube — on the couch in the Market back room.
- Gauge — on the picnic table nearest Mule Munchies in the RV Park.
- Screen — on a picnic table down the slope from the RV Park to the Beach.
The nuke takes three more:
- Road part — under the front of the red car on the road between the Motel and TV Studio.
- Stream part — at the end of the stream below the wooden bridge, under the large concrete Beach bridge.
- Fence part — on the right-side fence behind a gate approaching the TV Studio from the Snack Shack.
Assemble the three station parts on the empty garage table and install the three nuke parts into the nuke.
Older notes call the red-car part a spot 'under the red cat' — it is the red car between the Motel and TV Studio.
Open the safe → record the belly code
With the Crowbar, go to the Market back office with the safe and desk. Go prone on the desk's left side and read the four hidden numbers — write all four down. Then set each on one of the four pressure gauges, striking the rotating needle with the Crowbar as it reaches a chosen number:
- Gas Station — rear wall of the building.
- Snack Shack — right side of the building.
- Power Station — rear of the power-switch building.
- Motel — inside the maintenance room.
Any desk number can go on any gauge, but all four values must be represented; a second Crowbar hit resets a wrongly-stopped gauge. When all four are correct, return to the safe and take the paper — its number sequence is your SAFE / BELLY code, used at the very end.
Copy the code to a note outside the game immediately — during the final belly sequence the scoreboard view is obstructed and can't be trusted.
The colour step — M × O
This decides which colour filter shows the correct chemical numbers, so do it before reading any diamond board.
- M — in the Motel office, on the wall immediately right of the window. Record it exactly.
- True O — four O candidates exist: the Gas Station front door, the Market back room above the couch, the underside of the concrete Beach bridge, and the locked-RV refrigerator (view through the front window by jumping, or during a projector-button RV visit). At the TV Studio console, cycle Red / Green / Blue and inspect all four each time: the false ones flip to 'O is not equal to' in one of the colours — the true O is the single candidate that stays 'O equals' the same number in all three.
Multiply M × O, then read the television beside Elvira: it lists numeric ranges tied to Red, Green and Blue. The band your product falls into is your chemistry colour for the whole game — set the map to it on the console and leave it there.
Some guides mislabel the Motel value as 'N' — it is the Motel wall value (M) multiplied by the surviving O. Keep the M×O product separate from every reaction code; it only picks the colour.
Identify the 'perfect solution' compound
From about round 10, ordinary zombies drop a battery. Carry it to either repairable radio — the Power Station radio by the porta-potty or the Motel office radio on the couch — install it and interact repeatedly. One radio is Dr. Bright's chemistry exposition; the other evaluates the five possible anti-Crog compounds. Listen for the one named the 'perfect solution' to the mutated-crab problem and record only that one:
- 3,4-di-nitroxy-methyl-propane
- 1,3,5 tera-nitro-phenol
- Octa-hydro-2,5-nitro-3,4,7-para-zokine
- 3-methyl-2,4-di-nitrobenzene
- 2,4-propane-3,5-tetra-nitrite
Ignore every rejection — a chemical called a 'rather crude solution' is still a no. If all lines have played, end the round to rewind the tape. Community spellings vary (tera/tetra, para-zokine/-zocine); the spoken line is authoritative, and the ingredient chain is unaffected by spelling. Some launch guides list only four compounds — the fifth (2,4-propane-3,5-tetra-nitrite) is real.
Read the diamonds & craft the compound
Each ingredient has a fire diamond on one of six boards — Spawn (tent hallway by the lab), TV Studio (wall right of Bang Bangs), RV Park (beside an RV near Mule Munchies), Beach (near the water below the RV-to-Beach path), the garage (in or beside the nuke area) and the Power Station route (dirt path behind the Market). Read them in your chosen colour and use only the TOP (red) and LEFT (blue) number of each — ignore right and bottom.
Reaction code = (sum of every placed item's TOP + LEFT) − O. For example, with O = 8 and three items whose diamonds read 4+7, 2+4 and 2+3, you enter 4 + 7 + 2 + 4 + 2 + 3 − 8 = 14. Your target is a chain of two to four sub-reactions: place each reaction's ingredients on the floor squares by the tubes, enter its code on the keypad and hit the reaction button, then collect the produced intermediate from the garage's right side before the next row. Crucially, when an intermediate is used in a later reaction, read that intermediate's own diamond values — not the values of the ingredients that made it.
The five recipes are fixed — only the numbers and which target you're given change. Craft your target's chain top to bottom, collecting each intermediate from the garage's right side before the next row:
- 3,4-di-nitroxy-methyl-propane: Vodka + Pennies → Acetaldehyde · Racing Fuel + Quarters → Formaldehyde · Acetaldehyde + Formaldehyde + Detergent → Aldehyde Sludge · Aldehyde Sludge + Nail Polish Remover → the compound.
- 1,3,5 tera-nitro-phenol: Motor Oil + Wheel Cleaner + Insect Repellent → Phenol · Phenol + Drain Opener → Phenolsulfonic Acid · Phenolsulfonic Acid + Detergent → the compound.
- Octa-hydro-2,5-nitro-3,4,7-para-zokine: Racing Fuel + Quarters → Formaldehyde · Formaldehyde + Glass Cleaner → Hexamine · Hexamine + Vinegar + Plant Food + Detergent → the compound.
- 3-methyl-2,4-di-nitrobenzene: Paint + Detergent + Drain Opener → Methylbenzene · Methylbenzene + Baking Soda + Vinegar + Detergent → Dinitro · Dinitro + Racing Fuel → the compound.
- 2,4-propane-3,5-tetra-nitrite: Fat + Vodka → Glycerol · Detergent + Drain Opener + Ice → Mixed Acid · Glycerol + Mixed Acid → Nitrated Glycerol Solution · Nitrated Glycerol Solution + Baking Soda → the compound.
Where to find each ingredient: Racing Fuel (in front of the Gas Station) · Motor Oil (garage floor once it opens) · Quarters (Crowbar either Gas Station payphone) · Vodka (Market liquor shelf) · Baking Soda (right of the Market middle shelf) · Detergent (left of the Market left shelf) · Ice (Crowbar the Market ice machine) · Vinegar (Market back-room table) · Glass Cleaner (front of the Market right shelf) · Wheel Cleaner (left of the Market middle shelf) · Fat (Cleaver the top of the leftmost hanging freezer meat) · Pennies (Crowbar the Market register) · Insect Repellent (Spawn hallway right of Up 'N Atoms) · Plant Food (left side of the Snack Shack) · Paint (behind the small shack near Racin' Stripes on the TV-Studio path) · Nail Polish Remover (Motel office desk) · Drain Opener (a toilet in the RV Park bathroom).
Helper for the arithmetic: Chemical Formula Calculator — it sums TOP+LEFT and subtracts O. The M×O colour band is deliberately kept in this walkthrough, not in the tool, because it is a per-match threshold rather than fixed arithmetic. A failed mix does damage and yields no product: re-check the colour, the O subtraction, the ingredient set and whether you used an intermediate's own values.
Chemical Formula Calculator
Radioactive Thing — Gas StationDo Elvira's colour step first so you're reading the right boards. Enter the O value (the symbol showing “=”), then each required ingredient's fire-diamond TOP number (red, flammability) and LEFT number (blue, health). The code = the sum of every (top + left), minus O.
Attach the compound & charge the nuke
Take the finished target compound from the garage's right side and interact with the nuke (its three parts already installed). If no prompt appears, the radio target or the final compound is wrong. Once it attaches, every player interacts to charge the nuke, then interacts again to launch the boss sequence.
Fully prepare first — perks (Tuff 'Nuff, Quickies, Bang Bangs), a Pack-a-Punched high-reserve bullet weapon, full ammo and a charged Fate & Fortune hand — and make sure every player has the SAFE / BELLY code written down.
Boss — escort the cart & break Crog-Zilla's chest
The team teleports to the Beach. Push the nuke cart to the water by standing close to it; each time it stops and restarts, Crog-Zilla launches eggs and fireballs — shoot them out of the air and keep someone in movement range. At the shoreline the cart fires the nuke into its mouth, and the boss adds an antenna laser (a small sidestep) and a lethal ground slam (one or both claws raise first — run a long lateral route until impact).
Grab a death ray pickup — four spots: beside the OSA wall-buy, on the path from the Beach toward the RV Park, on the path uphill toward Main Street, and on top of the concrete bridge. When the chest weak point glows during an attack, hit it with a death ray: the first confirmed hit shows a skull icon and leaves the chest vulnerable, after which more death rays or a Spartan SA3 keep damaging it. Land about three to four chest hits until the glow dies and the boss pauses, then have every living player interact with the cart to start the next phase.
A Max Ammo spawns by the OSA wall-buy when the fight begins and respawns a couple of minutes after each pickup — use it. Stop hitting the chest when the glow disappears, not at a fixed ray count.
Radiation, lasers & the belly code
Charging the cart coats the front Beach in advancing radiation that forces the team back toward the wall under the bridge; Crog-Zilla fires two egg-and-fireball sets per spit — shoot projectiles, kill adds and never stand in the green zone. When the radiation clears, a laser obstacle course appears between the team and the cart: jump the high beams and slide under the low ones, and every player must reach and interact with the cart before the timer ends.
The team is then pulled inside the belly, where each player gets a cycling-light keypad and must personally enter the SAFE / BELLY code from the Market safe (it works like the Spawn number machine — stop the light on each digit). Each player has three strikes per attempt and three attempts.
A missed laser run or a failed code just repeats a shortened radiation-and-laser cycle — it is recoverable. Use the SAFE / BELLY code here, never the film codes.
Side Easter Eggs & extras
Everything beyond the main quest. Tap any entry to open the full how-and-where breakdown.
“Brachyura Boogie”
Chris Egert (with Elvira). Interact with 5 hidden vinyl records: the Power Station (by the shed), the Market (by the register), the RV Park (under the RV table), the Snack Shack (under a tarped pallet), and the Motel (in a lidless bin left of Bombstoppers).
- Interact with 5 hidden vinyl records (each turns its label a colour)
- Power Station — behind a wooden pallet by the shed near the Power Switch
- Beachside Market — under/near the register by the vodka shelf
- RV Trailer Park — under the dinner table inside the open RV (by Mule Munchies)
- Snack Shack — under a tarped stack of pallets across from the shack; Motel — in a lidless bin left of Bombstoppers
- 'Brachyura Boogie' (Chris Egert, with Elvira) plays
M.A.D. (Modular Atomic Disintegrator)
The Wonder Weapon — pulled from the Fate & Fortune box, then refilled at the green Crog-egg pods. A deathray for Crogzilla's core.
- Pull it from the Fate & Fortune box (Magic Wheel) — it's a random box weapon, not buildable
- A charged shot one-hits a Crog Brute and wipes a horde
- Add the Plunger attachment (a part found around the map) to enable refills
- Refill by using the plunger M.A.D. on the radioactive Crog eggs/pods around the map — it absorbs them for ammo
- Drained eggs respawn about 5 rounds later, so you can keep refuelling
Seismic Wave Generator
A buildable shockwave tool (blueprint at the Ice Cream Parlour back door; three parts around the Parlour and the drive-in playground) — required to raise the buried Beach arm and useful in the Crog-Zilla fight.
- Blueprint: at the Ice Cream Parlour back door, near the drive-in
- Coil: on the ground near the rear corner of the Parlour, just left of the blueprint
- Metal leg / rod: on the bench outside the Ice Cream Parlour
- Capacitor-like part: beside the porta-potties in the drive-in playground
- Assemble the blueprint and three parts on the build table in the Ice Cream Parlour back room, then take the finished device
- It raises the buried Beach arm (a required body part) and serves as a death-ray tool in the Crog-Zilla fight; if wasted it can be rebuilt after its scorestreak respawn delay
Double Pack-a-Punch (RV fuses)
Optional second upgrade tier — smash the locked-RV cabinet for uncharged Alien Fuses, charge them on the Power Station electric trap, then insert them at the projector so a once-upgraded weapon can be Packed again for 10,000.
- Have Pack-a-Punch open and the Crowbar (Motel maintenance room) in hand
- In the projector room, press the wall button — the normal exit now drops you into the locked RV instead of back onto the map, and you have only about six seconds
- Face the cabinet above the window across from the refrigerator, smash it with the Crowbar and take the uncharged Alien Fuses (if ejected first, retry after the portal cooldown)
- Re-equip the Cleaver and fill Elvira's vial a second time; in the Power Station, shuffle the uncharged fuses around the ground until the screen shakes, then drop them on that spot
- Install the electric-trap part (from the trash can by the bus near the Power Station) on the fence if it isn't already repaired, activate the trap and stand clear while it charges the fuses
- Collect the charged fuses and insert them into the Pack-a-Punch projector — a once-upgraded weapon can now be double-Packed for 10,000 points for the rest of the match
- The same locked-RV visit also holds the quest head, so on a prepared run grab the head first, smash the cabinet, then take the fuses before ejection
Fast-travel pads
Four one-way pads (activate each once; ~1-minute cooldown): Power Station roof → TV Studio; outside the TV Studio (by Bang Bangs) → RV Park; the RV Park by the Beach path → Gas Station / Main Street; right of the Market → Power Station. A big time-saver on chemistry laps.
Skull Hop — permanent perks
Complete the 6-skull Ghosts N Skulls quest to unlock the Skull Hop arcade minigame, granting all perks permanently (except Up n' Atoms solo) and unlimited Fate & Fortune refills.
- The Ghosts N Skulls quest powers the Ice Cream Shop cabinet — do the six skulls in order (each ends with a success tone). Turn on power first (no cleaning step on this one)
- Skull 1: with a scoped weapon, shoot any 5 of the ~10 small skull drawings hidden around the map (Power Plant, the store shelf by Deadeye Dewdrops, an ocean rock, the motel patio, the bridge bus tire, and more)
- Skull 2: pick up the yellow Pump at the Gas Station and place it in the Toxic Waste puddle by the Ice Cream Shop; wait ~4-5 minutes and collect it
- Skull 3: place the Pump in the Motel pool, fuel the generator with gas from the truck to arm the pool trap, and get exactly 16 trap kills
- Skull 4: read the randomised word on the Ice Cream Shop wall, then at the Drive-In swing set shoot the swing symbols to build each letter on the screen (via the symbol cipher) and shoot the correct letter to lock it — spell the whole word (most players use a community cipher solver)
- Skull 5: melee the Don't Blink paper at the RV Park, then at each of the four Wyler portraits place the Pump, melee it to release demons, and shoot them until the shield drops
- Skull 6: get the M.A.D. with the Plunger upgrade and fire a charged shot at the Skull Hop machine
- Win the minigame: match your platform's colour to the bar, Entangle the matching cube and shoot the skulls (wrong colour = a strike; 3 strikes fails) — clear three frames
- Reward: all perks permanently (except Up 'N Atoms solo), a Pack-a-Punched Magic Wheel and the Quarter Muncher achievement. (The optional Skull Hacker Fate card can unlock the cabinet without the six skulls.)
Elvira's colour filter
The TV Studio machine recolours the whole map (Red/Green/Blue) — central to reading the correct chemical boards.
Fate & Fortune cards
Restock at the Fate & Fortune Teller in the Market; the Skull Hop unlock gives unlimited refills.
- Fate cards are reusable and unlock as you level up (about 5 at Level 1); Fortune cards are single-use and come from Zombie Crates
- Buy Zombie Crates from the Store with Keys or CoD Points for more cards
- Build a deck of up to 5 cards in the Fate & Fortune menu before the match
- In-match, killing zombies and spending points fills the card meter
- Cycle equipped cards with the D-pad and activate with L1+R1 (LB+RB); refill a spent deck at a Fortune Teller machine in the map
Interactive solvers
Every solver for Attack of the Radioactive Thing, in the order you meet them. Each also appears inside its step in the walkthrough above — use whichever is handier. Browse every Zombies solver →
Chemical Formula Calculator
Radioactive Thing — Gas StationDo Elvira's colour step first so you're reading the right boards. Enter the O value (the symbol showing “=”), then each required ingredient's fire-diamond TOP number (red, flammability) and LEFT number (blue, health). The code = the sum of every (top + left), minus O.
Recommended loadouts
Three strong picks for this map — the map's Wonder Weapon plus reliable box/wall options. These are pre-augment-era games, so the setup is the gun plus Pack-a-Punch and perk synergy.
Pack-a-Punched rifle or LMG (high reserve)
Reliable primaryThe field guide's core pick — a high-reserve bullet weapon, Pack-a-Punched, is safer through the long chemistry laps and the boss adds than leaning on the M.A.D. Back it with Tuff 'Nuff, Quickies and Bang Bangs and keep a deep reserve for the boss.
Spartan SA3 (PaP)
Boss chest damageA wall-buy near the nuke-cart start: once a death ray lands the first confirmed hit on Crog-Zilla's glowing chest (the skull icon), the Spartan SA3 keeps damaging it, so it's the handy top-up between death-ray pickups.
M.A.D. (Modular Atomic Disintegrator)
Wonder-weapon panicPulled from the Fate & Fortune box and refilled at the green Crog-egg pods — excellent horde and panic clear, but the four map death-ray pickups are what break the chest, so treat the M.A.D. as backup rather than your boss plan.
Calling cards on this map
Cosmetic calling cards you can earn on this map. Global Dark Ops challenge cards are in the reference section below.
Director's Cut completion card
Main EEComplete the Attack of the Radioactive Thing Director's Cut Easter egg and its Soul Key piece.
Exact card name not yet confirmed.
Fate cards reference (Infinite Warfare)
Infinite Warfare's 16 Fate cards — unlimited-use, unlocked as you level. Held in a deck of 5; the Fortune Teller refills twice a match. We uniquely cover IW — no competitor documents these. Per-card rarity isn't officially documented, so none is shown.

Nade Party
Grenades regenerate for 3 waves.

Shop Class
Spawns a Carpenter.

Scorching Skin
Your next 10 attackers burn.

Mana Up
Faster health regen for 15s.

Eagle Eyed
Sniper hits are always critical (50 shots).

Timely Torrent
Melee summons 6 lava torrents (5 charges).

Irish Luck
Spawns a random Fate/Fortune card.

Blood Clot
Longer bleedout.

Scoped Dollars
$300 per sniper kill (×10).

Static Shock
Melee arcs electricity (5 hits).

Med Kit
You're revived faster.

Getting Railed
Ballista EM3 gets infinite ammo for 30s.
Best for Last
Last 4 bullets deal bonus damage for 3 waves.
5 Second Muscle
+damage for 5s after a reload (1 wave).

Socialist
Cash is split evenly.

Stimulus
Shots release an ally-healing AoE for 60s.
Fortune cards reference (Infinite Warfare)
Infinite Warfare's Fortune cards — single-use, drawn from Zombie Crates (a selection of the 46; some grouped as compiled). Rarity (Common/Rare/Legendary/Epic) exists in-game but isn't documented per card, so none is asserted here (§ honesty).
Perk Insured
Keep perks on revive.

Reanimated
Auto self-revive (3× solo / 1× co-op).

Get Head
Headshots instakill (15).

Pimp Slap
Melee instakill (1 wave).

Twice the Pain
2× bullet damage for 30s.

Kabooom!
Drops a Nuke.

Death's Party
Drops an Instakill.
All the Ammos
Drops a Max Ammo.

Black Friday
Drops a Fire Sale.
Pay Day · Money Shot · On the Money
Cash-boost cards.

Get Packed
Your next wall-buy comes Pack-a-Punched.
Packin' Heat
A random 2×-upgraded weapon.

Packed Magic
Your next Magic Wheel weapon is upgraded.
Coupon Clipper · Refund Policy
Free / refunded purchases.

Rising Phoenix
Revive all downed players.

Second Wind
Kill nearby zombies when near death (3×).

Raining Bullets
Drops an Infinite Ammo power-up.

Power Play
Higher power-up drop chance for 2 waves.
Turn Coat
The next zombie that hits you turns (3×).
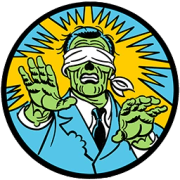
Hide n' Seek
Team invisible for 20s.
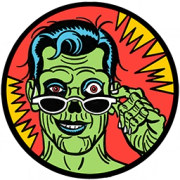
Zombie Magnet
All zombies aggro you for 10s.

Escape Route
Teleport to a safe spot.

Evade
A dodge ability for 2 waves.
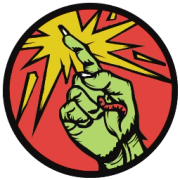
Explosive Touch
Contact zombies explode for 60s.

Twist of Fate
A roaming killer twister for 60s.
Scratch Post · Atomic Massacre · Dragon Breath · Black Hole Fun
Infinite special-weapon cards (30s each).

Super Minute Man
+1 weapon level for 60s.

Fire Chains
Kill-link to your closest ally for 30s.

Shared Fate
ADS marks zombies for shared damage (60s).

Ammo Crate
A crate refills ammo and the card meter (60s).

Head Reloaded
Headshot kills instant-reload (1 wave).

Restored Losses
Missed bullets refund stock ammo (60s).
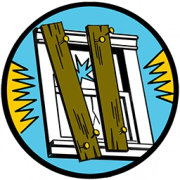
Home Remodel
Instant barrier rebuild with a bonus (5).

Slug Butt
Zombies move at their slowest for 30s.

Punching Bag$
$100 per hit taken for 60s.

The 2-Team
Invulnerable while your nearest team-mate has health (30s).

Ego Trip
+headshot damage for 60s.

Temporal Increase
Longer power-ups for 3 waves.

Purify
Heal all players and damage nearby zombies.
Skull Hacker
Activates the Ghosts 'N Skulls machine.
Super-EE cards (Infinite Warfare)
Infinite Warfare's headline animated cards for its cross-map ‘super’ Easter eggs. Per-map Director's Cut cards are listed on each map; Fate & Fortune is a separate system.
Demon Slayer
Super EEComplete every Director's Cut Easter egg (also unlocks the Director's Cut Camo).

Willard's Test
Super EEComplete ‘Sooooul Key’ as Willard Wyler.
When it isn't working
The stalls that actually cost people runs on this map, and what to do about each.
Stuck on step 2 — Open Pack-a-Punch through Elvira?
Doing everything right and nothing happens?
Common Attack of the Radioactive Thing questions
Direct answers to the specific things players look up mid-game — part locations, puzzle steps and more.
Which numbers on this map are randomised?
What order do I do the chemistry steps in?
Where is the power on Attack of the Radioactive Thing?
How do I open Pack-a-Punch here?
What is the M.A.D.?
What is the Seismic Wave Generator for?
Where are the fast-travel pads?
How do I get the Double Pack-a-Punch?
What does Skull Hop give me?
Where is the song?
Visual guides & sources
Screenshots and exact part locations live in these — open one on a second screen.
Map discussion
A shared community board for Attack of the Radioactive Thing — posts are public, saved on the server and visible to everyone across devices. Handy for strategies, spawn variations you've noticed, or steps to double-check. Please keep it civil and on-topic.