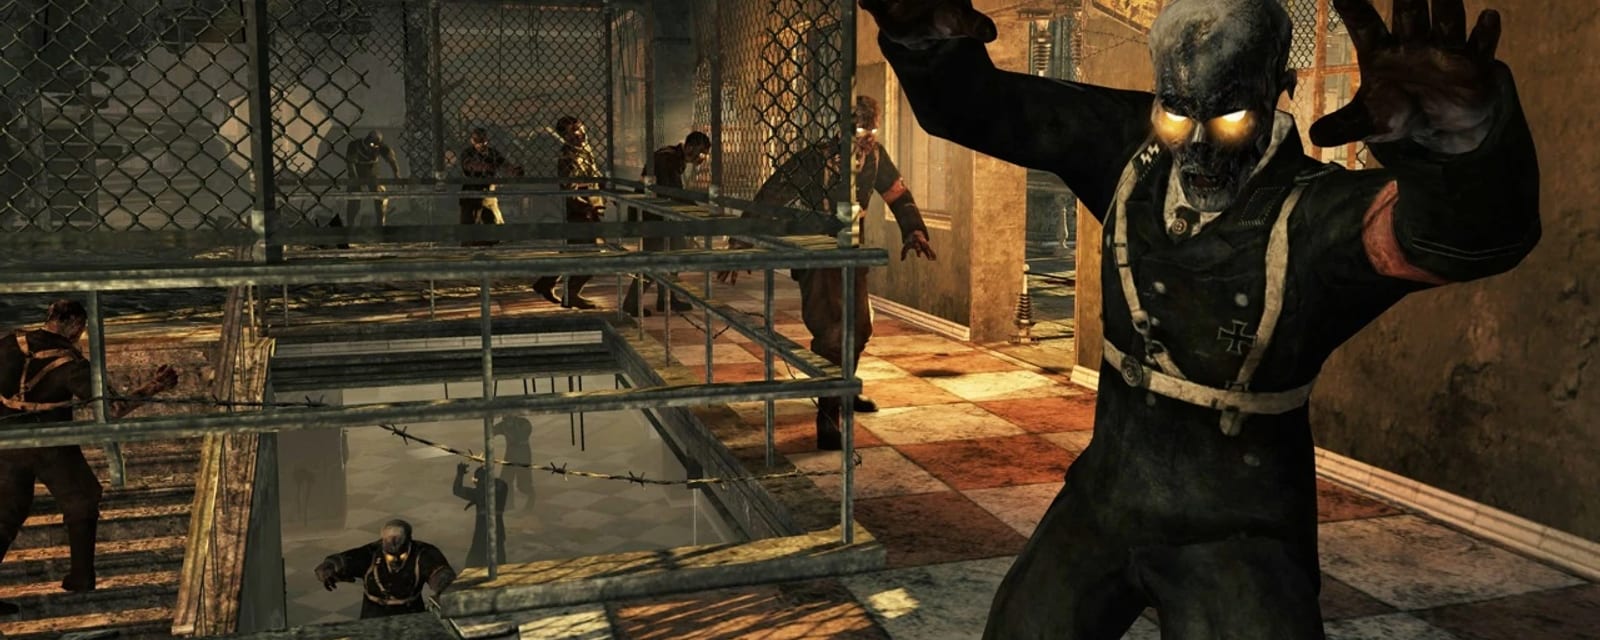
Verrückt
A German asylum, mirrored around two starting wings — and the map that invented the modern loadout. Perk-a-Colas, the power switch and the Electro-Shock Defences all debut here. In co-op the team spawns split and can only reunite once power opens the central electric door.
Quick answers
How do you complete the Verrückt Easter egg?
- In co-op, work your assigned wing toward the far power room — don't waste ammo on the central electric door (only power opens it)
- Throw the power switch: perks light, traps arm, the divider opens and the team reunites
- Buy Jugger-Nog first — Verrückt's zombies sprint unusually early
- Use the Electro-Shock Defences (1,000) as your infinite-damage tool in the narrow corridors
- Sing “Lullaby for a Dead Man”: flush the left-most bathroom toilet three times
What are the main areas on Verrückt?
How many side Easter eggs are on Verrückt?
When was Verrückt released?
Key areas
Spawn wings (American & German)
Two mirrored starting rooms at opposite ends. In co-op, players can begin on opposite sides of the central electric door and can't reach each other until power is on.
Power room
At the far centre where both wings meet — throw the switch here to light the perks, arm the electric traps and open the central divider.
Bathroom
Beside the power room — a bathtub, a shower and a row of three toilets. Home of the “Lullaby for a Dead Man” song.
Perk corridors
Jugger-Nog on one wing, Speed Cola along the opposite kitchen/hall route, Double Tap and Quick Revive in the upper rooms — the first map where you plan a perk route.
What to do
- In co-op, work your assigned wing toward the far power room — don't waste ammo on the central electric door (only power opens it)
- Throw the power switch: perks light, traps arm, the divider opens and the team reunites
- Buy Jugger-Nog first — Verrückt's zombies sprint unusually early
- Use the Electro-Shock Defences (1,000) as your infinite-damage tool in the narrow corridors
- Sing “Lullaby for a Dead Man”: flush the left-most bathroom toilet three times
Before you start
What to have in hand before step 1 — from the loadout notes, from the walkthrough itself, and from the map's own quest documentation where the gate is never stated in a step.
- Perks debut here: Quick Revive, Jugger-Nog, Speed Cola, Double Tap — no Pack-a-Punch at all. Double Tap is fire-rate only here, not the later 2.0 damage version.
- Zombies sprint unusually early on this map — buy Jugger-Nog first.
- Co-op spawns split across two wings behind a central electric door that only the power switch opens. Don't waste points trying to force it.
- Electro-Shock Defences (1,000) are the map's real high-round tool since there is no Pack-a-Punch.
- BO3/Zombies Chronicles adds a second hidden song, Der Wunderfizz and a doll hunt gated behind a 9-3-5 toilet code — none of it works in WaW or BO1.
- WaW-original zombies can spawn in front of you rather than behind, so pure camping is weaker here than on later maps; expect to keep a slow train moving.
Where your run will differ
Gathered here so you meet them before they cost you a run rather than after — quoted word for word from the guide below, or researched from the map's own quest documentation.
This map exists in more than one release, and these are the points where they differ. Everything else in this guide applies to both.
- “The 9-3-5 toilet-code doll quest, the blood fountain and Wunderfizz are Black Ops 3 / Zombies Chronicles…” Not in the original
- “Black Ops 3 / Zombies Chronicles only — does nothing in the 2008 original.” “Samantha's Sorrow” (Verrückt · BO3)
- “Black Ops 3 / Zombies Chronicles only — none of this works in the 2008 original.” “Samantha's Sorrow” (Verrückt · BO3)
- “BO3/Zombies Chronicles adds a Doctor Monty voice line reflecting on the asylum.” Doctor Monty radio (BO3 only)
Full walkthrough
The quest in the order this guide runs it — tap any step to jump to it, and it fills in as you tick steps off.
Work your wing toward the power room
Buy en route as needed: Springfield (200, WaW only) or Kar98k (200, replaces the Springfield in BO1), Gewehr 43 or M1 Garand (600), STG-44 or Thompson (1,200), MP40 (1,000), Trench Gun (1,500), Double-Barrelled Shotgun (1,200), BAR with Bipod (2,500), Bouncing Betties (1,000), Stielhandgranates x4 (250). The Kitchen itself has no weapons — it is a link room to the Power Room.
Quick win: Free atmosphere on the way, no reward but no cost either — a dentist chair drill and scream (interact with the wheel), crying from the American-side cremation oven, sobbing near the power-room door, whispers by the locked Speed Cola door.
Version: BO1 replaces the Springfield wall-buy with a Kar98k.
Throw the power switch
Power lights every perk machine, arms the Electro-Shock Defences and opens the central divider, reuniting a split co-op team. The Mystery Box's first spawn point (950) is in this room too.
Confirmation cue: Perk machines light up and the divider door opens.
Buy Jugger-Nog first, then map the rest
Jugger-Nog 2,500 (one wing — buy this first, zombies sprint early here), Quick Revive 1,500 (starting side), Speed Cola 3,000 (opposite wing, kitchen/hall route), Double Tap Root Beer 2,000 (upper rooms, fire-rate only). BO1 adds Mule Kick (4,000, Thompson/right-hall side).
Quick win: Speed Cola on the far wing means fewer reload deaths once you are running the kitchen/hall loop in step 8.
Confirmation cue: The perk icon appears on your HUD after purchase.
Version: Mule Kick is a BO1/BO3 addition; BO3 also adds Der Wunderfizz (a multi-perk machine) outside the Power Room.
Electro-Shock Defences
Get every player onto the same side before paying — the arc downs players as easily as zombies. Pay 1,000 and lead a committed train into the field. Wait for the hum to stop before crossing; it can look clear from a distance while still live. Keep roughly 1,000 in reserve for the next activation.
Tip: Trap kills give no weapon points, so use this for survival, not economy.
Quick win: Free crowd control that costs no ammo once you are set up.
Confirmation cue: The electrical hum and arc visibly stop.
Lullaby for a Dead Man
Face the physically left-most toilet (not the one that is left after you turn around) and interact three separate times, letting each flush register before the next. A cha-ching confirms the third flush, audible even over gunfire.
Tip: The track is coded as a sound effect rather than music, so it plays quietly — that is normal, not a bug; drop other audio if you cannot hear it.
Confirmation cue: The cha-ching after flush three, then Kevin Sherwood and Elena Siegman's track begins.
Version: Activatable once per game in every version.
Number station and radios
With power on, a voice near the Power Room recites 4, 8, 15, 16, 23, 42 — the numbers from Lost. Passive audio, no reward. BO1 adds an interactive radio on a desk visible through the American/Mule Kick balcony barrier — shoot it to cycle campaign, Zombies and Dead Ops tracks. BO3 adds a Doctor Monty voice line reflecting on the asylum.
Confirmation cue: The numbers sequence completing once is enough to count it as heard.
Version: The balcony radio is BO1+; the Doctor Monty line is BO3 only.
BO3 only: Samantha's Sorrow (the 9-3-5 code)
Flush the right-most toilet 9 times, the centre 3 times, the left-most 5 times (any order between toilets) — a scream confirms the code registered. A doll spawns left of Der Wunderfizz; interact to start the hunt. Nine spots are documented: the balcony behind Speed Cola, a toilet before the power generator, a morgue tray near spawn, a mannequin by the box spot atop the stairs, a kitchen pot, the patient chair near spawn, a gap in the Mule Kick room ceiling barrier, the flaming hole above Mule Kick, and the fountain statue at map centre. Our own count runs to ten and includes the dentist chair — sweep all of the above; a giggle means you missed the window and must restart from the doll by Der Wunderfizz.
Quick win: Shooting all five spawned dolls spawns a free Max Ammo on completion.
Version: Does nothing at all in WaW or BO1 — entering the 9-3-5 sequence there only risks throwing off your Lullaby three-flush count if the two get mixed up.
Hold-and-train plan for high rounds
A Steam Community strategy guide for this map found that WaW zombies spawn in front of players rather than behind, which breaks pure camping — its author was still working on a dedicated WaW hold spot. Their working answer: keep a small train going through the Thompson room or spawn room rather than parking, run wall guns with deep ammo reserves (BAR or Thompson) instead of relying on the Box, save the Ray Gun for emergencies, keep Quick Revive active, and skip the Carpenter power-up since it disrupts spawning. Fire the Electro-Shock Defences every time they are off cooldown to thin the train for free.
Tip: Never let a downed teammate be on the trap's live side — it blocks the fastest revive route.
Version: This running approach targets WaW; BO1/BO3 players can lean more on a fixed corridor hold, since spawning behaves more conventionally there.
Side Easter Eggs & extras
Everything beyond the main quest. Tap any entry to open the full how-and-where breakdown.
Perks debut — the first four
Verrückt is where Perk-a-Cola begins. After power: Quick Revive (starting side; solo self-revive), Jugger-Nog (one wing, the priority buy), Speed Cola (opposite wing along the kitchen/hall) and Double Tap (upper rooms). The original Double Tap is fire-rate only — not the later 2.0 damage version.
Power & the split-spawn reunion
The switch sits in the far central power room. Until it's thrown the central electric divider stays shut, so a split co-op team must each buy toward the rear to meet. Power also lights the perks and arms the traps.
Electro-Shock Defences
The map's signature buy (1,000) — an electric arc across a choke that shreds a committed train. It downs players too, so commit from one side and wait for the hum to stop before crossing. Full steps below.
- Find the wall switch beside an electrified choke point (the traps sit in narrow passages you can funnel a horde through).
- Get every player onto the same side before paying — the arc downs players too and blocks the fastest revive route.
- Pay 1,000 and lead a committed train into the field; trap kills give no weapon points, so use it for survival, not economy.
- Wait for the electrical hum to stop before crossing — the visual can look clear from a distance while the current is still live. Keep ~1,000 in reserve for the next activation.
“Lullaby for a Dead Man”
Kevin Sherwood ft. Elena Siegman. Flush the left-most of the three bathroom toilets three times — the bathroom is on the German side, in the room by the STG-44 and M1897 Trench Gun wall-buys (beside the power room), so you can find it without knowing where 'the power room' is. A ‘cha-ching’ sound plays after the third flush to confirm it registered even over gunfire. Activatable once per game. Full steps below.
- Reach the bathroom immediately beside the power room (a bathtub, a shower and a row of three toilets).
- Face the physically left-most toilet in the row (not the left one after you turn around).
- Press interact three separate times — let each flush sound register before the next.
- After the third flush “Lullaby for a Dead Man” begins. It can be mixed quietly, so drop other audio or move away from a firing trap if you can't hear it.
Environmental horror
Optional atmosphere, no reward: the dentist chair (crouch by the wheel and interact for a drill and scream), crying from the American-side cremation oven, sobbing near the power-room door, and whispers by the inaccessible Speed Cola door.
Number station (4·8·15·16·23·42)
With power on, stay in or near the power room and listen for a voice reciting the sequence 4, 8, 15, 16, 23, 42 — the numbers from the TV series Lost. Passive audio with no reward; treat it as heard once the sequence completes.
Campaign radio jukebox (Black Ops version)
Added in the Black Ops re-release. A radio on a desk visible through the American/Mule Kick balcony barrier — shoot it to cycle campaign, Zombies and Dead Ops tracks.
Not in the original
Mule Kick (Thompson/right-hall) and the balcony radio are Black Ops additions. The 9-3-5 toilet-code doll quest, the blood fountain and Wunderfizz are Black Ops 3 / Zombies Chronicles — the 9-3-5 sequence does nothing in the original and only confuses the three-flush song.
“Samantha's Sorrow” (Verrückt · BO3)
Black Ops 3 / Zombies Chronicles only — does nothing in the 2008 original. A second hidden song plus a free Max Ammo, gated behind the 9-3-5 toilet code. Full steps below.
- Black Ops 3 / Zombies Chronicles only — none of this works in the 2008 original.
- Enter the toilet code by flushing: the right-most toilet 9 times, the centre 3 times, the left-most 5 times (any order between toilets) — a Samantha scream confirms the 9-3-5 code registered
- A Samantha doll spawns to the left of the Wunderfizz machine — interact with it to start the hunt
- Find and shoot 5 dolls that spawn one at a time around the map (10 possible spots incl. the bloody fountain, a kitchen pot, the Speed Cola railing, a mortuary cabinet and the dentist chair) — each doll makes a sound nearby to locate it and despawns if you're too slow
- A giggle means you missed the window — restart the hunt from the RK5 doll
- Shoot all five to complete “Samantha's Sorrow” and spawn a free Max Ammo
Open Wide... (iOS app only)
On the old iOS Call of Duty: Zombies app, the dentist chair pays the Open Wide... achievement.
Doctor Monty radio (BO3 only)
BO3/Zombies Chronicles adds a Doctor Monty voice line reflecting on the asylum.
Zombie behaviour on Verrückt
Two swipes down you without Jugger-Nog, crawlers are fast, and zombies can reach through windows to hit you — buy Jugger-Nog before anything else.
Recommended loadouts
Three strong picks for this map — the map's Wonder Weapon plus reliable box/wall options. These are pre-augment-era games, so the setup is the gun plus Pack-a-Punch and perk synergy.
Ray Gun
Box crowd-clearThe Box's best pull — splash clears the tight asylum corridors. No PaP, so watch your footing near your own explosions.
Electro-Shock Defences
Infinite-damage trapsNot a gun but your real high-round tool — the 1,000-point electric arcs shred a committed train. Pair with Jugger-Nog so a mistimed cross doesn't down you.
Thompson / BAR
Wall backboneA reliable wall automatic (Thompson) or the harder-hitting BAR for steady damage and cheap ammo between Box pulls.
Common Verrückt questions
Direct answers to the specific things players look up mid-game — part locations, puzzle steps and more.
Why can't I reach my teammates on Verrückt?
Where is the power switch on Verrückt?
Which perks are on Verrückt, and where?
Is there Pack-a-Punch on Verrückt?
Why did the electric trap kill me?
Where is the bathroom for the song?
What is the 4, 8, 15, 16, 23, 42 voice?
Does the 9-3-5 toilet code do anything in the original?
What else is hidden around the asylum?
Visual guides & sources
Screenshots and exact part locations live in these — open one on a second screen.
Map discussion
A shared community board for Verrückt — posts are public, saved on the server and visible to everyone across devices. Handy for strategies, spawn variations you've noticed, or steps to double-check. Please keep it civil and on-topic.