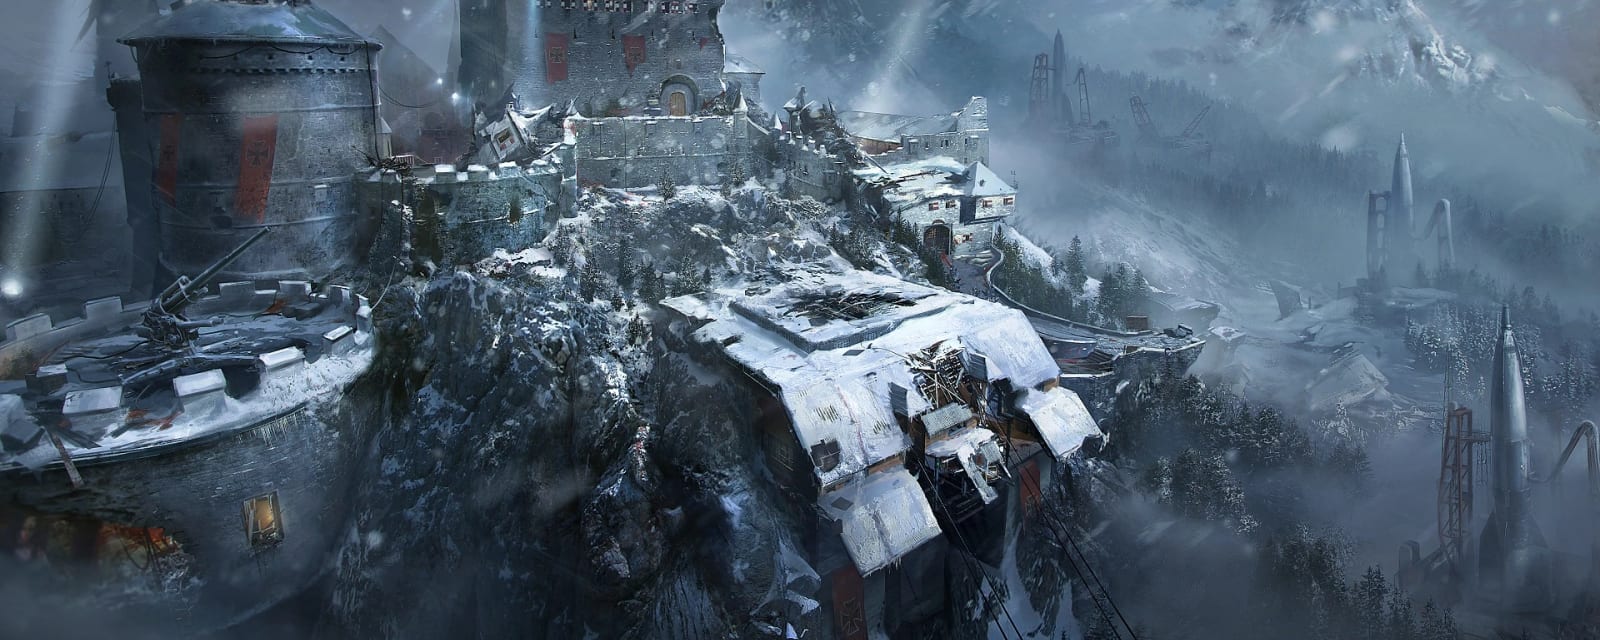
Der Eisendrache
An Austrian mountain fortress over a Group 935 rocket site. Recover the ancient bow, upgrade it to one of four elements, and in My Brother's Keeper erase the Ultimis Tank Dempsey. Widely rated one of the best BO3 maps.
Quick answers
How do you complete the Der Eisendrache Easter egg?
- Turn on power
- Build Pack-a-Punch (teleport 3 pieces)
- Feed the 3 dragons → the Wrath of the Ancients bow
- Upgrade one elemental bow per player
- Build the Ragnarok DG-4
- Fuse the Death Ray and flip it to Protect
- Charge the teleporter, find 4 wisps → travel to the past
- Note Groph's safe code; do the rocket Simon Says
What is the Wonder Weapon on Der Eisendrache?
Who is the boss on Der Eisendrache?
How long does the Der Eisendrache Easter egg take?
Can you do the Der Eisendrache Easter egg solo?
Is there a song Easter egg on Der Eisendrache?
What are the main areas on Der Eisendrache?
How many side Easter eggs are on Der Eisendrache?
When was Der Eisendrache released?
Key areas
Undercroft / Pyramid
The crypt MPD, workbenches and low-gravity wall-runs — hub for the bow rituals and the boss fight.
Mission Control (bow room)
Where the base Wrath of the Ancients is claimed after feeding the three dragon statues.
Rocket Launch Pad
Outdoor pad with the trucks and the rocket used across several quest steps.
The Bastion (Death Ray)
The trap by the power switch, toggled Destroy/Protect — central to the main quest.
Clock Tower
Spiral-stair tower with the weathervane and terminals; used for bows and code entry.
Samantha's Bedroom / Courtyard
Song objects, the music box, the courtyard dragon statue and a traversal hub.
Steps at a glance
- Turn on power
- Build Pack-a-Punch (teleport 3 pieces)
- Feed the 3 dragons → the Wrath of the Ancients bow
- Upgrade one elemental bow per player
- Build the Ragnarok DG-4
- Fuse the Death Ray and flip it to Protect
- Charge the teleporter, find 4 wisps → travel to the past
- Note Groph's safe code; do the rocket Simon Says
- Retrieve and place the Keeper Stone
- Feed the Keeper at 4 ritual circles (correct bows)
- Defeat the corrupted Keeper
- Charge and seat the Summoning Key
Before you start
What to have in hand before step 1 — from the loadout notes, from the walkthrough itself, and from the map's own quest documentation where the gate is never stated in a step.
- Storm and Void are the most beginner-friendly elements to upgrade the bow into. — step 3
- Feed each dragon-head statue about 8 kills (courtyard, Mission Control, Undercroft) — wait for the chewing animation each time — before the Wrath of the Ancients appears behind the knight's tomb. — step 2
- The Storm and Wolf bow paths both need Anti-Gravity activated first — their wall-run steps require the low-gravity state. — step 3
- Finding the four wisps after charging the teleporter is timed, and the spots rotate each attempt. — step 6
- The Rocket Launch Pad Simon Says spawns infinite Hellhounds while it runs, right after the Clock Tower console. — step 7
- Feeding the Keeper spans several rounds across four ritual circles — go in with loadout and perks already sorted. — step 9
- You need one upgraded bow per player for the ritual — ranked solo needs one; local or unranked needs all four. — step 3
Set aside 45–75 min · 1–4 (solo-capable) · the full loadout is further down this page
Full walkthrough
The quest in the order this guide runs it — tap any step to jump to it, and it fills in as you tick steps off.
Power & Pack-a-Punch
Flip the power switch by the Death Ray. Then teleport the three PaP pieces from three teleporters — behind the power switch, the underground chamber past the first courtyard dragon, and the gated 1500-point teleporter. Pack-a-Punch then works in the Undercroft.
Build the bow
Kill zombies beside each dragon-head statue (about 8 each; wait for the chewing animation) — courtyard near spawn, Mission Control above the fireplace, and the Undercroft pyramid room. Collect the Wrath of the Ancients from behind the knight's tomb in Mission Control.
Upgrade a bow (one per player)
Each player upgrades the bow to one element — Fire, Storm/Lightning, Wolf or Void. All players need an upgraded bow for the later ritual. Full steps are in the Side Easter Eggs section below.
Tip: Storm and Void are the most beginner-friendly.
Build the Ragnarok DG-4
Collect three parts — from a killed Panzersoldat's chest, by pulling the lever during a rocket test, and a floating part grabbed mid-air off a Wundersphere launch pad — and assemble at a bench.
Fuse the Death Ray → Protect
Insert the fuse on the clock-tower-facing side to start the current, then pull the lever on the opposite side to switch the trap from Destroy to Protect.
Charge the teleporter & find the wisps
Shoot the prongs above the teleporter until it glows, then find 4 wisps within the time limit using uncharged bow shots (spots rotate — clock, telephone, globe, crafting table, etc.). Everyone enters the purple-lit teleporter to travel to the past.
Safe code & rocket Simon Says
In the past, grab the soul canister and fuses and memorise the 3 symbols Dr. Groph enters into the safe. Enter that code at the clock-tower terminal to open the safe (Tesla coils + keycard), install the coils in the two Bastion towers and set the Death Ray to Destroy. Then clear both Simon Says consoles — the Clock Tower first, then the Rocket Launch pad (infinite Hellhounds spawn while they run) — set the Death Ray back to Protect and press the green launch button so the coils strike the rocket. Collect the Vril Generator from Dempsey's crashed cryo-pod in the second courtyard.
Retrieve & place the Keeper Stone
Redo the wisp/teleport sequence, open the crate holding the Keeper Stone, and place it under the lamppost near Double Tap.
Feed the Keeper
Insert the Vril Generator (the golden rod from the crashed rocket) into the crypt socket, then follow the spectral Keeper to four ritual circles. Stand in each and kill zombies close by using the correct-coloured bow (the circle's glow tells you which); part-way through, insert the Keeper Stone in the wall slot on the Double Tap route. Spans several rounds.
Defeat the corrupted Keeper
Trigger anti-gravity on the blue MPD panels to enter the fight (skeletons and Panzers spawn). Damage the boss's chest by deploying the Ragnarok DG-4 on the lightning orbs at centre-map — about three phases. Then charge the Summoning Key on the MPD and seat it at the clock-tower terminals to finish.
Side Easter Eggs & extras
Everything beyond the main quest. Tap any entry to open the full how-and-where breakdown.
The elemental bows — overview
Upgrade the Wrath of the Ancients into one of four elements — you need one per player for the main quest. All four share the base-bow start and each ends by charging its forged arrow at that colour's Undercroft altar. Storm and Void are the most beginner-friendly. The Storm and Wolf paths both need Anti-Gravity activated first — their wall-run steps require the low-gravity state.
- Base bow first: feed the three dragon-head statues (~8 kills each, waiting for the chewing animation) and collect the Wrath of the Ancients from behind the knight's tomb in Mission Control — a charged shot uses two arrows and starts every upgrade.
- You need one upgraded bow per player (ranked solo needs 1; local / unranked needs all four). Each element's forged arrow is charged with nearby kills at its matching altar in the Undercroft.
- Pick your element below — Storm and Void are the most forgiving; Fire and Wolf add rocket-test timing and painting / skull hunts.
Storm / Lightning Bow
Weather-vane arrow → light three bonfires → the five-symbol wall-run → charge three lightning urns and imbue the bonfires → forge at the blue altar.
- Shoot the weather vane on the castle roof with the base bow and take the dropped broken arrow.
- Ignite three distant bonfires with charged arrows: the village hill below the castle, the rampart outside the Clock Tower, and the hill above/right of the Rocket Launch site.
- During Undercroft low gravity, wall-run across all five blue wall symbols without touching the floor (a touch resets the pass — wait for the next low-gravity cycle).
- Charge three urns by killing ~6 zombies near each: inside the Clock Tower, the room above Double Tap, and the tunnel toward the Rocket Launch site.
- Stand by a charged urn, fully draw until the arrow turns electrical, keep it drawn and fire at one bonfire; repeat for the other two urns/bonfires (an urn cannot be reused).
- Return to the weather-vane tower and interact with the blue electrical cloud at its base for the forged arrow.
- Place it in the blue altar in the Undercroft and kill nearby zombies until it stops taking souls; take the Storm Bow.
Void / Demon Gate Bow
Void symbol by Double Tap → release the Trophy-Room urn → six skulls → feed six crawlers → decode the three spoken words on the knight statues → forge at the purple altar.
- Charged-shoot the purple Void symbol above the tunnel gate near Double Tap.
- In the trophy room beneath the Clock Tower, melee-kill a zombie on the glowing purple floor tile, then interact with the broken tile to release the urn.
- Collect six skulls: broken wall near Mule Kick; window ledge right of the church entrance; toy chest in Samantha's room; wall near Double Tap; sink in the teleporter room; truck bed at the Rocket Launch site.
- Lead six crawlers one at a time into the purple circle so the skulls consume them.
- Charged-shoot the floating urn and note the three spoken words in order (possible words: Door, Roe, Horn, Heart/Hearth, Crown, Griffin).
- Kill zombies until you have picked up six purple symbol drops (they fade fast).
- Interact with the knight statues matching the three spoken words in spoken order and record the three symbols they reveal.
- Shoot the three matching floor symbols in the purple circle in that order (a wrong order makes the skulls attack — leave, survive, re-enter); interact with the tile for the arrow.
- Charge it at the purple altar in the Undercroft; take the Void Bow.
Wolf Bow
Four wolf-king paintings in order → wolf skull from the rocket flag → follow the spectral wolf to three bone piles → wall-run the wolf symbol → forge at the green altar.
- Interact with the four wolf-king paintings in story order — king on the throne with a wolf; armoured king on horseback; burning castle / dark creature; king's skeleton — spread across the Clock Tower, the room beneath it near Mule Kick, the church balcony, and the corridor beyond Samantha's room.
- Take the broken arrow from the newly opened wall by the Undercroft stairs.
- At the Rocket Launch site, charged-shoot the flag above the sealed doorway and pick up the falling wolf skull.
- Place the skull on the headless wolf skeleton beside the green altar in the Undercroft.
- Follow the spectral wolf to three bone piles; at each, feed souls with nearby kills and take the bone fragment when the wolf scratches the pile.
- At the final Undercroft wall during low gravity, wall-run and shoot the glowing wolf symbol above the hole, then stand on the raised platform and interact with the hole for the arrow.
- Place it in the green altar, charge with nearby kills, and claim the Wolf Bow.
Fire / Rune Prison Bow
Fire symbol in the Clock Tower → after a rocket test the sky fireball glows for only ~10 seconds, so be ready to shoot it → hit the three mid-air Wundersphere fire rings (each stays lit once hit) → chain each lit ring to its fixed rune fireplace (Clock Tower→Supply Room, castle top→Church, Double Tap bridge→Samantha's room) → 4-shot volcanic-rock escort → forge at the red altar.
- Shoot the red Fire symbol high in the Clock Tower and take the broken arrow from the opened wall.
- Wait for a rocket test; the instant the safety doors reopen, step outside and shoot the glowing fireball in the sky above the concrete building.
- Use the three Wundersphere launch routes and, while airborne, shoot the three glowing red ground circles (a direct hit keeps a circle lit; repeat any that do not stay).
- Stand inside each circle and kill zombies until its fire charge completes.
- Interact with the Clock Tower mechanism to reveal a random rune, then find the castle fireplace bearing that same rune.
- From the charged circle nearest that fireplace, fire charged arrows into the ground to chain temporary fire circles toward it (each shot must land in the active fire), and finish by shooting into the fireplace to ignite it.
- Return to the Clock Tower solar-fire mechanism and interact with the completed fire energy for the arrow.
- Place it at the red altar, feed nearby souls, and take the Fire Bow.
Ragnarok DG-4
Buildable gravity-spike wonder weapon: Panzersoldat chest part, rocket-test lever part and a floating Wundersphere part, assembled at a bench. Spikes clear hordes and give a safe revive.
- Part 1: kill the Panzersoldat boss (first appears ~round 8-12) — it drops the first part
- Part 2: near the Clock Tower, activate the launch pad and trigger the Death Ray; a part appears high in the sky — use a Wundersphere to launch up and grab it mid-air (collect within ~2 minutes)
- Part 3: during the scripted rocket test, flip the lever behind the rocket (red→green) then reach the teleporter console before the doors seal until all three lights are green; the part appears in the teleporter
- Build all three at a workbench (Undercroft/pyramid) for the Ragnarok DG-4 gravity spikes
“Dead Again”
Elena Siegman (Kevin Sherwood). Interact with 3 teddy bears: Samantha's bedroom chair, the prison cell across from Juggernog, and a truck on the rocket pad.
- Interact with 3 teddy bears, in any order
- Samantha's bedroom — sitting on a chair
- Prison cell across from Juggernog — on a crate
- Rocket launch pad — in the passenger seat of one of the trucks
- 'Dead Again' by Elena Siegman plays; replayable afterward from the Data Vault
Music box & gramophones
'Samantha's Lullaby' plays from the music box on Samantha's nightstand; activating the 3 gramophones (Samantha's bedroom, Control Room, pyramid stairs) plays a Requiem track.
- Samantha's Lullaby: in Samantha's bedroom, hold Use on the music box on the nightstand
- Requiem (Dies Irae): hold Use on the 3 gramophones
- Gramophone 1 — Samantha's bedroom, on a shelf facing away from the teddy bear
- Gramophone 2 — the Control Room, on a chair
- Gramophone 3 — the Pyramid room, facing the stairs down to the crypt (order doesn't matter)
Wundersphere & Death Ray
500-point Wundersphere pads launch you for traversal and mid-air grabs; the Death Ray trap toggles Destroy/Protect and is tied into the quest.
Zombie Shield (Der Eisendrache)
The map's Zombie Shield — one part in each of three regions (first courtyard, second courtyard/church, and the Undercroft during low gravity, three possible spawns each). Build at the Undercroft bench or the bench above Double Tap; the back plate soaks hits and the boost aids revives. Enter the boss with a fresh shield. Full steps below.
- Part 1 (tank plate): first Courtyard, near the Double Tap gate, usually on stacked crates
- Part 2 (iron eagle top): the second Courtyard / Church area
- Part 3 (bulletproof glass): the Undercroft — activate anti-gravity to wall-run up and pull it off the wall
- Build all three at the Undercroft bench (or the bench above Double Tap); the back plate soaks hits and the boost aids revives — enter the boss with a fresh shield
Panzer Helmet
Drop and trigger the three ceiling metal claws — first-courtyard balcony, the armour corridor, and the stone tunnel by Quick Revive — and use each to kill a Panzersoldat; permanently reduces Panzer damage.
Plunger
Open the Fire-Bow wall, place a Ragnarok in the Clock Tower mechanism and stop the clock at ~9:35; time-travel, collect the plunger, then kill a Panzer to charge it as a temporary melee upgrade.
Free Mega GobbleGum
Take the small plant from the teleporter-room shelf; place it on the matching shelf during a past visit, then interact with the grown plant back in the present.
Skeleton mode
With In Plain Sight equipped, activate the three hidden skull targets to replace normal zombies with skeletons.
Smaller secrets
Wall-run the single blue square facing Pack-a-Punch for a free Death Machine; wall-run the Undercroft pressure symbols to reveal the BRM wall-buy; shoot the ceiling moon then the aligned rocket in the church command room; and complete the gondola fuse sequence for the alternate cable-car trip.
Recommended loadouts
Three strong picks for this map — the map's Wonder Weapon plus reliable box/wall options. These are pre-augment-era games, so the setup is the gun plus Pack-a-Punch and perk synergy.
Wrath of the Ancients (upgraded bow)
Crowd-clear Wonder WeaponCharged shots pull and delete groups — Storm/Lightning or Void are the easiest. Pair with Widow's Wine and Double Tap for panic control.
Ragnarok DG-4
Panic + boss damageGravity spikes clear the surrounding horde and give a safe self-revive; keep charges for the final Keeper's chest window. Run Quick Revive + Stamin-Up.
KN-44 / Drakon (PaP)
Reliable primaryPack-a-Punch and run Speed Cola + Juggernog for high-round trains; Deadshot Daiquiri helps headshots on the Panzersoldat.
Recommended kit & gum picks
Der Eisendrache predates Field Upgrades and Ammo Mods — consumables are GobbleGums; the elemental bows and Ragnarok DG-4 are your real firepower (in Recommended loadouts). Alchemical Antithesis refills a bow fast.
Frag / Semtex Grenade
Crowd clear for the ritual-circle holds and the wisp-hunt rounds.

Monkey Bomb
Buys space during the rocket Simon-Says and the corrupted-Keeper fight.
Alternate Ammo Type
PaP your bullet gun for a random AAT — Dead Wire and Fire Works clear the Keeper's adds while you save bow charges.

Perkaholic
Ultra-RareEvery perk at once — a strong solo opener for a long bow quest.

Aftertaste
MegaKeep your perks after a revive (3 rounds).

Wall Power
Rare MegaNext wall-buy comes Pack-a-Punched.

Alchemical Antithesis
ClassicEvery 10 points = 1 reserve ammo — refills an elemental bow.

Kill Joy
Rare MegaDrops an Insta-Kill (2×) to reset a bad round.
Perkaholic
Ultra-RareFull perks for whoever pops it.

Phoenix Up
MegaRevive all downed team-mates, perks kept.

Near Death Experience
Ultra-RareProximity revive during the ritual-circle holds.
Aftertaste
MegaKeep perks through a down at a ritual circle.

On the House
Rare MegaFree Random Perk bottle for the squad.
GobbleGum reference — Black Ops 3
All 63 Black Ops 3 GobbleGums by tier — Classic (free, packs of 5), Mega, Rare Mega and Ultra-Rare (Black-Market / Liquid Divinium). Filter by tier. Some seasonal/Chronicles gums are grouped as compiled.

Always Done Swiftly
ClassicFaster ADS walk and raise/lower for 3 rounds.

Arms Grace
ClassicRespawn with the guns you bled out with.

Coagulant
ClassicLonger bleedout time.

In Plain Sight
ClassicZombies ignore you (2×, 10s each).

Stock Option
ClassicAmmo drawn from your stockpile, not the magazine (2:30).

Impatient
ClassicRespawn near the end of the current round.

Sword Flay
ClassicMelee does 5× damage (2:30).

Anywhere But Here!
ClassicTeleport to a random location with a concussive blast (2×).

Danger Closest
ClassicZero explosive self-damage for 3 rounds.

Armamental Accomplishment
ClassicFaster weapon switch, melee and item use for 3 rounds.

Firing On All Cylinders
ClassicFire while sprinting for 3 rounds.

Arsenal Accelerator
ClassicCharge your special weapon faster for 10 min.

Lucky Crit
ClassicBetter Alternate Ammo Type proc for 1 round.

Now You See Me
ClassicAll zombies chase only you (2×, 10s).
Alchemical Antithesis
ClassicEvery 10 points earned becomes 1 reserve ammo (2×, 60s).
Aftertaste
MegaKeep perks on revive (3 rounds).

Burned Out
MegaYour next hit ignites nearby zombies (2 hits).

Dead of Nuclear Winter
MegaSpawns a Nuke (2×).

Ephemeral Enhancement
MegaHeld gun becomes Pack-a-Punched for 60s (2×).

I'm Feeling Lucky
MegaDrops a random power-up (2×).

Immolation Liquidation
MegaDrops a Fire Sale (3×).

Licensed Contractor
MegaDrops a Carpenter (3×).
Phoenix Up
MegaRevive all team-mates with perks.

Pop Shocks
MegaMelee electrocutes (5×).

Respin Cycle
MegaRe-spin the Mystery Box (2×).

Unquenchable
MegaAn extra perk slot when at 4.

Who's Keeping Score?
MegaDrops Double Points (2×).
Idle Eyes · Flavor Hexed · Board Games · Board To Death · +8 more
Mega12 further Megas incl. Crawl Space, Fatal Contraption, Unbearable, Disorderly Combat, Slaughter Slide, Mind Blown (DLC/Chronicles).

Cache Back
Rare MegaDrops a Max Ammo.
Kill Joy
Rare MegaDrops an Insta-Kill (2×).
On the House
Rare MegaDrops a Random Perk Bottle.
Wall Power
Rare MegaYour next wall-buy comes Pack-a-Punched.
Undead Man Walking · Fear in Headlights · Temporal Gift · Crate Power · Bullet Boost · Extra Credit · Soda Fountain
Rare Mega7 further Rare Megas (DLC/Chronicles).

Killing Time
Ultra-RareFreeze all zombies for 20s; shot ones die.
Perkaholic
Ultra-RareEvery perk on the map.
Near Death Experience
Ultra-RareProximity revive with perks (3 rounds).

Reign Drops
Ultra-RareAll core power-ups at once (2×).
Shopping Free · Round Robbin' · Head Drama · Secret Shopper · Profit Sharing · Self Medication · Power Vacuum
Ultra-Rare7 further Ultra-Rares (DLC/Chronicles).
Projectile Vomiting · Newtonian Negation · Eye Candy · Tone Death
Classic (Whimsical)4 cosmetic-only DLC classics.
Dark Ops & prestige cards (Black Ops 3)
Black Ops 3 has few Zombies calling cards and mostly no per-map cards; its main-quest cards are on the maps themselves.

Primis Rulz
Dark OpsComplete all the Zombies story quests.

Prestigious Protagonist
PrestigeEnter Prestige after reaching Deresurrectionist (Zombies rank Lv 35).
When it isn't working
The stalls that actually cost people runs on this map, and what to do about each.
Dragon statue kills don't seem to count
Can't find the wisps in time
Getting swarmed during the rocket Simon Says
Can't damage the corrupted Keeper's chest
Storm/Wolf bow wall-run sections won't work
Common Der Eisendrache questions
Direct answers to the specific things players look up mid-game — part locations, puzzle steps and more.
Why won't the ritual step progress?
Which bow should I upgrade first?
Why is my bow doing nothing in the ritual circle?
How do I get the base bow?
How do I build the Ragnarok DG-4?
What is the Death Ray, and what does Protect do?
How do I get the Panzer Helmet?
How do I get the Plunger?
Where are the three teddy bears?
What is skeleton mode?
Visual guides & sources
Screenshots and exact part locations live in these — open one on a second screen.
Map discussion
A shared community board for Der Eisendrache — posts are public, saved on the server and visible to everyone across devices. Handy for strategies, spawn variations you've noticed, or steps to double-check. Please keep it civil and on-topic.