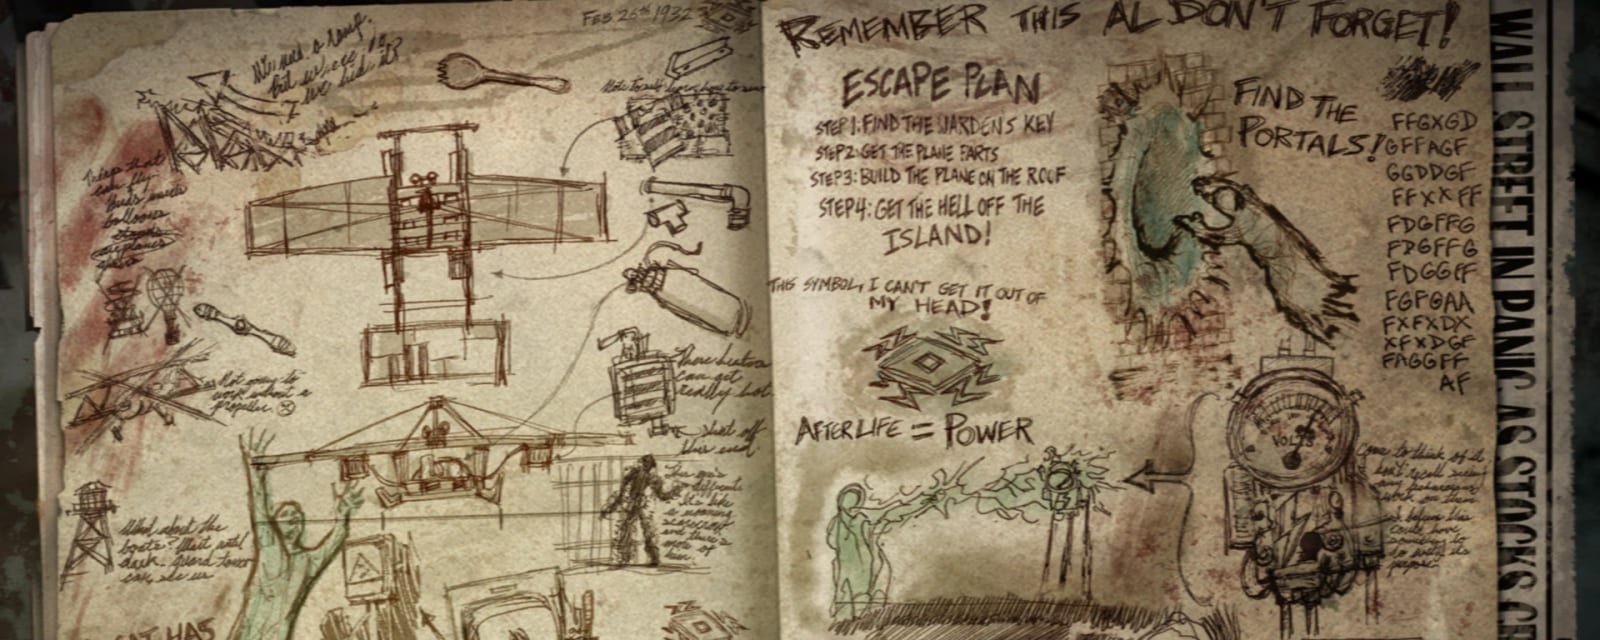
Mob of the Dead
Alcatraz, 1930s. Four mobsters trapped in a death loop. Complete the cycle... or break it. Weasel is the key — one player must be him for the ending.
Quick answers
Mob of the Dead is a Black Ops 2 map set on Alcatraz in the 1930s, where four mobsters are trapped repeating their own failed escape. The quest, Pop Goes the Weasel, plays out over three flights to the Golden Gate Bridge and ends with a choice: the mob kills Weasel, or Weasel kills the mob. One player has to be Weasel. Rated Hard, 45–75 minutes.
How do you complete the Mob of the Dead Easter egg?
- Prep — Hell's Retriever (feed the 3 hellhounds), build the plane
- Collect the 5 blue skulls → free Blundergat
- Get the Golden Spork
- Fly the plane to the bridge ×3 (upgrade the Acid Gat + PaP en route)
- Enter the prisoner numbers
- Collect the audio tags
- Final flight — kill Weasel, or Weasel kills the mob
How long does the Mob of the Dead Easter egg take?
Can you do the Mob of the Dead Easter egg solo?
Is there a song Easter egg on Mob of the Dead?
How many side Easter eggs are on Mob of the Dead?
When was Mob of the Dead released?
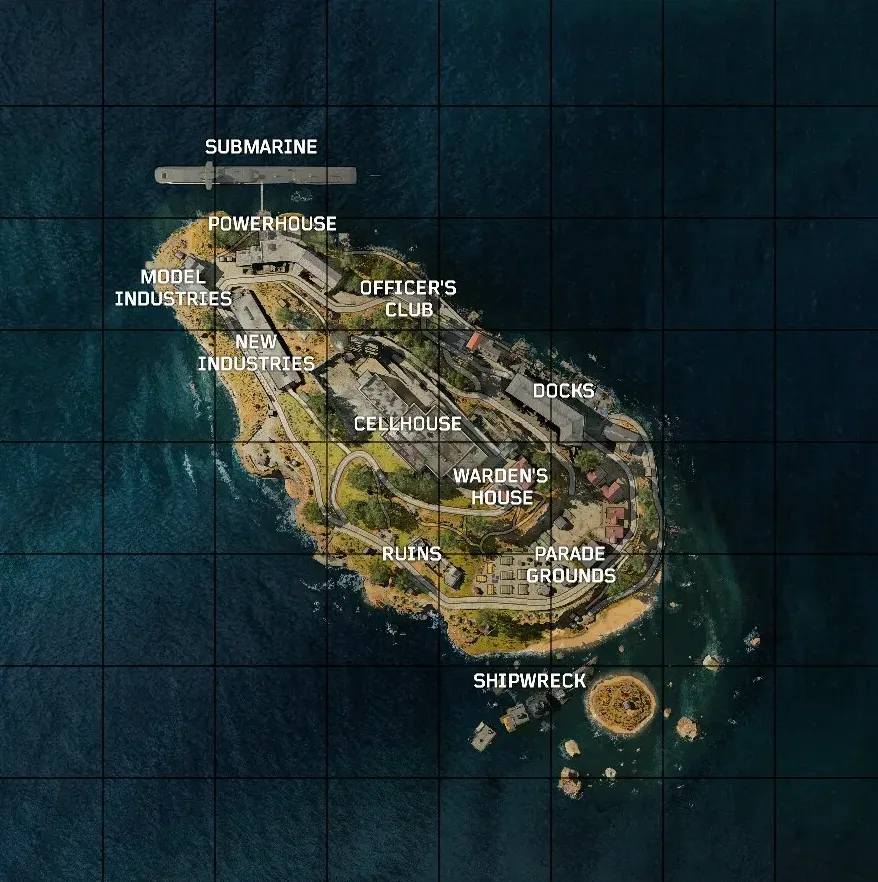
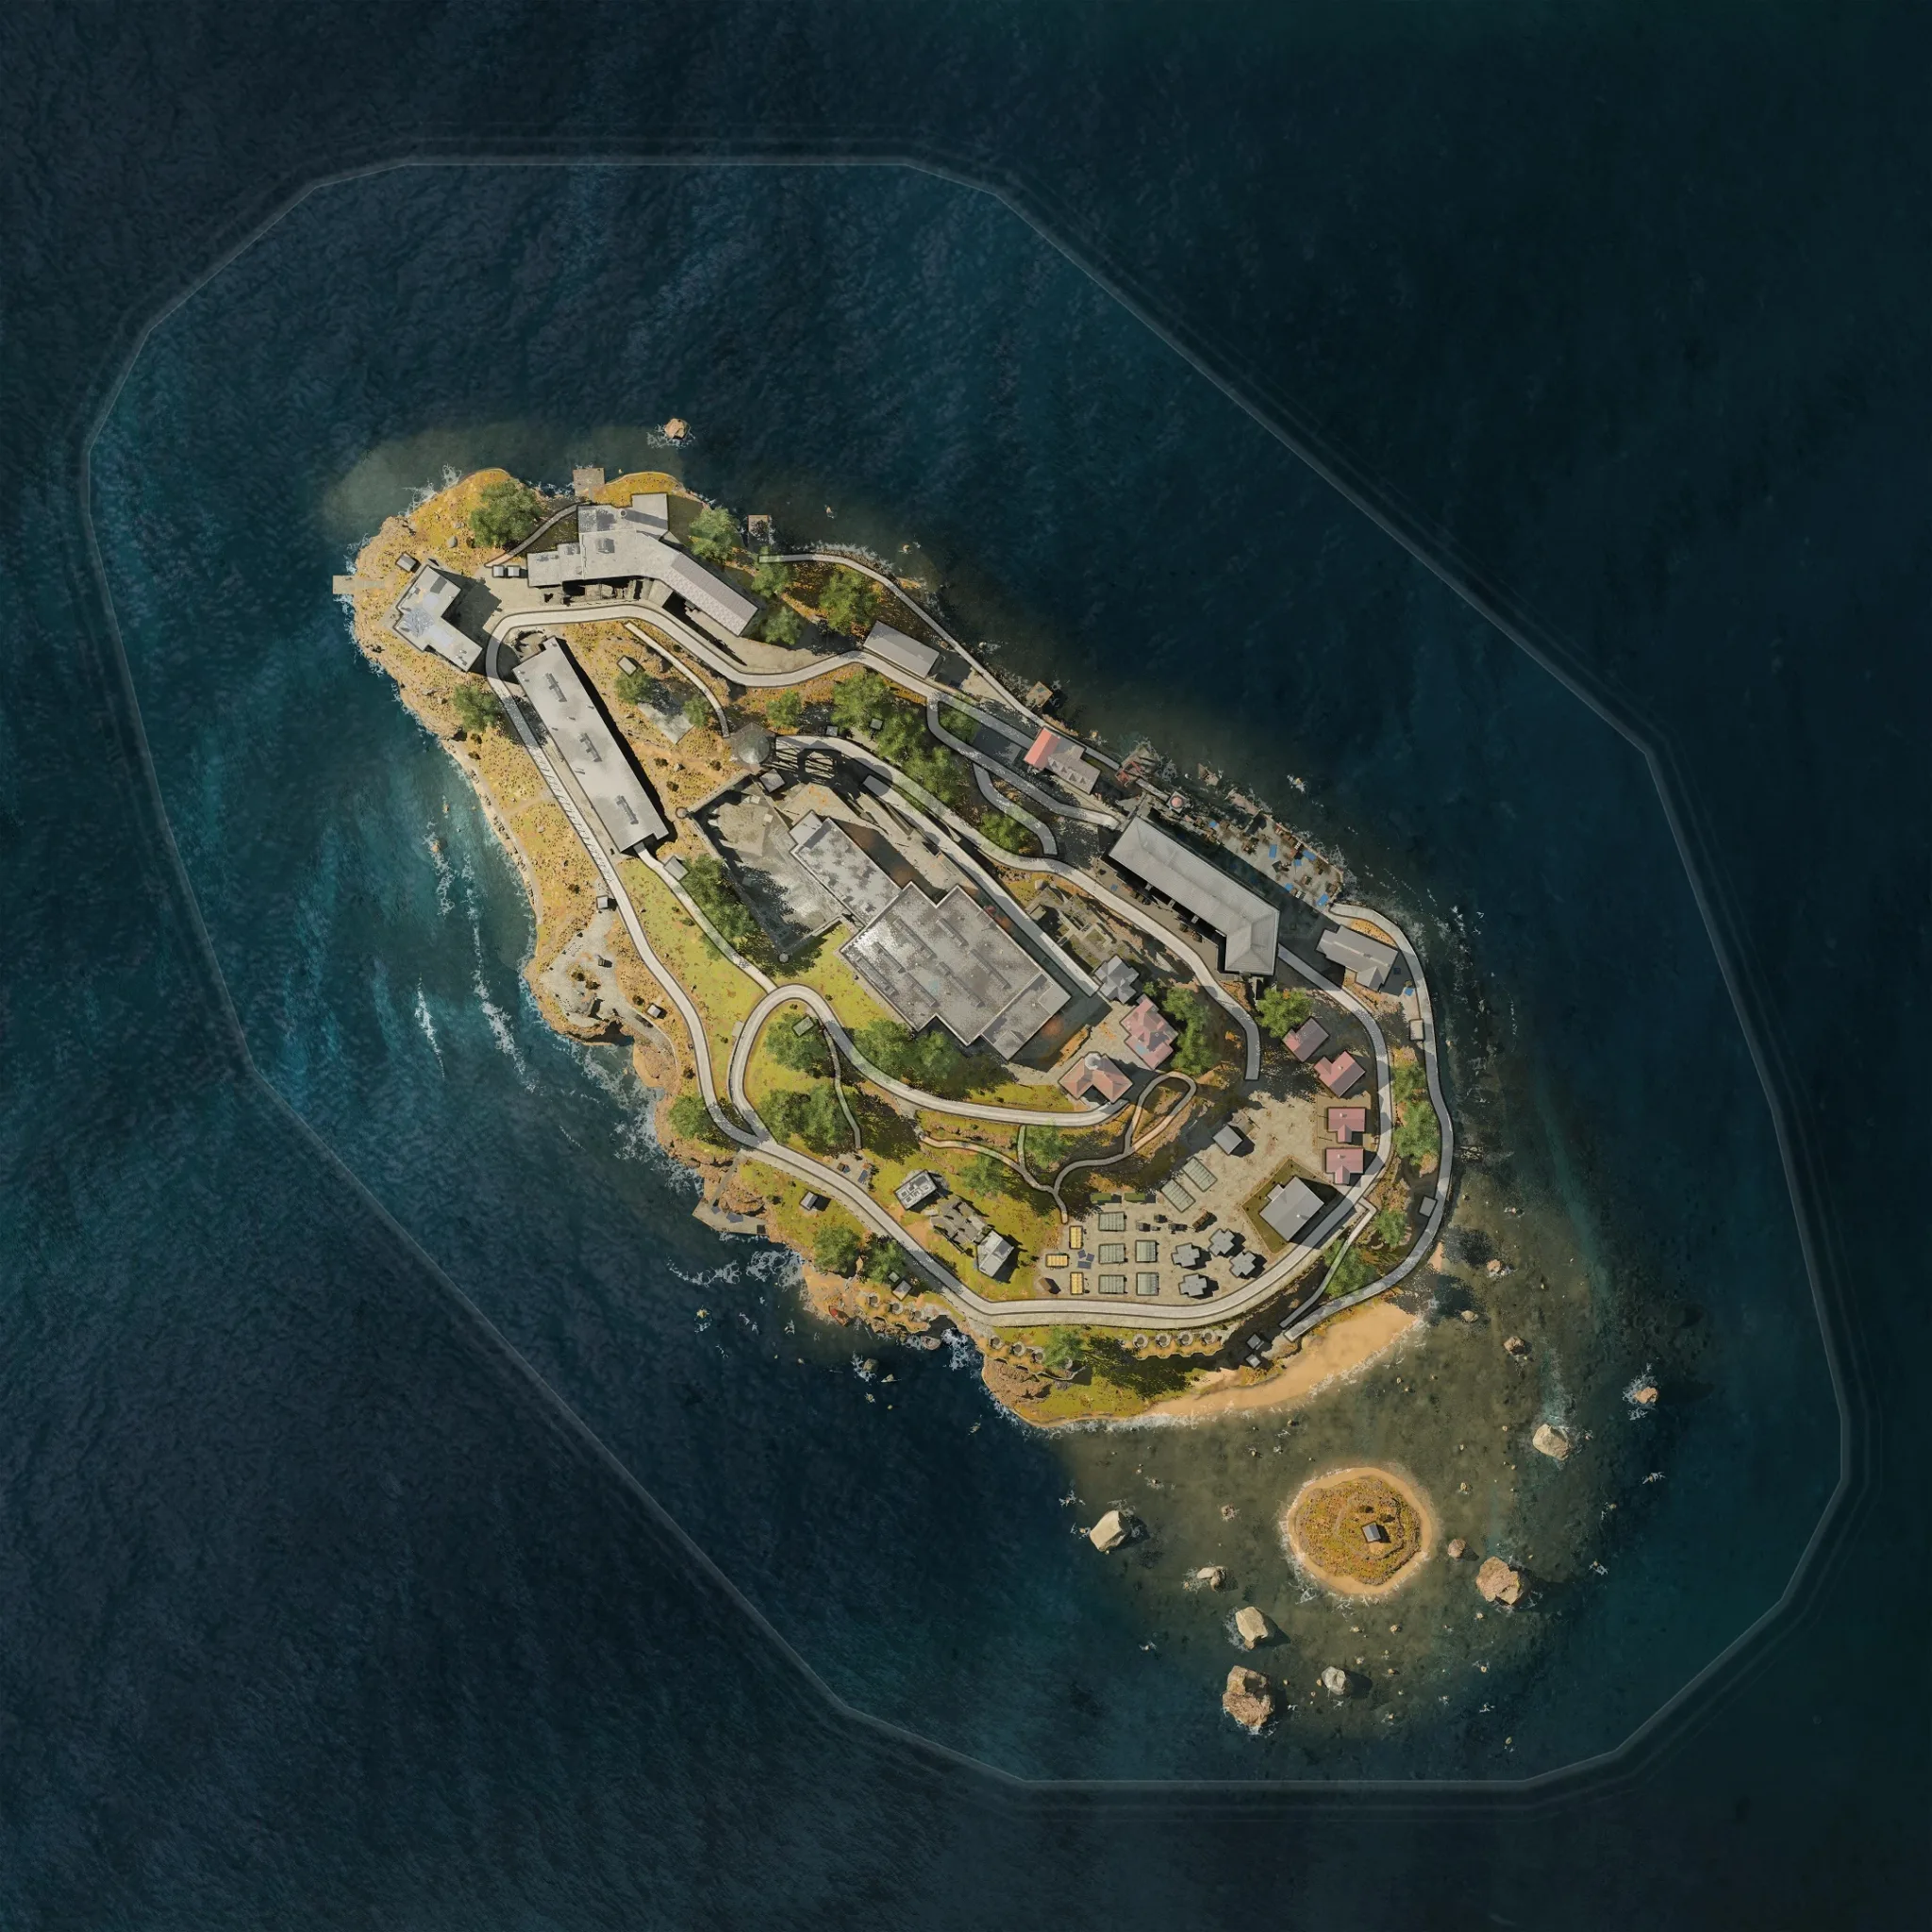
Map & Key areas
The map layout first, then the areas worth knowing by name. Map imagery © Activision, self-hosted.
Steps at a glance
- Prep — Hell's Retriever (feed the 3 hellhounds), build the plane
- Collect the 5 blue skulls → free Blundergat
- Get the Golden Spork
- Fly the plane to the bridge ×3 (upgrade the Acid Gat + PaP en route)
- Enter the prisoner numbers
- Collect the audio tags
- Final flight — kill Weasel, or Weasel kills the mob
Before you start
What to have in hand before step 1 — from the loadout notes, from the walkthrough itself, and from the map's own quest documentation where the gate is never stated in a step.
- The quest does not run on Easy — set the game to Original before you start.
- The ending needs at least two players, and one of them has to be playing Weasel.
- The number pad will not accept anything until the cycle has been completed three times, the free Blundergat has been earned from the five skulls (a Mystery Box Blundergat does not count), and the spoon has been collected.
Set aside 45–75 min · 1–4, but the ending needs 2+ (co-op required)
Where your run will differ
Gathered here so you meet them before they cost you a run rather than after — quoted word for word from the guide below, or researched from the map's own quest documentation.
This map exists in more than one release, and these are the points where they differ. Everything else in this guide applies to both.
- There is no remaster of this quest. Blood of the Dead is a different map with a different quest, and its steps do not transfer.
What changes with your player count. The rest of the guide is the same either way.
- “You get up to 3 Afterlives solo (1 per player in co-op), each ~1 minute” Afterlife & the gondola
- Everything is soloable except the ending, which needs at least two players with one of them playing Weasel. Entering the Afterlife numbers is easier in co-op, where a partner can pause-revive your body while you work.
Full walkthrough
The quest in the order this guide runs it — tap any step to jump to it, and it fills in as you tick steps off.
Retriever, Warden's Key & the plane
Master Afterlife (enter from red boxes to shock panels and meters). The Warden's Key hangs in one of two spots — outside the Warden's Office by the Citadel entrance, or above the Showers by the Cafeteria — with its Afterlife portal directly above it; lower it by Afterlife-shocking the generator above it to unlock the five plane-part cages. Feed all three Cerberus heads (~6 close kills each) to earn Hell's Retriever from the Citadel Tunnels alcove, then gather the five Icarus parts and install them on the rooftop frame. Each player can carry only one part at a time.
- Uniform — Showers laundry: shock the machine, then survive the lock-in that seals the Showers until the wash finishes
- Rigging/rope — Citadel Tunnels (Warden's Key, read 3 Afterlife digits, shock the number pad)
- Engine — Warden's Office rear room (Warden's Key)
- Oxygen tanks — Docks cage: a two-player gate dance — shock the panel, grab the part, shock again to get back out
- Control valve — Infirmary display case by the roof dog (Warden's Key)
Blundergat (5 skulls)
Collect the 5 blue skulls — they are only visible in Afterlife, but you must hit each with the Hell's Retriever while alive. Scout a skull in Afterlife and note its spot, revive, then throw the Retriever through it (don't waste Afterlives trying to throw from spirit form). All five → free Blundergat from the Warden's Office desk.
- Roof — far-left edge/corner behind the plane
- Docks — the third wooden pier pillar
- Jugger-Nog — the lamp/post by the machine
- Outside Warden's Office — the power-line/lamp post
- Cell Block / Library — inside the toilet in the open cell
Golden Spork
A personal multi-step quest (needs Hell's Retriever + an Acid Gat): Retriever the blue-green movie poster in the cell row by Warden's Office to open an Afterlife portal, shock the hidden spoon through the revealed wall, then Retriever the Silver Spoon through the Cafeteria window. Drop it in the Infirmary blood bathtub, get ~50-70 Acid Gat kills in the Showers, and return to the tub to claim the Golden Spork (a one-hit melee into the low 30s).
Three bridge trips
Fly the plane to the bridge and return via the electric chairs — three times total. Build the Acid Gat (Kit + Blundergat) and Pack-a-Punch at the bridge along the way. One round after each return, five fuel cans replace the plane parts at their pickup spots — carry them to the roof to refly.
Prisoner numbers
At the Citadel number pad (bottom of the spiral): once your three bridge round-trips are done the pad's numbers cycle continuously — if they're not cycling yet, fly more trips first. Enter Afterlife and shock the four codes in order — 101, 872, 386, 481 — accepting each before the next. You do not have to enter all four in one Afterlife (that's nearly impossible); re-enter Afterlife between codes. The screen turns black-and-white and the prison audio changes.
Audio tags
Collect the ~5 glowing headphone audio tags that appear along the path up to the roof.
Final flight
Everyone enters Afterlife and interacts with the plane to board — this final flight needs no fuel. At the bridge, revive at the electric chairs. Kill markers appear: the mob must kill Weasel (cycle continues) or Weasel kills the mob (cycle broken — canon). Either ends the game with the achievement.
Side Easter Eggs & extras
Everything beyond the main quest. Tap any entry to open the full how-and-where breakdown.
“Rusty Cage”
Johnny Cash (Soundgarden cover). Hold interact on the 3 whiskey bottles: the Library bookshelf by the Olympia, behind a Docks crate at the far fence, and on an Infirmary desk across from the blood tubs. Once per match.
“Where Are We Going?”
Malukah. Enter Afterlife at the Citadel number pad and shock the digits 9-3-5 (do it separately from the four main-quest codes).
- Input 935 on the Warden's Office number pad to play 'Where Are We Going?' by Malukah
- Bonus 'Rusty Cage' (Johnny Cash) — hold Use on 3 whiskey bottles: Library (shelf by the Olympia), Infirmary (desk near the roof, across from the blood baths), Docks (under a crate at the far-left gate)
- Bonus 'Samantha's Lullaby' — at match start, stand still and let the Afterlife timer run out without reviving
“Samantha's Lullaby” opening
Do it in the first seconds of a fresh match: nobody moves, nobody shoots, and everybody lets the starting Afterlife meter run all the way out. The screen drains to black and white, the four mobsters bleed out where they stand, and the lullaby plays over it. It ends the match — it is a thing to see once, not a run.
Hell's Redeemer
On round 10+, survive a full round on the Golden Gate Bridge using only Hell's Retriever (30+ kills, no guns fired), return to Alcatraz, and throw the Retriever into the lava pit by the first Cell Block dog painting (B23R area). Finish that round, then collect the upgraded Hell's Redeemer in Afterlife from the Citadel Tunnels alcove.
- Earn the Hell's Retriever first (feed all three Cerberus heads)
- Get a round's worth of kills using only the Retriever
- Fly to the Golden Gate Bridge and throw the Retriever into the fiery pit — leave it there
- Return to Alcatraz; next round, collect the Hell's Redeemer at the Cerberus head — faster, stronger, longer range
Zombie Shield (Mob of the Dead)
Three parts (grate, clamp, dolly) around the Citadel-to-Docks lower complex, built at the Docks workbench — wear it through the narrow prison corridors.
- Part 1 — a grate/vent cover, in the lower Citadel-to-Docks complex
- Part 2 — a clamp, in the same lower area
- Part 3 — a dolly, nearby
- Build all three at the Docks workbench — wear it through the narrow prison corridors; rebuild when it breaks
Acid Gat & Vitriolic Withering
Build the Acid Gat Kit (motor, metal case, acid bottle across the Warden / Cell Block / Infirmary regions) and insert a Blundergat for the Acid Gat; Pack-a-Punch it at the bridge into the Vitriolic Withering — the safest tool for charging the Golden Spork.
Afterlife & the gondola
There's no Quick Revive machine — you self-revive in Afterlife, and Afterlife (from red boxes) is how you shock perk voltmeters, hidden numbers/symbols and the roof panel. Power the gondola meter in Afterlife to ride between the upper prison and the Docks.
- Enter Afterlife by going down — you become a ghost and revive yourself rather than bleeding out — or voluntarily from one of the red Afterlife boxes, which costs no perks and does not count as a down
- You get up to 3 Afterlives solo (1 per player in co-op), each ~1 minute
- As a ghost, use the electric shock on Afterlife panels and generators to power machines, open sealed doors and lower plane parts
- You can pass through certain Afterlife-only routes and shock zombies to clear space
- Return to your body before the timer ends to revive yourself (a ghost can also shock a downed teammate)
Brutus
The Warden boss spawns from breaking key barriers — he locks the box, perks and workbenches until paid off (2,000) or killed; focus his helmet to speed the kill.
- Brutus (the Warden) first spawns after rounds 5 and 7 among the zombies, then randomly — and if you overuse the Mystery Box or go on the bridge
- He disables perk machines, the box, workbenches and traps he reaches
- Knock off his heavy helmet to take him down much faster — the Hell's Retriever tomahawk removes it quickly
- Focus the exposed head once the helmet is off; he drops a power-up on death
- Kite him like a normal zombie and keep him away from utilities you want to protect
Recommended loadouts
Three strong picks for this map — the map's Wonder Weapon plus reliable box/wall options. These are pre-augment-era games, so the setup is the gun plus Pack-a-Punch and perk synergy.
Acidgat / Blundergat
Build-up wonder weaponGet the Blundergat (box/Golden Spork route) and upgrade to the Acid Gat Kit — corrosive rounds melt the cell blocks.
Hell's Redeemer
Infinite tomahawkUpgrade the Hell's Retriever (see side EEs) — a returning one-hit throwing weapon with no ammo cost.
Ray Gun
All-roundBox splash; strong with Electric Cherry and the Warden (Brutus) fights.
When it isn't working
The stalls that actually cost people runs on this map, and what to do about each.
The number pad won't accept codes / I run out of Afterlife before finishing
We did everything but can't finish the quest solo
Free Blundergat step won't trigger even though I have a Blundergat
The spoon isn't where guides say
Plane won't board for the ending
Common Mob of the Dead questions
Direct answers to the specific things players look up mid-game — part locations, puzzle steps and more.
How does Afterlife work?
Where is Pack-a-Punch on Mob of the Dead?
What is Brutus and how do I stop him?
What is the strongest melee weapon on Mob of the Dead?
How do I get the Hell's Retriever?
Why is there no Quick Revive on Mob of the Dead?
Can I have both the Blundergat and the Acid Gat?
What are the electric chairs for?
What does the gondola do?
Visual guides & sources
Screenshots and exact part locations live in these — open one on a second screen.
Map discussion
A shared community board for Mob of the Dead — posts are public, saved on the server and visible to everyone across devices. Handy for strategies, spawn variations you've noticed, or steps to double-check. Please keep it civil and on-topic.