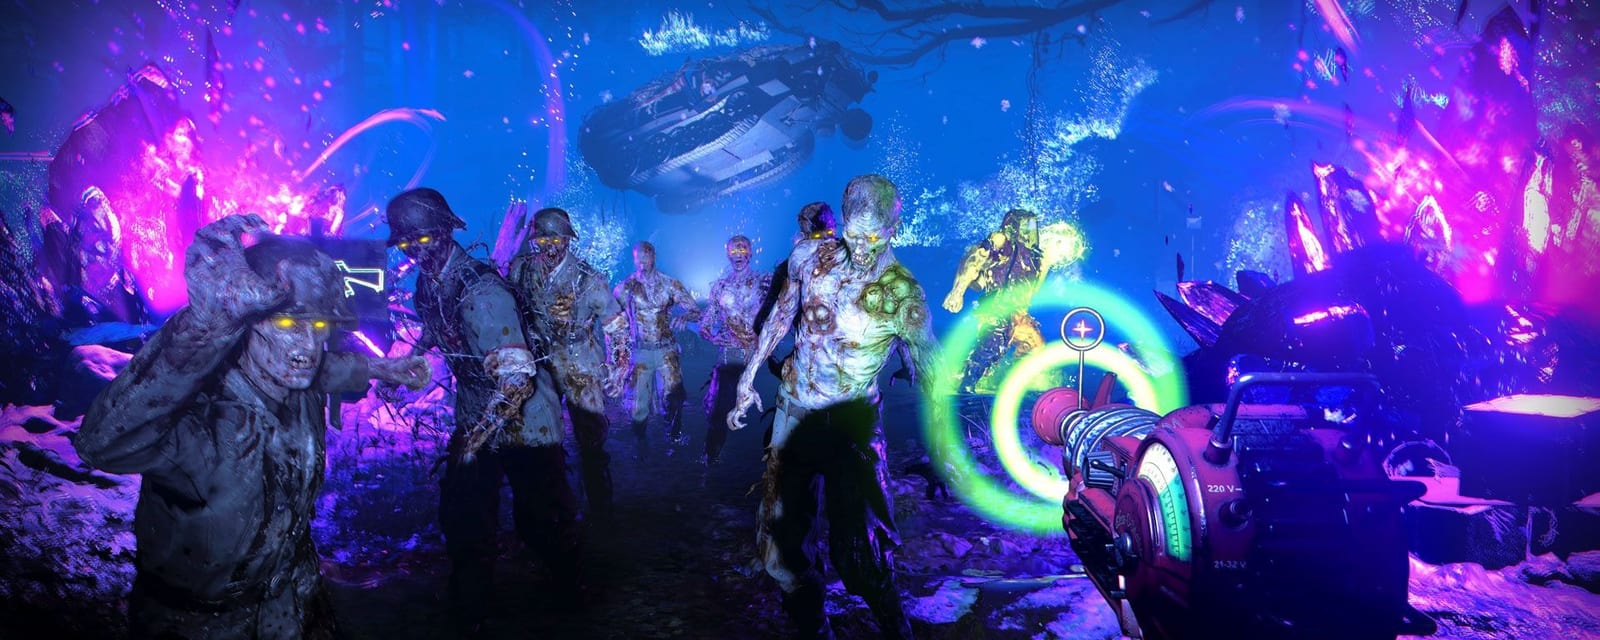
Die Maschine
The launch map of the Dark Aether saga and the cleanest place to learn the Cold War economy. Beneath an abandoned Nazi facility built over the original Nacht der Untoten, a particle accelerator has torn a rift into the Dark Aether. The main quest, Seal the Deal, has you forge Pack-a-Punch, build the D.I.E. Shockwave into all four elements, decontaminate the machine, and escape the collapsing site.
Quick answers
How do you complete the Die Maschine Easter egg?
- Buy a path from the Yard down into the facility and tunnels.
- Turn on main power in the Particle Accelerator.
- Activate both terminals to open the Dark Aether portal.
- Recover the Machine Part from the Aether Tunnel and forge Pack-a-Punch.
- Kill a Megaton for its keycard; claim the D.I.E. Remote in the Weapons Lab.
- Charge the Nacht trap and blast open the room to grab the D.I.E. Shockwave.
- Unlock all four elements: Nova-5, Cryo-Emitter, Electrobolt, Thermophasic.
- Build the Aetherscope and recover Vogel's Diary from the Medical Bay.
What is the Wonder Weapon on Die Maschine?
How long does the Die Maschine Easter egg take?
Can you do the Die Maschine Easter egg solo?
Is there a song Easter egg on Die Maschine?
What are the main areas on Die Maschine?
How many side Easter eggs are on Die Maschine?
Are there solvers for the Die Maschine puzzles?
When was Die Maschine released?
Map & Key areas
The map layout first, then the areas worth knowing by name. Map imagery © Activision, self-hosted.
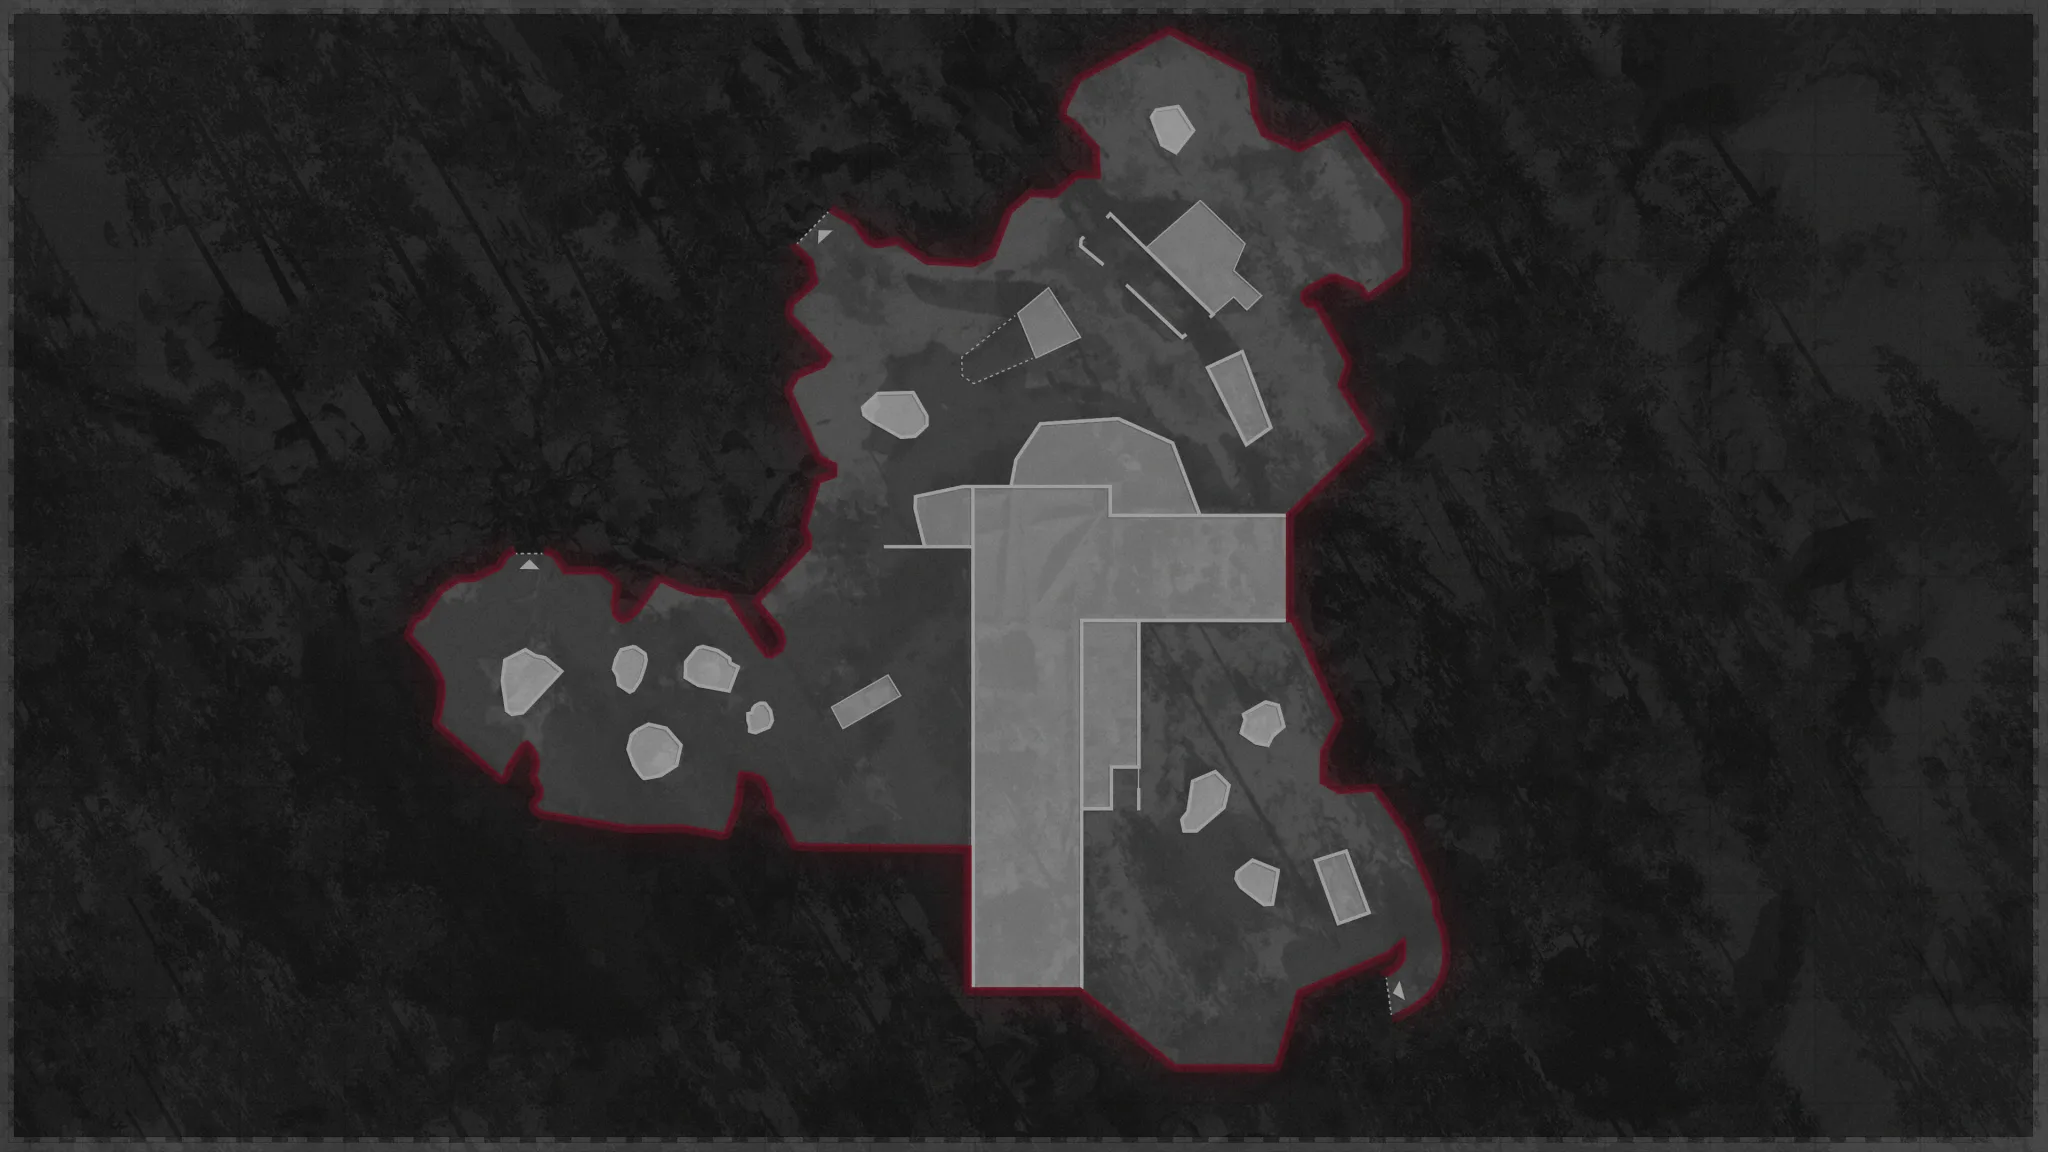
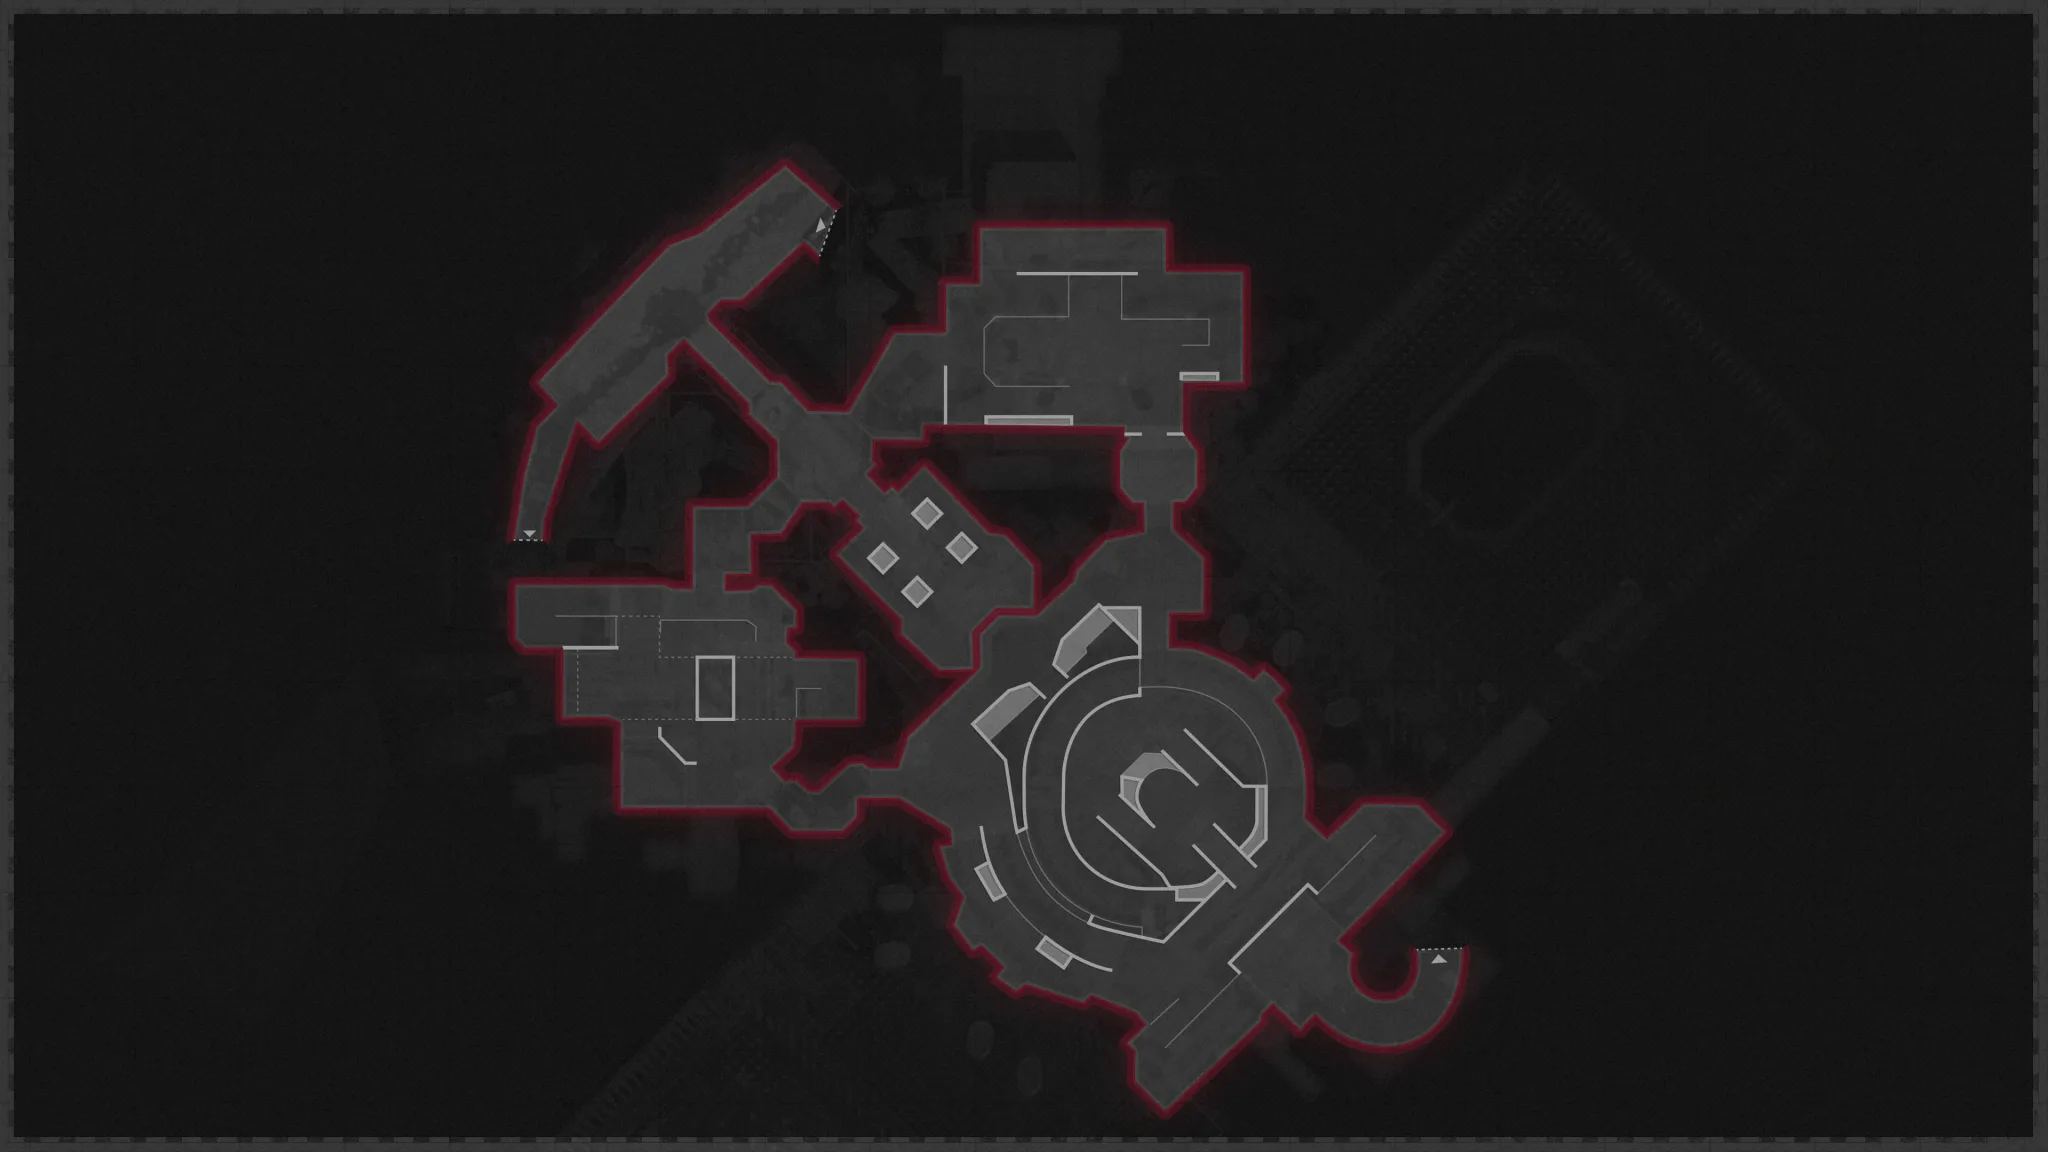
Yard / Spawn
Starting area with the Crafting Table, an Aetherscope part under the concrete stairs, and the tank you repair with the Dark Aether Wrench.
Nacht der Untoten
The half-buried WWII bunker; its Living Room houses the charged trap that opens the sealed D.I.E. Shockwave room, plus a song tape.
Crash Site
Downed plane wreck holding the Decontamination Agent, Jugger-Nog, a Cryo/Nova crate, and D.I.E. upgrade actions.
Pond
Exfil helicopter zone; the tree fungus and Thermophasic crate sit here, near the Mystery Box.
Medical Bay
Vogel's diary, the four-armed decontamination machine and its coloured ports, Speed Cola, and the Megaton capture chamber.
Particle Accelerator
The hub: main power, both terminals, Pack-a-Punch, the Aetherscope bench, Electrobolt crystals, and the three-terminal Orlov finale.
Steps at a glance
- Buy a path from the Yard down into the facility and tunnels.
- Turn on main power in the Particle Accelerator.
- Activate both terminals to open the Dark Aether portal.
- Recover the Machine Part from the Aether Tunnel and forge Pack-a-Punch.
- Kill a Megaton for its keycard; claim the D.I.E. Remote in the Weapons Lab.
- Charge the Nacht trap and blast open the room to grab the D.I.E. Shockwave.
- Unlock all four elements: Nova-5, Cryo-Emitter, Electrobolt, Thermophasic.
- Build the Aetherscope and recover Vogel's Diary from the Medical Bay.
- Deliver the diary to three Spectral Reflections and enter the password.
- Fire each element into its matching Medical Bay port.
- Repair and fire the tank, then carry the Decontamination Agent to the chamber.
- Capture both Megaton halves, then grab Orlov's photo to start the finale.
- Defend Orlov at three terminals, then race the 90-second escape to the Pond chopper.
Before you start
What to have in hand before step 1 — from the loadout notes, from the walkthrough itself, and from the map's own quest documentation where the gate is never stated in a step.
- Preserve your base weapon until all four D.I.E. ports are charged — primary fire launches a shockwave, alternate fire vacuums zombies and ammo. — step 2
- Open this whole loop before the first Megaton so every upgrade area is reachable. — step 1
- In co-op, every player must be at Dr. Vogel's computer to start the capture procedure. — step 10
Set aside 25–45 min · 1–4 (solo-capable)
Where your run will differ
Gathered here so you meet them before they cost you a run rather than after — quoted word for word from the guide below, or researched from the map's own quest documentation.
What changes with your player count. The rest of the guide is the same either way.
- “Once both are captured, go up to Dr.…” step 10
Full walkthrough
The quest in the order this guide runs it — tap any step to jump to it, and it fills in as you tick steps off.
Power and Pack-a-Punch
Buy a route from the Yard down through the facility, then flip the main power switch. Use both terminals to stabilise the accelerator and open the Dark Aether portal. Step through, follow the Aether Tunnel, collect the Machine Part, return, and install it on the central frame to forge Pack-a-Punch.
Tip: Open this whole loop before the first Megaton so every upgrade area is reachable.
Order isn't strict. These steps aren't hard-locked — you can collect parts and unlock elements in whatever order suits your run. A few actions do have prerequisites (e.g. Electrobolt needs the Aetherscope/diary step done first), and those are flagged where they matter.
Acquire the D.I.E. Shockwave
The golden keycard is a guaranteed drop from the first Megaton you kill (the first spawns around round 8, and all its split forms must die). Grab it and use it on the weapon locker in the Weapons Lab to take the D.I.E. Remote. Insert the remote at the broken wall in Nacht's Living Room, activate suction, and feed it zombies until charged, then interact to blast the door and collect the D.I.E. Shockwave.
Tip: Primary fire launches a shockwave; alternate fire vacuums zombies and ammo. Preserve the base weapon until all four ports are charged.
Unlock Nova-5 (Gas)
Vacuum the empty canister off the mezzanine ledge above Nacht. Place it in the Cleaning Unit in the Weapons Lab and kill a Plaguehound beside it to fill it with gas. Install the charged canister at the Crash Site crate, melee it, and collect D.I.E. Nova-5.
Unlock Cryo-Emitter (Ice)
Shoot the ledge crate on the Penthouse roof edge to drop the flask. At the Pond, bait a Megaton ranged blast into the tree fungus to mutate it, place the flask beneath it, wait about a minute, then carry the filled flask to the D.I.E. weapon crate right next to Speed Cola (Medical Bay) and interact with it to claim D.I.E. Cryo-Emitter.
Unlock Electrobolt (Electric)
Enter the lowest Particle Accelerator anomaly, then collect one orange crystal charge at a time with alternate fire, returning to fire each into the yellow accelerator crate.
Tip: Requires the Aetherscope/diary stage done first, and you can only carry one charge at a time.
- Crash Site crystal near Jugger-Nog
- Penthouse crystal near Der Wunderfizz
- Pond crystal near the Mystery Box
Unlock Thermophasic (Fire)
Take the Pond Dark Aether portal, open the fuse box beside the Crash Site Aether Tunnel, and insert the fuse into the Plasma Cutter in the Weapons Lab while still in the Dark Aether. Return to normal space and open the fire crate at the Pond to collect D.I.E. Thermophasic.
Build the Aetherscope, then deliver Vogel's Diary
Part A — the Aetherscope. Collect the three Aetherscope parts in the Dark Aether, then build the device at the bench behind Pack-a-Punch. Only one part is active at a time and the order is random, so recheck all three spots after each pickup.
Part B — the diary. Trigger the Medical Bay anomaly and take Vogel's Diary from the upper desk. Enter the Dark Aether and visit three Spectral Reflections in order: activate each anomaly, then activate the ghost to hand over the diary and let it finish speaking. Then return to the Medical Bay computer (next to where the diary was) and hold interact — the password enters automatically; there is nothing to type or decode.
If the Medical Bay anomaly hasn't spawned, flip rounds until it does. You can hit all three Vogel anomalies/ghosts one after another without waiting for the dialogue to finish — this saves several minutes. And in the Dark Aether, avoid the red 'Mayak' Megaton — don't fight it.
Tip: the two halves are separate — you build the Aetherscope from the parts, and the diary delivery is its own chain (the three ghost spots below are only visible while you're in the Dark Aether).
- Aetherscope part — Particle Accelerator, centre stairs by the portal
- Aetherscope part — Crash Site, by the plane wreck
- Aetherscope part — Yard, under the stairs by the workbench
- Diary ghost 1 — Medical Bay, under Vogel's office (by Speed Cola)
- Diary ghost 2 — Control Room, behind equipment on the right (facing the trial machine)
- Diary ghost 3 — Particle Accelerator, in front of the Aetherscope bench
Charge the four ports
Fire each D.I.E. element into its matching coloured corner of the hanging test chamber above Speed Cola; the fuse flips upward when you hit the right one.
Fire is the RED corner (nearest Speed Cola) — not orange, a common guide error. Element → port colour map. The four D.I.E. elements are variants, not one-way upgrades — swap freely at their crates at any time, so one player can cycle all four solo.
- Nova-5 into green
- Cryo-Emitter into blue
- Electrobolt into yellow
- Thermophasic into red (corner nearest Speed Cola)
D.I.E. element → port colour
Medical Bay test chamber (charge the four ports)Fire each upgraded D.I.E. variant into the matching coloured corner of the hanging chamber above Speed Cola; the fuse flips up when you hit the right one. Fire is RED — the corner nearest the Speed Cola machine — a common guide error calls it orange.
Wrench, tank and Decontamination Agent
First get the Dark Aether Wrench: interact with the portal that has appeared in the Medical Bay to spawn an anomaly, step into the Dark Aether, and let the two Soviet spectral reflections on the ledge finish talking about the Decontamination Agent. When the sequence ends and you are back in normal space, the wrench is waiting on the ground right where the ghosts spoke (by Speed Cola).
In the Yard, strike the tank three times with the wrench, kill the zombie that crawls out, then attach a lethal (Semtex) to the open hatch to fire it — the shot knocks a branch off a tree near the plane, dropping the Decontamination Agent by the front of the plane wreck at the Crash Site. Carry it to the Medical Bay electrical box (where the ghosts were talking) and insert it.
Tip: You cannot sprint, mantle or fast-travel while carrying the agent — clear your path first.
Capture the Megaton and start the finale
Split a Megaton and lure both halves under the Medical Bay chamber one at a time (keep both alive) so they're sucked in. Once both are captured, go up to Dr. Vogel's office and interact with his computer to start the procedure — in co-op every player must be at the computer — and let the cutscene play out.
Finish all preparation now. Then activate the final anomaly at the Nacht der Untoten Living Room and interact with Orlov's spectral reflection; after his monologue his family photo appears on the table in that corner. Interacting with the photo launches the finale.
Tip: The photo is the point of no return — buy armour, perks, ammo, self-revive, tacticals and support before touching it.
Defend Orlov and escape
Orlov works three terminals — Magnetic Containment, Primary Coolant, and Fail-Safe. He is invincible but stalls whenever zombies touch him, so clear the close ring first and burn down Megatons fast. When the machine seals, run the 90-second escape: Weapons Lab, Control Room, Tunnel, Crash Site, then the Pond exfil helicopter before the timer expires.
Tip: Ring of Fire and Aether Shroud shorten the Orlov stalls and bypass bad escape chokepoints.
Side Easter Eggs & extras
Everything beyond the main quest. Tap any entry to open the full how-and-where breakdown.
“Alone” (Kevin Sherwood)
Collect three cassette tapes: Living Room by the toppled fridge, Medical Bay shelf by the pill cabinets, and Particle Accelerator machinery beneath Pack-a-Punch.
Coffin Dance chest
After forging Pack-a-Punch, shoot five blue orbs around the Particle Accelerator, then open the chest for salvage, a random weapon, a free Jugger-Nog can (and a possible D.I.E.).
Free 1,500 Essence
Apply the Dead Wire ammo mod, rotate three dishes around the Crash Site / Pond toward the Penthouse antenna, then collect at the Penthouse.
Free legendary upgrade
In the Dark Aether, shoot four red Medical Bay buttons with a Pack-a-Punched weapon, open the side room, and let the giant hand kill 15 zombies.
Trials
Stack the Trial Computer rewards to Legendary before collecting — a strong alternate route to a free D.I.E. Shockwave.
Exfil
Call exfil from the Pond and survive the surge; a Chopper Gunner, War Machine or Ring of Fire clears it fast and can drop Raw Aetherium Crystals.
D.I.E. Shockwave
Free wonder weapon built via the Weapons Lab remote and Nacht Living Room trap; upgradable into Nova-5, Cryo-Emitter, Electrobolt and Thermophasic.
Interactive solvers
Every solver for Die Maschine, in the order you meet them. Each also appears inside its step in the walkthrough above — use whichever is handier. Browse every Zombies solver →
D.I.E. element → port colour
Medical Bay test chamber (charge the four ports)Fire each upgraded D.I.E. variant into the matching coloured corner of the hanging chamber above Speed Cola; the fuse flips up when you hit the right one. Fire is RED — the corner nearest the Speed Cola machine — a common guide error calls it orange.
Recommended loadouts
Three strong picks for this map — the map's Wonder Weapon plus reliable box/wall options. These are pre-augment-era games, so the setup is the gun plus Pack-a-Punch and perk synergy.
Gallo SA12 (PaP III / Legendary)
The workhorse crowd-clearerFast-firing auto shotgun that shreds the close ring on Orlov and deletes Megaton halves. Rarity it up, add Brain Rot or Dead Wire, and keep salvage topped for ammo.
Krig 6 (PaP III / Legendary)
Accurate elite and range damageLow-recoil AR that lands consistent Megaton crits from a safe distance — ideal for clearing distant enemies during the Orlov defence without leaving his ring exposed.
D.I.E. Thermophasic (upgraded)
Utility wonder weaponThe strongest of the four elements for sustained burn, plus the alt-fire vacuum for repositioning crowds. Great insurance, but pair it with a real gun for boss DPS.
Calling cards on this map
Cosmetic calling cards you can earn on this map. Global Dark Ops challenge cards are in the reference section below.
Checkmate
Map challengeComplete every Trial in Die Maschine in a single game.
Main-quest completion card
Main EEComplete the Die Maschine main quest.
Exact card name not confirmed. Cold War's global ‘Evil Unleashed’ Dark Ops card also unlocks for completing any main Easter egg.
Field Upgrade reference (Cold War)
Black Ops Cold War introduced Field Upgrades — the tactical ability you charge with kills. Cold War upgraded them through Aetherium Crystal skill tiers (I–V), not the Major/Minor augment system that arrived in Black Ops 6.

Energy Mine
A proximity energy explosion.

Frost Blast
A frost AoE that slows enemies.

Healing Aura
Instant heal beams (also revives teammates in BO6/BO7).

Ring of Fire
A damage-boost ring that also burns enemies (15s).

Aether Shroud
Phase out of enemy detection.

Tesla Storm
Lightning links players, stunning and damaging enemies.

Frenzied Guard
Repair armour and taunt enemies; kills repair your armour.

Toxic Growth
Thorn vines that slow and damage.
Dark Ops & mastery cards (Cold War)
Black Ops Cold War introduced the Zombies ‘Dark Ops’ card system — hidden challenges earnable on any map (plus Dead Ops Arcade). Filter by category.

Another Round?
Dark OpsReach Round 100.

Reaper of the Undead
Dark OpsKill 1,000,000 zombies.

Invincible
Dark OpsReach Round 30 without going down.

Social Distancing
Dark OpsReach Round 20 without taking a hit.
Good Enough
Dark OpsReach Round 20 with your starting loadout.

Armed to the Teeth
Dark OpsHold 2 fully-upgraded weapons with ammo mods and 6 active perks.
Box Addict
Dark OpsBuy every Mystery Box weapon in one game.

Harbinger of Doom
Dark OpsKill 50 enemies with a single Support.

The Anvil
Dark OpsExfil a game using only melee attacks.

Evil Unleashed
Dark OpsComplete any main Easter-egg quest.

King of Silverbacks
Dead Ops ArcadeReach a cumulative Dead Ops Arcade score of 999,999,999.

Pristine Pelt
Dead Ops ArcadeBeat Mamaback (the DOA final round) without dying.

Dark Ops Master
MasteryComplete the Dark Ops set.
Intel
80 pieces across the four factions — Requiem 23, Omega 13, Maxis 12, Dark Aether 32 — split into 20 Audio Logs, 18 Radio Transmissions, 32 Documents and 10 Artifacts (59 at launch, 21 added in Season One). Only the audio logs and the two radios are physically in the map; the rest come from Megatons, Dark Aether Trials and the main quest, so it's a long haul over many matches. Intel here is story/lore — there's no gameplay reward for collecting it.
Audio Logs 20
The Incident (Requiem)
Right next to the Power switch.
Description: Projekt Endstation scientists Doctor Vogel and Doctor Kurtz initiate Cyclotron Test Run Number 12.
Parallel World (Requiem)
By the Pack-a-Punch machine at the Crash Site.
Description: Doctor Vogel records a report on the Incident. He suspects the Cyclotron has opened a rift across spacetime, and notes that radiation of some sort is spilling through — many of his men have been infected by an unexplainable sudden illness he describes as living death.
Exo-Element 1 (Requiem, Season 1)
Medical Bay — on the cabinet near Speed Cola.
Description: Doctor Vogel discovers an element from the Dark Aether as the source of his men's transformation. It is classified as Exo-Element 1.
New Orders (Requiem, Season 1)
Deadshot Daiquiri alcove — on the table by the perk.
Description: Doctor Vogel and Doctor Kurtz discuss their new orders from the Reichstag.
8th Guard's First Contact (Omega)
On the ground by the first Bunker doors (facility entrance gate, left side).
Description: The Russian 8th Guards Army arrives at the Projekt Endstation facility, one week after it was abandoned. Privates Alexei Dmitriyev and Vadim Kalashnik record their unit's exploration of the facility.
The Volunteer (Omega)
Medical Bay — by the fast-travel portal spawn.
Description: Kazimir Zykov, a mechanic from the 1st Guards Tank Army, is volunteered by Colonel Pavel Lazarev to deactivate the Cyclotron.
For Mother Russia (Omega)
Deadshot Daiquiri / Weapons Lab — by the wall past the shutter door.
Description: Sealed inside the Projekt Endstation facility, Zykov records a final message for his family.
Turning Point (Omega, Season 1)
Nacht der Untoten top-floor bedroom (the Stamin-Up room) — on the table by the chalkboard.
Description: Doctor Aleksandra Valentina, Lead Scientist of Omega Group's Psychotronics Research, reports that she has given the order to reactivate the Projekt Endstation cyclotron.
Next Phase (Omega, Season 1)
Crash Site — against a rock in the far corner, right of Jugger-Nog.
Description: Doctor William Peck, Lead Scientist of Omega Group's Exoscientific Phenomena Research, reports that Operation Undertaker was a success, paving the way for the next phase of Omega Group's plan.
Cold War Paranoia (Maxis)
On the couch in Nacht der Untoten's first room, just through the 500-point door.
Description: BND Agent Samantha Maxis leaves a message for Officer Weaver.
Game Changer (Maxis)
Nacht rooftop — shoot the destructible crate with the Cryo (ice) D.I.E. upgrade to drop it.
Description: Agent Maxis leaves a second message for Officer Weaver. She has learned that a KGB Special Operations Group has a special interest in Projekt Endstation.
The VHS Tape (Maxis)
Nacht — lands by the Nova-5 (toxic) D.I.E. canister after you suck it up with the D.I.E.
Description: Agent Maxis leaves another message for Officer Weaver. She has received a VHS tape from her KGB contact, which she is sending to him for review.
Dark Aether — 8 Lost Souls logs 8
Earned from Dark Aether Trials at the trial computer, not found in the map (max 3 Trial-reward intel per match, so it takes several games).
Lost Souls: Johannes
Is... is anyone out there? Can anyone hear me?
Lost Souls: Mariska
Dead men wander this land, feasting on the living. If you can call it living.
Lost Souls: David
I've met quite a few others who got trapped here. Every time the question comes up: are we in Hell or not?
Approach
It is coming.
Lost Souls: Alice
This place is a hodgepodge of creatures and artifacts, a collision of cultures and eras... I've seen ancient storybook creatures and mechanical monsters...
Lost Souls: Barbara
Confession time... and this one's gonna sound a little nutzoid, but stay with me.
Lost Souls: Fritz (Season 1)
We thought this mission would be quick. How hopeful we were...
Lost Souls: Pyotr (Season 1)
Atmospheric readings match crystal radiation signatures... personal contamination remains in safety range...
Radio Transmissions 18
Requiem radio — 7 transmissions 7
2nd floor of Nacht der Untoten, on the table by the exit toward the Pond. One transmission per game.
Officer Weaver
Officer Weaver, the head of Requiem's Field Operations Division, briefs his strike team about the state of the world, and their role in the CIA's newest department.
Doctor Grey
Doctor Elizabeth Grey, the head of Requiem's Unnatural Sciences Division, introduces herself to the strike team.
Dimension of Death
Doctor Grey discusses the Dark Aether and what it may offer humanity.
Doctor Strauss
Doctor Oskar Strauss, the head of Requiem's Energy Research Division, introduces himself to the strike team.
Aetherium
Doctor Strauss muses on the scientific potential of the newly discovered element.
Major Carver
Major Mackenzie Carver, the head of Requiem's Containment and Security Division, introduces himself to the strike team.
New Arms Race
Major Carver considers the possibility of weaponizing the Dark Aether's technologies.
Maxis radio — 6 transmissions 6
Pond area, left of the tunnel entrance near Quick Revive (Samantha Maxis's messages). One per game.
Agent Maxis
Agent Maxis contacts the strike team and introduces herself.
Scorpions from Frogs
Believing the BND has been compromised by Omega Group, Agent Maxis has gone to ground as she continues her investigation.
Why You're Here
Agent Maxis reveals she gave Officer Weaver the intel on the Projekt Endstation site.
The New Threat (Season 1)
Agent Maxis suspects Omega Group's research is far ahead of Requiem's.
Divided Loyalties (Season 1)
Agent Maxis muses on the shifting geopolitical landscape and the loyalties of Requiem's strike team.
Shared History / Old Friends (Season 1)
Agent Maxis provides some insight into her history with Officer Weaver.
Dark Aether — 5 transmissions 5
Filed under Radio Transmissions but earned from Dark Aether Trials, not from a physical radio.
Alive (Season 1)
I am still alive. I am trapped here.
Gathering (Season 1)
The congregations in the valleys grow larger.
Behemoth (Season 1)
There is a presence here the scale of which I cannot explain.
Dominion (Season 1)
A presence here has corrupted the minds of others.
Horde (Season 1)
There is a roar in the deep dark.
Documents 32
Megaton documents — 17 17
Random drops when you kill a Megaton mini-boss (Requiem, Omega and Maxis entries). Roughly one a game, so it takes many matches.
Requiem · Endstation Approval Letter
A letter from Uranverein Director Doctor Kurt Diebner, announcing that Projekt Endstation has been approved for funding as part of the Reich Atomic Program. Construction is to begin immediately.
Requiem · Spacetime Breach Sketch
A hurried sketch of Projekt Endstation's dimensional breach, drawn by a research assistant.
Requiem · D.I.E. Blueprints
The blueprint of the Decompressive Isotopic Estrangement device. The device collects hazardous materials, including Exo-Element 1, and, when at capacity, releases a devastating concussive blast.
Requiem · Der Wechsler Blueprint
The blueprint of Der Wechsler. One of Doctor Vogel's pet projects, Der Wechsler was a decontamination chamber designed to restore the brain functionality of those infected by Exo-Element 1.
Requiem · V Cipher #1
Recovered Projekt Endstation cipher. Decryption is required.
Requiem · V Cipher #2
Recovered Projekt Endstation cipher. Decryption is required.
Requiem · Doctor Vogel Entry 203 (Season 1)
An entry torn from Doctor Vogel's personal diary, chronicling the Incident and its aftermath. Uranverein has taken great interest in Projekt Endstation's discovery.
Omega Group · An Explanation
A letter from Zykov, written to his wife as he attempts to deactivate the cyclotron. He explains that his sacrifice is not in vain, and it will help shape the world for the better.
Omega Group · Before the Devil Arrives
A second letter from Zykov, written to his wife. He fears his sanity is slowly slipping.
Omega Group · K Cipher
Recovered Omega Group cipher. Decryption is required.
Omega Group · G Cipher
Recovered Omega Group cipher. Decryption is required.
Omega Group · Omega Group Foundation (Season 1)
A government document from the State Security Chairing Committee, approving the formation of KGB Omega Group.
Omega Group · Operation Undertaker (Season 1)
KGB Spetsnaz report on the status of Omega Group Operation Undertaker. Doctor Valentina confirms they are ready to proceed with cyclotron reactivation.
Omega Group · Khe Sanh Site (Season 1)
KGB Spetsnaz report detailing the next phase of Omega Group's operation. Construction has begun on a new facility in Vietnam.
Maxis · KGB Videotape Note
The note attached to the videotape Agent Maxis received from her recently deceased KGB contact.
Maxis · Dieter's Note
A note from Agent Maxis' BND colleague, Dieter.
Maxis · Message for Weaver
A letter from Agent Maxis to Officer Weaver. She has made contact with someone inside Omega Group and believes they can be turned.
Dark Aether documents — 15 15
The Stranger's day-numbered journal entries (Day 95, Day 175 onward) plus two corrupted logs, all earned from Dark Aether Trials.
$!%()$3@!
Content unknown. No available translation. Possibly a system error from the computer.
I @N#B%D! O% T@#&
Content unknown. No available translation. The symbol arrangement seems almost intentional — it might not be a system error, but a scrambled message.
Day 95
A diary that appears to be written by a stranger lost in a strange land, possibly a human trapped in the Dark Aether.
Day 175
The Stranger has had encounters with other humans — as well as other creatures. They are building a transmitter.
Day 213
The Stranger recounts a deadly attack.
Day 937
The Stranger's attempts to build a transmitter continue to prove unsuccessful.
Day 1,108
The Stranger has discovered they can briefly return to our world, albeit only for several seconds before being yanked back. They say they were like a ghost, and that no one could see them.
Day 1,646
The Stranger reports seeing giants. They say they have met others who call them Elder Gods.
Day 2,873
The Stranger returns to their transmitter project.
Day 3,289
The Stranger's reputation in the other dimension seems to have grown. No news on the transmitter project.
Day 4,100 (Season 1)
The Stranger has learned of a powerful overlord.
Day 6,121
The Stranger finds new machines that can dispense beverages.
Day 13,773
Verified: the computer is displaying messages; they appear to be diary entries of some sort. Unclear if these messages are stored locally on this machine, or if they are being transmitted from another location.
Day 13,784 (Season 1)
Confirmed: these messages are being broadcast to this computer from the Dark Aether. The Stranger is attempting to establish communication.
Hello? (Season 1)
Contact.
Artifacts 10
10 artifacts — main quest & D.I.E. 10
All from progressing the main Easter egg and building/upgrading the D.I.E. Wonder Weapon — e.g. the D.I.E. Machine and Remote, the Aetherscope, and the Dark Aether Crystal and Wrench from the upgrade steps.
Requiem · D.I.E. Remote Control
The D.I.E. Remote can locate and remotely activate the D.I.E. device. Be advised: do not activate with the D.I.E. device aimed in your direction.
Requiem · D.I.E. Machine
The Decompressive Isotopic Estrangement Machine was initially designed to be an Exo-Element 1 collector, but an incident led to a design change. During an outdoor test, an assistant accidentally ejected a full capacitor all at once, triggering a shockwave blast that destroyed a military transport and Doctor Vogel's personal automobile. Projekt Endstation saw the device's full potential as a wonder weapon — and the assistant saw the full potential of a firing squad.
Requiem · Aetherscope
The Aetherscope is a portable scanner designed for studying the Dark Aether. The device is capable of uncovering strange phenomena, including Spectral Reflections of past events reoccurring outside spacetime parameters.
Requiem · Doctor Vogel's Diary
Doctor Vogel's diary, containing many untold secrets of Projekt Endstation — including the password to the Der Wechsler command console.
Requiem · Decontamination Agent
The Decontamination Agent, a component for Der Wechsler made of gold, was thought to have been lost when it was stolen in 1945. It was recovered nearly forty years later when it was found in a tree near the facility — apparently, the thieves forgot where they had hidden it.
Omega Group · Orlov Family Photo
A photograph of Omega Group Lieutenant Orlov's family.
Dark Aether · Mutated Fungus
Altered by the Megaton's blast, the chemical nature of the fungus has been transformed, releasing a substance that most closely resembles liquid nitrogen.
Dark Aether · Plaguehound Gas
The odour of Plaguehound Gas is as lethal as it is foul, causing light-headedness before melting a person's skin and evaporating their blood. A horrible way to die.
Dark Aether · Dark Aether Crystal
An elemental mineral from the Dark Aether — Projekt Endstation scientists used this particular sample as part of a locking mechanism. Further study required.
Dark Aether · Dark Aether Wrench
Crafted from the energy of the Dark Aether, there is far more to this wrench than meets the eye. Particularly good for waking the dead.
When it isn't working
The stalls that actually cost people runs on this map, and what to do about each.
The Medical Bay port won't flip for Fire
Electrobolt won't unlock
The Medical Bay anomaly for Vogel's diary never spawns
Fighting the red Megaton in the Dark Aether wrecks the run
Can't move while holding the Decontamination Agent
Common Die Maschine questions
Direct answers to the specific things players look up mid-game — part locations, puzzle steps and more.
What should I do before picking up Orlov's photo?
How do I get the D.I.E. Shockwave?
Is there a shortcut to a free D.I.E.?
Where is the power on Die Maschine?
Where are the three cassette tapes?
What is the Coffin Dance chest?
How do I get free Essence?
How do I get a free legendary upgrade?
Is exfil worth calling?
Visual guides & sources
Screenshots and exact part locations live in these — open one on a second screen.
Map discussion
A shared community board for Die Maschine — posts are public, saved on the server and visible to everyone across devices. Handy for strategies, spawn variations you've noticed, or steps to double-check. Please keep it civil and on-topic.