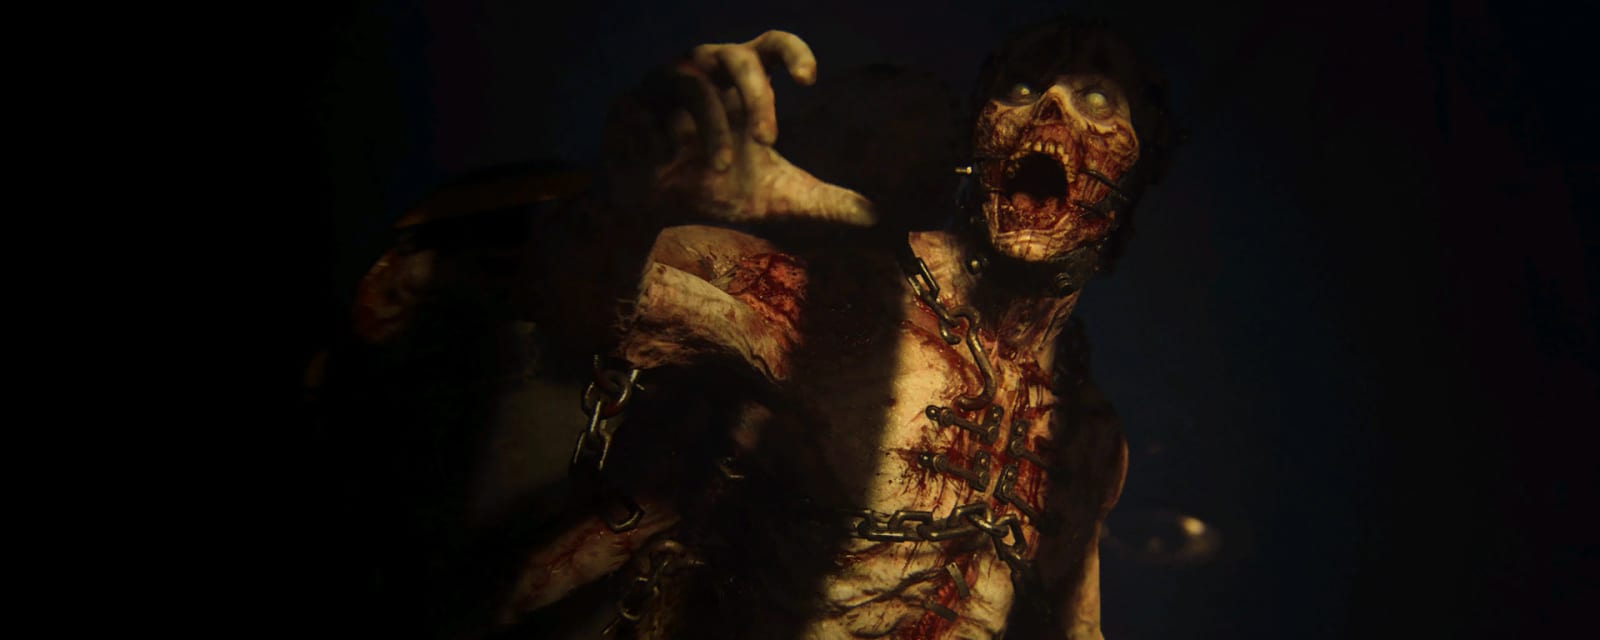
The Darkest Shore
A fog-drowned island fortress of U-boat pens and artillery bunkers, stalked by the relentless Meuchler. Build the Ripsaw saw-gun and run a long ritual chain to reclaim another shard of the Sword of Barbarossa.
Quick answers
How do you complete the The Darkest Shore Easter egg?
- Turn on power (two switches)
- Build the Ripsaw → upgrade to the Ranged Ripsaw
- Raise Pack-a-Punch (3 minecart Elektroschnalle)
- Unlock the freezer Corpse Gate (head + valve lockdown)
- Shoot down the Stukas with the AA guns
- Escort the friendly Bomber → charge the flak battery
- Open the Ancient Door; collect 3 Son-of-Nerthus statues
- Extract the anointed spines (Wüstling, Meuchler, Pest)
What is the Wonder Weapon on The Darkest Shore?
Who is the boss on The Darkest Shore?
How long does the The Darkest Shore Easter egg take?
Can you do the The Darkest Shore Easter egg solo?
What are the main areas on The Darkest Shore?
How many side Easter eggs are on The Darkest Shore?
When was The Darkest Shore released?
Key areas
Beach (Strand)
The landing zone and starting area — where the final boss waves begin and end.
Bluffs / Overlook
Cliffside paths — the Mystery Box, the buildable radio table and several Enigma cylinders.
U-Boat Pens
The flooded submarine dock — the Ripsaw workbench, the freezer Corpse Gate and a power switch.
AA-gun bunkers
Bunkers housing the anti-air guns used to shoot down the Stukas.
Artillery Bunker
The big flak cannon — the second power switch, the Enigma cannon and the ship-sinking gun.
Bunker 3
Below Double Tap — the Übersprengen (Pack-a-Punch) lift and the sawblade pickup.
Steps at a glance
- Turn on power (two switches)
- Build the Ripsaw → upgrade to the Ranged Ripsaw
- Raise Pack-a-Punch (3 minecart Elektroschnalle)
- Unlock the freezer Corpse Gate (head + valve lockdown)
- Shoot down the Stukas with the AA guns
- Escort the friendly Bomber → charge the flak battery
- Open the Ancient Door; collect 3 Son-of-Nerthus statues
- Extract the anointed spines (Wüstling, Meuchler, Pest)
- Build the radio, sink the warships
- Ritual chamber: place 4 heads → Barbarossa's Pommel
- Trigger the boss (Pommel + radio)
- Beat the Meistermeuchler → the Sword
Before you start
What to have in hand before step 1 — from the loadout notes, from the walkthrough itself, and from the map's own quest documentation where the gate is never stated in a step.
- Blow open all seven fuse boxes (3 U-Boat Pens, 1 above Bunker 3, 3 Overlook/Artillery) before delivering the Pest spine — the ricochet coils don't matter until every box is open. — step 9
- In phases 1–3 a Meistermeuchler only flees when hit, it does not die — keep firing until hitmarkers stop; only phase 4 lets you kill them for good. — step 12
- Buy armour and refill Ripsaw ammo before throwing the Pommel at the built radio — all players interacting to start is the point of no return into the boss fight. — step 12
Set aside 50–80 min · 1–4 (solo-capable)
Full walkthrough
The quest in the order this guide runs it — tap any step to jump to it, and it fills in as you tick steps off.
Turn on power
Flip the two power switches (one in the U-Boat Pens, one in the Artillery Bunker) to power the doors and the minecart system.
Build the Ripsaw
Grab the sawblade (Bunker 3, right of the MP-40) and the handle (Artillery Bunker — one of the bunk beds by the minecart switch, right of the armor station, or the table right of Faustblitz), and assemble at the U-Boat Pens workbench (2,500 Jolts) — it starts melee-only.
Ranged Ripsaw upgrade
Charge a zombie with the Ripsaw like a bayonet (hold ADS + fire) to rip out a charged spine (it glows at the tip), attach it at the workbench and kill ~20 zombies to finish — it now fires ricocheting saw blades.
Pack-a-Punch (Übersprengen)
Activate the Artillery-Bunker minecart switch, then ride the three route pairs — Bunker 1↔Beach, Beach↔U-Boat Pens, U-Boat Pens↔Bunker 1 — and on each ride look to the side at the midpoint and grab the green Elektroschnalle battery. Insert all three in the machine down the slope from Kugelblitz in Bunker 3 to raise the Übersprengen lift.
Open the Corpse Gate
Shoot down the hanging corpse's head with the Ranged Ripsaw and place it on the headless body chained to the freezer door; killing zombies there starts a lockdown — shut off the 3 gas valves while dodging fire.
Shoot down the Stukas
Man the AA guns and down the Stuka dive-bombers to restore the objectives (also used to blast a cliff boulder that frees a statue).
Charge the flak battery
Activate the green-lit console to spawn a friendly Bomber; escort it to the artillery bunker where it drops a battery, then charge the battery with nearby kills.
Ancient Door & 3 statues
Minecart to the Beach and blow open the wall by the artillery shell to reach the circular door with three holes. Collect the three Son-of-Nerthus statues: the Cliff Son (shoot the marked cliff rock with the Overlook AA gun so the statue drops to the Beach), the Drowned Son (give a normal zombie's spine to the Monk Head and defend the friendly zombie to the water — it returns carrying the statue), and the Moss-rock Son (fire the ranged Ripsaw at the moss-covered rocks — 9 possible spots around the Beach, Bluffs and Bunker 3 — until one drops it). Insert all three in the Ancient Door.
Anointed spines
For each of three enemies, rip its charged spine, drop it in the freezer basket, do its escort task, then hook the glowing head in a lockdown:
- Wüstling — escort the friendly Wüstling to deactivate perks in order: Kugelblitz → Faustblitz → Laufenblitz → Lebenblitz
- Meuchler — weaken a Meuchler in the sacrificial room for its spine, then hit the friendly Meuchler 3× in the fog (follow its screams)
- Pest — first blow open all 7 fuse boxes with grenades (3 in the U-Boat Pens, 1 above the Bunker 3 doorway, 3 around the Overlook / Artillery Bunker), then deliver the Pest spine and, at each of its 5 scripted stops, ricochet a Ripsaw blade off the called coil into it (blue by the M1927 → yellow by the minecart → blue above the Bluffs door → yellow above the M1941 → yellow by the power switch)
Radio & sink the warships
Collect the two radio parts — one in the upper Bunkers (by the corpse right of the Combat Shotgun), one in the Bluffs (shoot the dangling man's arm above the Bunker 3 doorway with the Ripsaw) — and assemble the radio on the Overlook table right of the Mystery Box. Two destroyer ships then attack one at a time: read angle and distance off the wall charts by the cannon, set elevation and angle, and fire to sink each.
Ritual chamber → the Pommel
Take the monk's head from the freezer, place all four anointed heads on the ceiling hooks and survive the lockdown — Barbarossa's Pommel spawns in the central statue's hand. It takes the lethal (grenade) slot, stuns nearby zombies for a few seconds when thrown and self-replenishes every ~15 seconds, so use it freely as a panic tool right up until you spend it on the radio throw that starts the boss.
Beat the Meistermeuchler
Throw the Pommel at the built radio and all players interact to start (point of no return — buy armour and refill Ripsaw ammo first). Fight four Meistermeuchlers, each with a specialist ability — purple (buffs nearby zombies), green (blinding blast), red (stun) and yellow (ricocheting sawblade) — across four phases: (1) Beach in fog, one at a time; (2) U-Boat Pens, two at once; (3) Upper Bunkers / Artillery, three at once; (4) Beach, no fog, all four and now permanently killable. In phases 1-3 a boss only flees — keep firing until hitmarkers stop; only phase 4 lets you kill them for good.
Side Easter Eggs & extras
Everything beyond the main quest. Tap any entry to open the full how-and-where breakdown.
Ripsaw → Ranged Ripsaw
The buildable saw Wonder Weapon — sawblade (Bunker 3) + handle (Artillery Bunker) at the U-Boat Pens workbench; upgrade with a charged spine to fire ricocheting blades.
- Turn on power first
- Grab the sawblade (by the Pack-a-Punch battery in Bunker 3, right of the toolbox) and the handle (one of three Artillery Bunker spots)
- Assemble at the U-Boat Pens workbench (~2,500 Jolts) — it starts melee-only
- Upgrade: charge a zombie with the Ripsaw like a bayonet (hold ADS + fire) to rip out a charged spine (it glows at the tip)
- Attach the spine at the workbench and kill ~20 zombies nearby — it now fires reloadable, ricocheting saw blades
Pack-a-Punch the Ripsaw (Enigma code)
Read the six Enigma cylinder numbers, input them as coordinates at the artillery cannon and fire, then collect the fuse under the barrel and install it in the Übersprengen.
- Read the six Enigma cylinders (best through a scope): the Bluffs cliff path, the Beach Passage bars, a U-Boat Pens barred door (prone), left of the Bunker 1 AA gun, the Artillery power-room locker, and by the Artillery gun wall-buy
- Note each cylinder's number
- At the artillery cannon, enter the numbers in the coordinate order shown on its display and fire
- Collect the fuse that drops under the barrel and install it in the Übersprengen to Pack-a-Punch the Ripsaw
“The Classic” PPSh-41 (Bomber path)
Drop 1,000 Jolts in the friendly Bomber's path to obtain the classic PPSh-41.
Blitz machines & armour
The perks — Kugelblitz, Schnellblitz, Laufenblitz, Lebenblitz, Faustblitz; the red armour stands give 3 armour per buy (there's no buildable shield on this map).
Minecart fast-travel
Route-switchable minecarts link the Trench, Beach and U-Boat Pens — and underpin the Pack-a-Punch unlock.
“Red Riding Hood” recorders
Three hidden recorders (U-Boat Pens under the yellow stairs, the Beach Passage bench, and the Bunker 3 toolbox) unlock a set of story audio files.
Recommended loadouts
Three strong picks for this map — the map's Wonder Weapon plus reliable box/wall options. These are pre-augment-era games, so the setup is the gun plus Pack-a-Punch and perk synergy.
Ranged Ripsaw
Wonder WeaponThe buildable saw-gun — nearly every quest gate needs its ricocheting blades. Build it early and keep it upgraded.
PPSh-41 (PaP)
Horde-clearing SMGGrab it as 'The Classic' (1,000 Jolts in the Bomber's path) or from the box; Pack-a-Punch for sustained mag dumps.
BAR (PaP)
Anchor DPSHigh per-shot damage that scales well Packed — strong for holding a bunker choke or shredding the Meistermeuchler.
When it isn't working
The stalls that actually cost people runs on this map, and what to do about each.
The boss keeps fleeing and won't die
The Ranged Ripsaw upgrade won't finish
Can't get the freezer Corpse Gate open
Warship shells keep missing
The Pest spine delivery doesn't seem to register hits
Common The Darkest Shore questions
Direct answers to the specific things players look up mid-game — part locations, puzzle steps and more.
What do I need to carry the whole quest?
How do I build the Ripsaw?
How do I open Pack-a-Punch on The Darkest Shore?
Where are the two power switches?
Why should I learn the minecart routes early?
How do I get The Classic PPSh-41 here?
Is there a buildable shield on this map?
Where are the Red Riding Hood recorders?
Visual guides & sources
Screenshots and exact part locations live in these — open one on a second screen.
Map discussion
A shared community board for The Darkest Shore — posts are public, saved on the server and visible to everyone across devices. Handy for strategies, spawn variations you've noticed, or steps to double-check. Please keep it civil and on-topic.