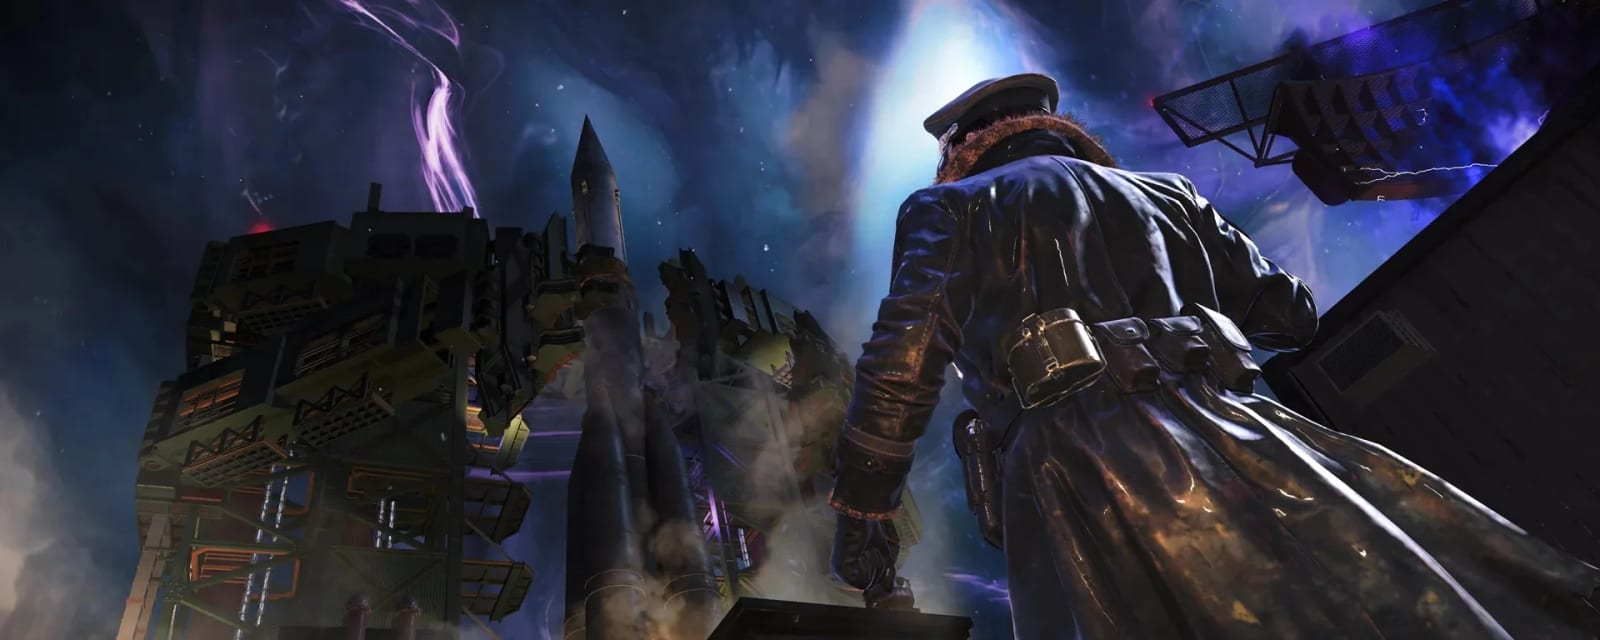
Ashes of the Damned
The huge launch map — a Dark Aether collapse spanning Ashwood, Vandorn Farm, Blackwater Lake and more, linked by the drivable Ol' Tessie. Free Klaus, brew the serum, and defeat Veytharion in the Dust to Dust main quest.
Quick answers
Ashes of the Damned is the launch map for Black Ops 7 Zombies and the biggest round-based map in series history — a 15-step main quest called 'Dust to Dust'. You power the map, build the Necrofluid Gauntlet, complete four POI soul quests, then fight the boss Veytharion from the drivable Ol' Tessie. Expect 70–120 minutes; solo-capable.
Where is Pack-a-Punch on Ashes of the Damned?
What is the Wonder Weapon on Ashes of the Damned?
Who is the boss of Ashes of the Damned?
How long is the Ashes of the Damned Easter egg?
How many serum parts are on Ashes of the Damned?
How do you complete the Ashes of the Damned Easter egg?
- Install Ted's head on Old Tessie → power all three generators
- Fit Pack-a-Punch to the back of Tessie at Ashwood
- Collect the six serum parts (run in parallel with everything)
- Round 8+: kill the Uber Klaus at Janus Plaza for the Stabilizer Chip
- Wake Klaus in the Ashwood jail with bounced stun grenades
- Retina scan at Zarya → aether canister → charge all three generators (timed)
- Read the three barn-roof symbols → set the cube → Necrofluid Gauntlet
- Yuri's Lab: decode the pigpen cipher → add blood → survive the lockdown
Can you do the Ashes of the Damned Easter egg solo?
What are the main areas on Ashes of the Damned?
How many side Easter eggs are on Ashes of the Damned?
Are there solvers for the Ashes of the Damned puzzles?
When was Ashes of the Damned released?
Map & Key areas
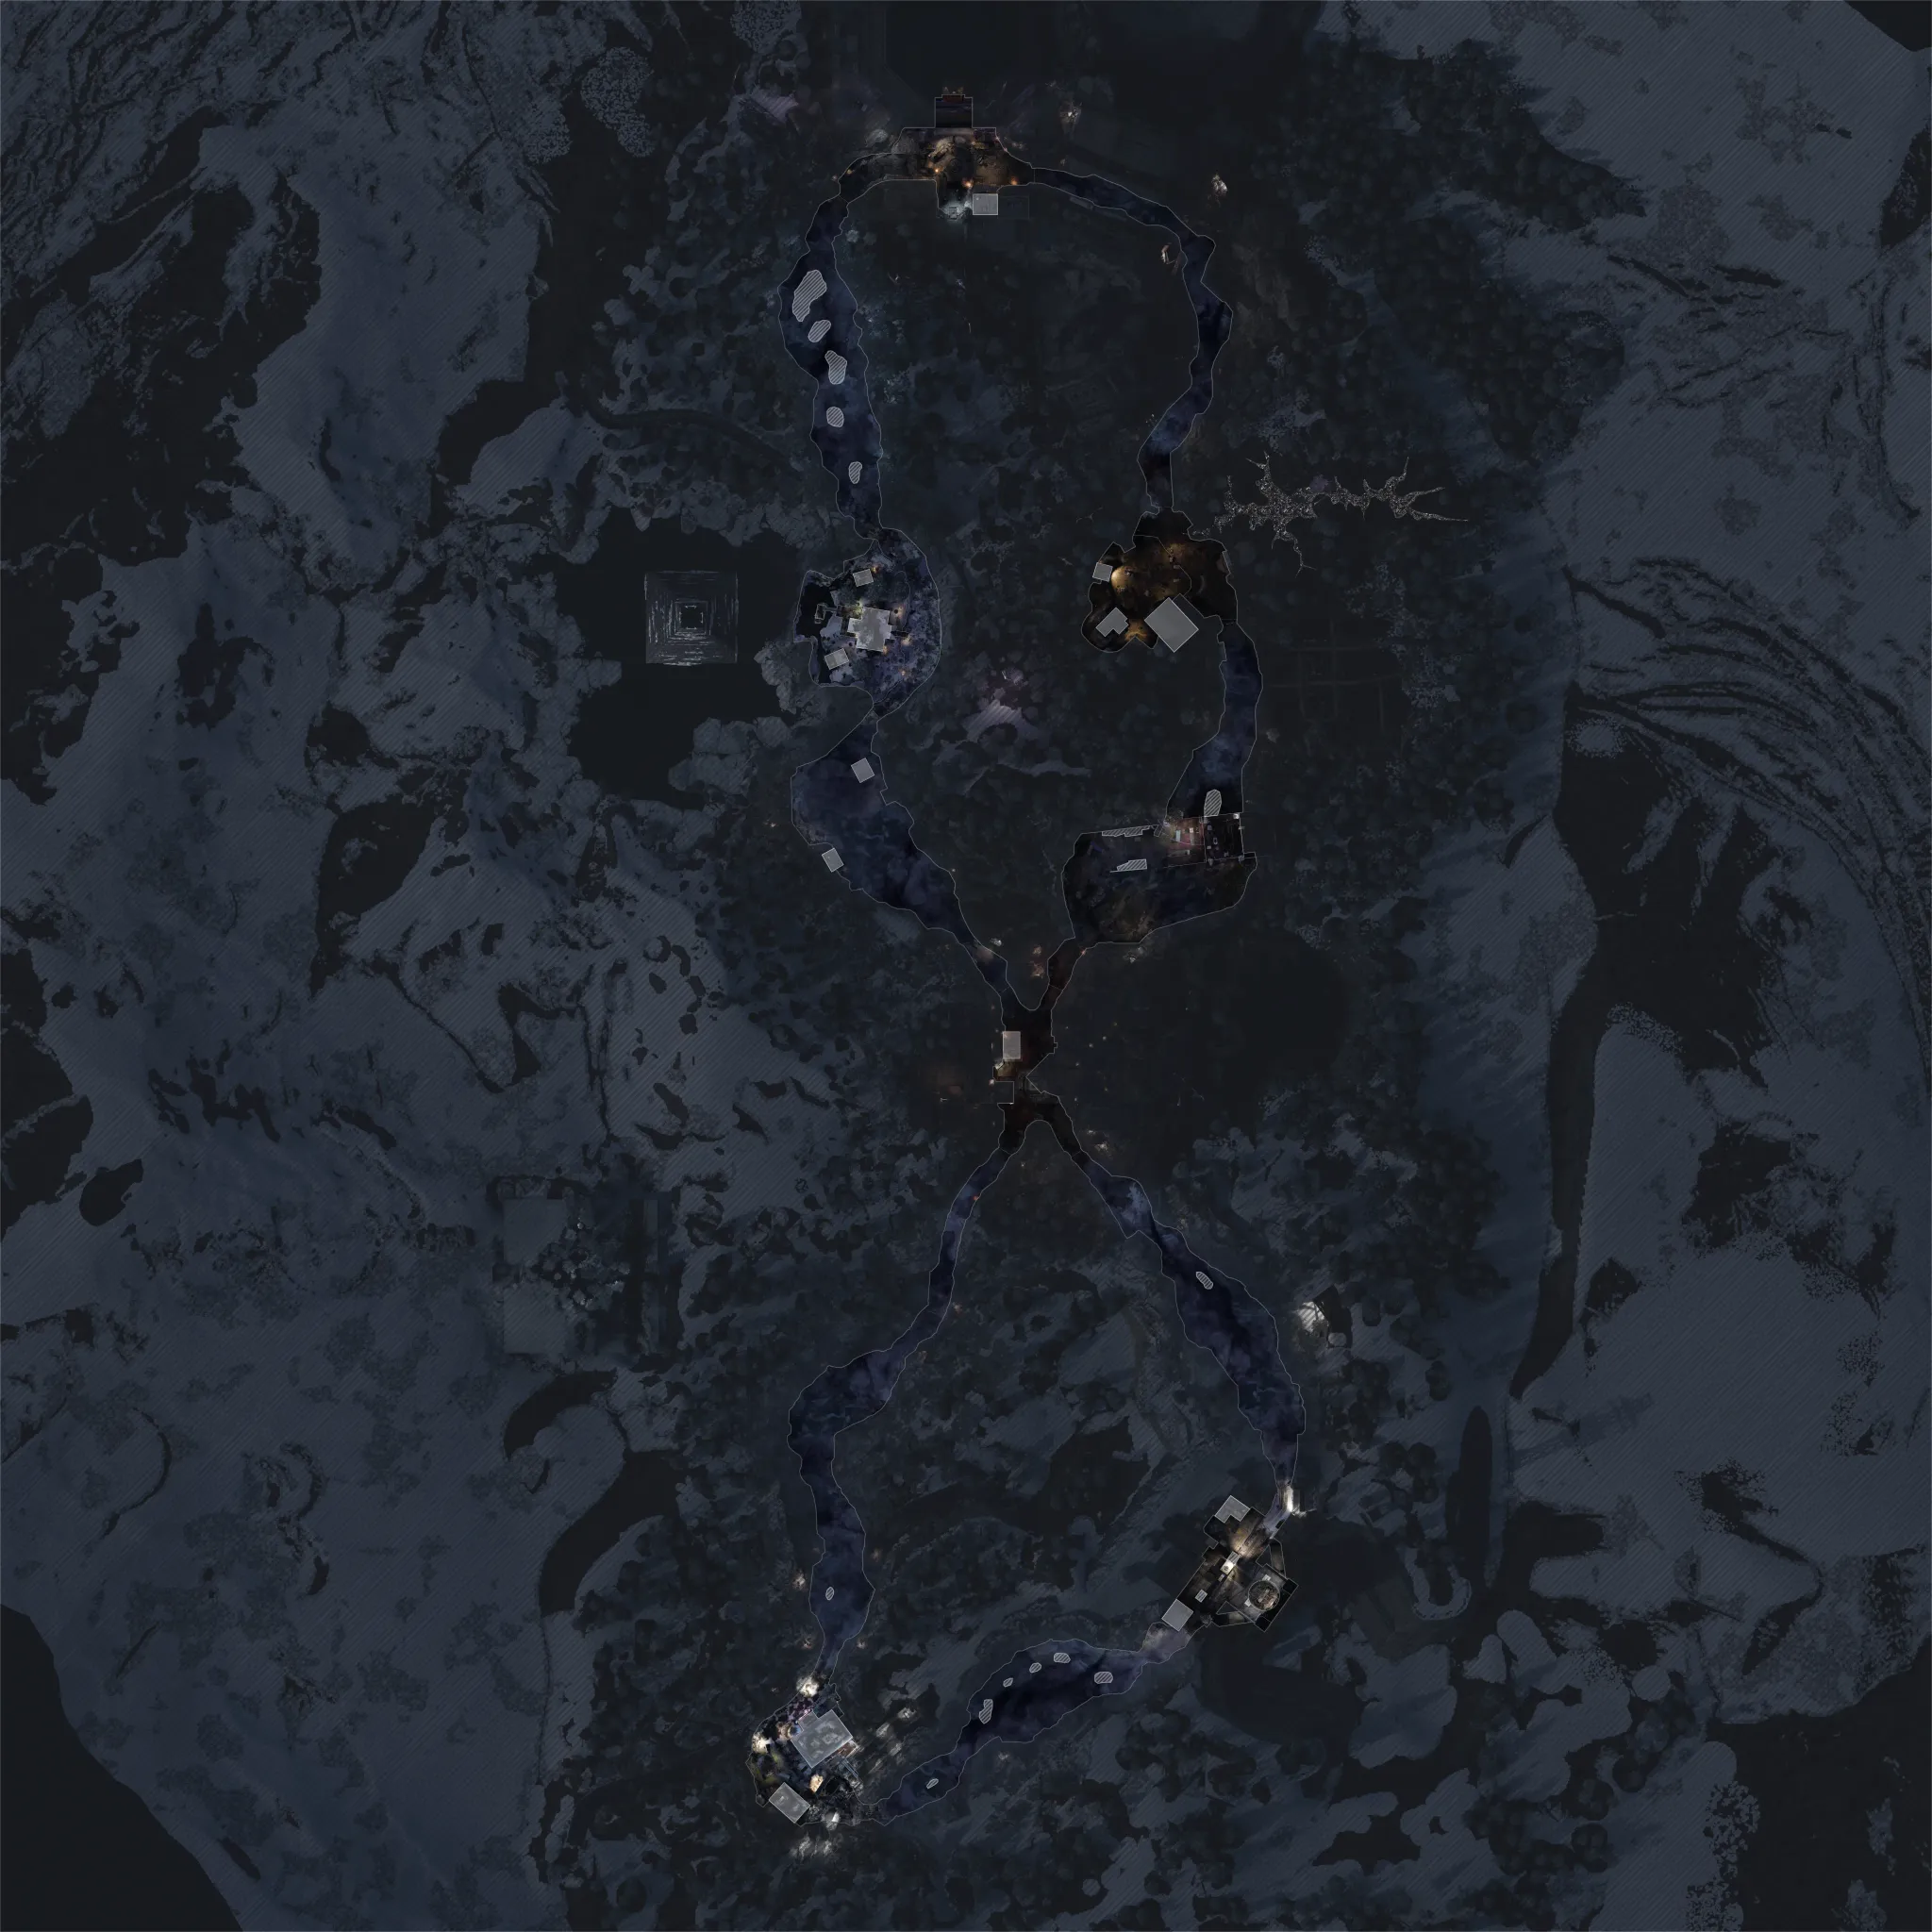
The map layout first, then the areas worth knowing by name. Map imagery © Activision, self-hosted.
 Ashwood
 Wall Buy (CODA 9 Pistol)
 Fast Travel
 ExfilWall Buy (M34 Novaline)
 Trap
Trap Ammo CacheAmmo CacheAmmo CacheWall Buy (X9 Maverick)
 Crafting Table
 Jugger-NogFast Travel
 Double Tap
 Mystery Box
 Arsenal
 Armor Vest
 Vulture AidWall Buy (VS Recon)Wall Buy (Akita)
 Power DoorPower DoorPower DoorPower DoorBlackwater LakeArmor VestWall Buy (Dravec 45)
 Speed Cola
 GobbleGum MachineArsenalAmmo CacheAmmo Cache
 Melee MacchiatoFast TravelWall Buy (M10 Breacher)Crafting TableMystery BoxWall Buy (M8A1)ExfilPower DoorJanus Towers PlazaWall Buy (CODA 9)GobbleGum MachineAmmo Cache
 Quick ReviveFast TravelWall Buy (Warden 308)Vandorn FarmFast TravelWall Buy (Echo 12)Armor VestGobbleGum Machine
 Stamin-UPWall Buy (Peacekeeper MK1)Saw Blade TrapWall Buy (Ryden 45K)Crafting TableAmmo CacheExfil
 Death PerceptionMystery BoxPower DoorArsenalWall Buy (MK.78)Exit 115Zarya CosmodromeAmmo Cache
 Elemental PopSaw Blade TrapWall Buy (AK-27)GobbleGum MachineAmmo CacheArsenalWall Buy (Shadow SK)Fast TravelCrafting Table
 Deadshot DaiquiriArmor VestWall Buy (XM325)ExfilPower DoorArmor Vest
 Wisp TeaFast TravelAmmo CacheGobbleGum MachineAmmo CacheAmmo CacheMystery BoxWall Buy (XR-3 ION)Arsenal
 PhD FlopperCrafting TableExfilWall Buy (M15 Mod 0)Wall Buy (DS20 Mirage)Power Door
Tap a category to show or hide it. Pinch or double-tap to zoom in — marker positions come from the official Call of Duty map data.
Janus Towers Plaza
Spawn. Server Room holds the T.E.D.D. Head; Uber Klaus spawns west.
Ashwood
Sheriff's Office (Klaus's cell), Tailor Shop mirror, clock tower.
Vandorn Farm
Farmhouse Roman-numeral clock; serum basement; crafting table.
Blackwater Lake
Spores Jar; the docks where you start the final boss.
Zarya Cosmodrome
Support Systems — the Aether Barrel.
Reba's Diner / Exit 115
Freezer (Abomination Carcass); rooftop clock.
Steps at a glance
- Install Ted's head on Old Tessie → power all three generators
- Fit Pack-a-Punch to the back of Tessie at Ashwood
- Collect the six serum parts (run in parallel with everything)
- Round 8+: kill the Uber Klaus at Janus Plaza for the Stabilizer Chip
- Wake Klaus in the Ashwood jail with bounced stun grenades
- Retina scan at Zarya → aether canister → charge all three generators (timed)
- Read the three barn-roof symbols → set the cube → Necrofluid Gauntlet
- Yuri's Lab: decode the pigpen cipher → add blood → survive the lockdown
- Three glowing keys from the fog zones → the Ashwood pyramid
- Fit the DG-2 turret → stop the ethereal clock to go purple
- Four POI soul quests: Farm ritual, Exit 115 lightning, Zarya rocket, Blackwater reels
- Wisp drive — 3 souls per fog zone, never leave one early
- Boss: boost-ram with Tessie, turret the mouths, chase the beams in immunity phases
Before you start
What to have in hand before step 1 — from the loadout notes, from the walkthrough itself, and from the map's own quest documentation where the gate is never stated in a step.
- Aether Shroud Field Upgrade — Setup & safety
Set aside 70–120 min · 1–4 (solo-capable) · the full loadout is further down this page
Where your run will differ
Gathered here so you meet them before they cost you a run rather than after — quoted word for word from the guide below, or researched from the map's own quest documentation.
What changes with your player count. The rest of the guide is the same either way.
Full walkthrough
The quest in the order this guide runs it — tap any step to jump to it, and it fills in as you tick steps off.
Power the map and fit Pack-a-Punch
Grab Ted’s head and install it on Old Tessie. Drive to Blackwater Lake or Vandorn Farm, clear the spore infestation off the power pump and switch the power on. Then drive to Ashwood — zip line either side, opening onto Ashwood Bridge — destroy the infestation there, turn the power on, and install Pack-a-Punch on the back of Tessie.
Do not skip the third generator. Go back and power whichever of Blackwater or the Farm you left — all three are needed later for the timed canister run, and discovering that mid-timer is miserable.
Open the rest of the map by driving Tessie through the barriers between POIs.
Loadout trade-off: MrDalekJD runs the Nikita shotgun, strong against the boss’s red critical mouths up close. MrRoflWaffles says long-range only, no shotguns, because the boss sits at distance. Both work — pick based on whether you expect to be on foot near the crit heads. Cryofreeze and Napalm Burst are both strong against Uber Klaus, and Napalm Burst melts the zursa bears.
Quick win: The Max Ammo statue is in the Server Room ceiling directly above Quick Revive — stick a C4 to it before you leave spawn and detonate it the first time you run dry. The vending machine in the plaza pays random loot for one crouched melee per round (punch it with Melee Macchiato and it breaks for a bigger one-off drop).
Collect the six serum parts
Six parts, order flexible, and worth chipping away at alongside the Wonder Weapon build. Track them in the HUD under Serum.
Tomahawks and Molotovs: craft at the barn bench with salvage, or take the free ones — a tomahawk in the diner and at Blackwater Lake, Molotovs in Ashwood.
Worth doing all game: keep destroying the purple ground plants with Tessie’s beam even after you have the Horde Husk Chunks — at high rounds they drop tier-3 Pack-a-Punch crystals.
The other guide: MrDalekJD attributes the fridge key to a special Cook zombie at Exit 115, and says the spore jar needs only two rounds.
Quick win: One free perk a match from Reba's Diner soda fountain (the Mixologist Easter egg) — drop three ingredients and drink. Quick Revive: bleach on the Server Room desk, the fish opposite the Blackwater box spawn on the pier, the Stim Shot in the Zarya Control Room cabinet. Juggernog: the plant on the raised road out of Janus Towers to Blackwater, the bottle in the Barn wall gap before the cellar, the eggs on the diner kitchen rack. Speed Cola: the plant behind the crashed cart entering Blackwater (go prone), the nuts in a crate in Hargrove's Mercantile, the sugar packets on the diner table. Stamin-Up: nuts on the cellar's south-west shelf, the bean bag behind Hargrove's counter, the gas can by the service-station bin. The first drink also pays the Soda Sommelier calling card.
Quick win: While you are at the Farm for the bones, reload-interact the haystacks for the Playmates document, and melee Chompy's bin when it is active — feed it a weapon or a piece of equipment for salvage, occasionally a Ray Gun.
Quick win: Death Perception shows bear prints in the fog roads (Crashed Rocket / Orda Graveyard). Follow the five prints to a hidden Zursa and kill it with melee only for the Claw Talisman — permanent double points on every melee kill for the rest of the match. (Two guides; their spawn zones differ.)
Cursed only — Feed your starting pistol to Chompy before you replace it: that is the Common rung of Samantha's Drawing, and the Uncommon, Rare, Epic and Legendary rungs can follow at any round before the round-40 Wonder Weapon hand-in.
- Human Bones — in the Vandorn Farm barn, a body hangs with a foot dripping blood. Throw a tomahawk at the foot to sever it, then a Molotov to burn it down to bone
- Ravager Eyes — on a ravager round, activate any sword or saw trap and let the trap itself kill a ravager. If nothing drops, try a different trap next ravager round
- Horde Husk Chunks — kill a good number of zombies inside the Exit 115 diner until the fridge key drops (check outside too, the key-zombie can wander), open the diner freezer for the Abomination Carcass, install it on the front of Tessie at the Ashwood garage to unlock the beam, then destroy a purple glowing plant at ground level in the fog zones
- Fungus (Widow's Lantern) — take the serum jar from the Blackwater Lake cabin kitchen, plant it on the spore-covered horse just outside Vandorn Farm, wait three to four full rounds, then interact again
- Mysterious Limb — from round 16, damage a yellow-eyed zursa bear with bullets then land the killing blow with Tessie's beam. Blue-eyed fog bears do not count, and if nothing drops your gun did too much of the work
- Powder of the Forgotten — buy Wisp Tea, activate your wisp by shooting zombies, lead it into the Ashwood tailor shop with the mirror, then shoot the mirror with the Necrofluid Gauntlet
Serum Symbol Matcher
Yuri's Lab — Zarya CosmodromeInteract with the Powder of the Forgotten (5th bowl) and three pigpen words appear on the chalkboard — top, middle and bottom, a different set each game. Each tile below shows an item's pigpen symbols; match the chalkboard words to the tiles and tap them in that order (you only need the first symbol to tell them apart). The bowl to use and where to collect each item show below.
Kill the Uber Klaus for the Stabilizer Chip
From around round 8, be at the Janus Towers Plaza as the round turns — an Uber Klaus climbs out of the Project Janus container. Stand close to the container if he will not appear, and take another round if needed.
Come prepared: have at least Pack-a-Punch tier 1 and a few perks. He is weak to Cryofreeze and Napalm Burst. Shoot the shoulder pads off, and when his health empties he collapses into a core — destroy that.
Confirmation cue: he drops the Stabilizer Chip, highlighted yellow.
Quick win: You can be holding the Necrofluid Gauntlet by round 8 if you push this straight after power — it is what makes every later step (and the Teddy Bear relic hunt) quick.
Wake Klaus and pass the retina scan
Take the Ashwood left zip to Market Square and open the Sheriff’s Office. Klaus is in the jail cell — not the Uber Klaus cage. Interact with the terminal to install the chip.
Now buy or craft stun grenades at 250 salvage each — bring three or four, and spawning in with stuns equipped makes them free. Stand to the left of the jail cell and bounce them off the wall in quick succession.
Confirmation cue: sparkles above Klaus’s head, then his eyes light up. The player who woke him controls him, directing him with the tactical button.
Take Klaus to the Cosmodrome and down to the Support Systems level. Direct him to the broken wall panel so he bashes it, then interact with the machine and stand inside the red scan circle until the bar fills while purple zombies swarm.
Two things stall this: only the scanning player may stand in the circle, and you must look at the scanner beam or progress will not tick at all. In co-op, have someone cover you.
Confirmation cue: the wall cupboard opens — take the aether canister. If Klaus times out, resummon him from any activation station after a couple of minutes.
The three-generator charge run
Pre-position Tessie before you pick the canister up. Carrying it means no sprinting and no jump pads, so solo players want the truck waiting; in co-op have someone drive.
Slot the canister into the middle of each spore-infestation generator in the order Ashwood, Blackwater, Farm. Each extraction takes ten to fifteen seconds with zombies attacking.
The timer is the whole difficulty: between generators a Refined Energy Decay countdown of about 1:30 runs. Fail it and you redo the retina scan and all three generators — not just the leg you missed.
After the Farm charge, carry the canister into the cellar below the barn and interact with the cube. It takes the canister and changes appearance.
The barn symbols and the gauntlet
Take the jump pad between Janus Towers and Vandorn Farm and, while airborne, read the three red symbols on the barn roof — right, middle, then left across the two jumps. Write them down.
At the cube, the front face has an eyeball — do not touch it. Hold interact on the other three faces to cycle symbols and set your three, then hold interact on the eyeball face to submit. Each face carries a different symbol set, so duplicates are impossible.
Confirmation cue: the eye disappears and the Necrofluid Gauntlet is inside.
The tutorial lockdown: you are rooted to a floor sigil. Shoot a barb at each of the six green blobs around the basement and press reload to recall the barb back through them. All six destroyed releases you. Controls: fire launches a barb, reload recalls it, aim-down-sights detonates it in place.
Necrofluid Gauntlet Symbols
Aether Barrel cube — red eyeOn the jump-pad flight over Vandorn Farm, three red symbols appear on the rooftops — one for each cube face. At the Aether Barrel cube, click the symbol you saw on the Left, Right and Back faces; it lays out the cube and reminds you to confirm at the red eye in order Left → Right → Back. Which symbols appear is randomised per match — these are our own redrawn versions of the in-game glyphs, so match by eye.
Yuri's Lab — the pigpen cipher
Open the debris at the Cosmodrome to reveal Yuri’s Lab. Interact with the powder on the chemistry table and a pigpen cipher appears on the chalkboard — three lines, one word each.
Decode all three. The possible words are FUNGI, LIMBS, OCULI, CONCH and TALIS, and each maps to an item on the table. Hold interact on the three corresponding items in top-to-bottom line order.
Confirmation cue: red smoke around the central canister and an “add blood” prompt. A wrong order gives a fail line and black smoke — retry next round.
Prepare before you add blood. The blood-giver’s health drops to around 75 with no regeneration for the duration, and the lockdown runs about 90 seconds during which you cannot leave the room. Kill zombies inside so their souls flow into the canister. Going down fails it — retry at the beaker next round. An Instakill gum makes solo far easier.
Confirmation cue: purple gas washes over the screen, and wisps now orbit the four main POIs.
Pigpen Cipher Decoder
Ashes rocket launch / Yuri's Lab / Buried mine signsThese all use the classic pigpen (tic-tac-toe) alphabet. Click the symbols you see in-game, left to right — the word builds below, and for the Ashes rocket-launch console the six-number code (each letter's alphabet position, A=00) builds alongside it. For Buried's mine signs you just need the word.
The three glowing keys
Each key sits in a fog zone with three possible spawns. Shoot it with a gauntlet barb then detonate or recall to suck it free, and pick it up off the ground. All three go to the pyramid device in Ashwood, and each delivery breaks one set of chains.
Every key applies a debuff while carried — so bring Tessie or a teammate as escort rather than walking it. If a key is not at any listed spot, flip the round and re-check.
Confirmation cue: after the third key, a mid-game cinematic plays.
- Red / Nightbird — Order Graveyard, between Ashwood and Exit 115. Debuff: no health regeneration. Look in the high T-Rex skull's mouth, the ground-level T-Rex skull at the back of the mouth (fiddliest — check the others first), or wedged right of the Project Janus tank vehicles
- Yellow / Bruin — the fog between Ashwood and Zarya. Debuff: melee only. On top of the fallen radio tower, on the building edge as you exit the Cosmodrome near the radar, or high on the cliff up-left entering from Ashwood
- Green / Terrapin — the grounded ship zone between Ashwood and the Farm. Debuff: no sprint, so park Tessie as the escape. Inside the blue shipping container, on the shelf through the window on top of the ship, or under the ship left of the two big silver barrels
The turret and the ethereal clock
Right after the cutscene, pick up the DG-2 turret part and install it on Tessie at the Ashwood garage bench.
Once per round, switch to the turret seat and shoot the floating ethereal clock tower above Ashwood Bridge — drive slightly out of town toward the grounded-ship entrance for the angle, since the turret cannot aim straight up. That stops the clock.
This is the engine for everything that follows. With the clock stopped, shoot a clock face with a barb at close range and detonate to turn purple for a limited window. Three of the four faces work, each once per round — so up to three purple windows per round, and a new round means re-shooting the tower to reset them.
Every one of the four POI quests below must be done while purple.
Vandorn Farm — the ritual
While purple, enter the farmhouse and read the wall clock time. Stand on the matching Roman numeral scratched into the floorboards — III, IX and XII are marked, and the 6:00 spot is opposite the father, unmarked — and look at the father figure at the head of the table. Stand still.
Wait for the cue. His head slowly turns toward you and his eyes glow red. Only then shoot the head with the gauntlet — the skull knocks back and the step activates.
Collect four ritual items, place them at the ground circles, then quickly re-interact with all four to start a 60-second defence. The artifacts have health, so keep zombies off them — one player per circle in co-op, and Kazimirs, monkeys or Frenzied Guard help a lot solo.
Confirmation cue: the screen flashes white.
Quick win: Free Wisp Tea from the Twins: interact with the farmhouse TV (right of Stamin-Up upstairs) until it shows two girls then one, find the ghost girl scratching tic-tac-toe in the Barn cellar, return to the TV (empty room), then approach the two girls dancing outside by the power pump for a Wisp Tea can — it repeats every couple of rounds. The Meat the Vandorns audio log spawns on the barn-cellar shelf once the ritual is done.
- Teddy bear head — on the bunk bed in the upstairs bedroom
- Face mask — in the mystery-box room, or the second floor of the barn (creators differ)
- Chalice — in the cellar next to the bathtub
- Pea's pig sticker — prone under the table to reach it
Exit 115 — the frozen lightning
This needs lightning striking over the diner, which appears about fifteen seconds into a round; if it is absent, play another round or two. Park Tessie in front of the diner and pre-summon Klaus from the radio spawner before you start the timer — you will not have time afterwards.
While purple, shoot the clock on the service-station rooftop with the gauntlet. The lightning freezes and a 60-second timer starts. Inside it, do any or all of three revives — they are repeatable across rounds because the souls persist.
Do not kill a glowing zombie inside its lightning — the soul has to fly up on its own. Any you kill by accident will respawn during the step.
Confirmation cue: the zombies freeze in the lightning and, when the timer ends, become wisps and vanish.
Quick win: From the diner roof, the Bonus Points statue sits under the car on the right of the broken bridge; the service-station vending machine takes one melee per round; She Got Hers is in the diner kitchen and He Got His plus the Evidence document are inside McDougal's.
- Waitress — melee the diner cash register to pop it, reviving the waitress beside it; lead her onto the diner rooftop into her matching-colour lightning
- Engineer — direct Klaus to the side of the car by the service station so he stamps it; lead the revived engineer to the yellow lightning on the service-station rooftop
- Trucker — hit the red shipping container with Tessie's beam then ram it open; lead the trucker to the red lightning on the Exit 115 rooftop
Zarya Cosmodrome — launch the rocket
While purple, put a gauntlet barb into each of the two spinning satellite dishes to stop them — one per purple window, so this may span two rounds. Purple mist engulfing the dish is the cue it worked.
In the control room behind the Wisp Tea machine, the right-hand monitors flash pigpen symbols two letters at a time, spelling a six-letter word — one of ROCKET, ENGINE, LAUNCH or WEAPON. The word re-randomises after any failure.
The input rule that catches people: each of the six number monitors blinks through four numbers, and the correct one is the letter’s alphabet position counting A as 0 — so position minus one. When the right number shows, shoot the little red button beneath that monitor to lock it, working left to right.
Confirmation cue: souls stream into the rocket and it launches. Take too long and you redo the satellites and re-read the word next round.
Quick win: Three intel pieces unlock the moment the Serum puzzle is done — Ground Control (Control Room, south-east wall), Maintenance (shoot the papers on the north-east shelf) and What Came After (a box in the Flame Trench, facing north). The Full Power statue is through the fence gap in the Flame Trench.
Blackwater Lake — the projector and reels
With the other three POIs done, interact with the wisp on the docks — it flies to the pyramid, confirming you are ready.
While purple, shoot the projector inside the cabin and immediately watch the screen: it shows four locations in a random order — front of the lodge, upstairs, boathouse, and the shed behind the cabin. Then shoot a regular barb into each film reel in that exact order.
Confirmation cue: each correct reel turns purple and locks in. A wrong order gives a jump scare and you retry next round.
Afterwards, blue misty intel spawns at the reel spots — optional story pickups. Then upstairs in the Speed Cola room, hold interact on the big misty soul to open a box at the foot of the bed. Summon Klaus, direct him to the box, and he takes the glove and walks slowly to the edge of the dock walkway.
Quick win: The blue intel that appears after the reels is four audio logs — Scene 27 (back railing by the ammo box), Study Room Monologue (fishing-hut south window), Confrontation in the Parlor (cabin upstairs shelf by the projector reel) and Director's Notes (toolshed shelf below the reel). Stand on the odd-coloured floorboard in the toolshed and shoot the dartboard bullseye for the Cut document. If you have shot the other seven statues, the Fire Sale statue is now floating above the cabin's second floor — look up through the open roof.
- Back of the cabin, by the staircase
- Top of the cabin staircase upstairs, near the power switch
- Boathouse — sticking out of the ceiling rafters
- Tool shed — on the shelf inside the little hut
The wisp drive
Point of no return. Interacting with Klaus at the dock starts the final vote. Before voting: tier-3 Pack-a-Punch, best rarity, Kazimirs, armour plates, a salvage reserve for Tessie repairs, and gums ready.
After the vote, souls scatter from the pyramid across the map. Wait about twenty seconds for them to distribute, then drive a full lap from Blackwater.
Three souls per fog zone, and you must collect all three before leaving. Leaving a zone early gives a gong sound and fails the step, forcing a revote next round. Put a gunner on the turret to shoot the explosive mines off the road.
The loop: Blackwater into the Monolith Forest fog toward Janus Towers, through the plaza and the collapsed tower to Vandorn Farm — driving over the green healing pods — then Farm to the grounded ship, up the ramp with a slow right turn and one soul at the end of the ship, into Ashwood, U-turn, and back through the lost cabins zone to Blackwater.
Confirmation cue: picking up the final soul teleports you straight into the boss arena.
Boss fight
This one is fought from the vehicle. The core loop: drive until boost is charged, then boost up the centre ramp and ram the boss for huge damage while firing the abomination beam. A second player mans the DG-2 turret and shoots the weak-point mouths that ramming exposes. On foot, spray the unarmoured head — grey hit markers mean unarmoured, blue means armoured.
Rockets: red circles appear on the ground and detonate after a few seconds. On foot, run tight circles and cut back through spots that have just exploded — that is your safe window.
Immunity phases at roughly 80% and 35% health, plus once at the very end: the boss spins and takes no damage. Keep the turret firing and wait for a blue beam of light to spawn — race the boss to it and drive through to infuse Tessie, then boost-ram to break immunity for about ten seconds and shoot the crit spot under its mouth. If beams stop spawning, ram the boss with un-infused Tessie to unstick the pattern. A Max Ammo in an arena corner signals the phase ending.
The purple laser in the final quarter: its mouth glows for ten to fifteen seconds while charging, then fires a beam that near-instantly kills anyone in the open. Get behind a pillar, or time a ram during the charge-up to interrupt it.
Logistics: a destroyed Tessie costs 150 salvage and about ten seconds to repair, during which you are vulnerable — pop Kazimir or Aether Shroud first. There is a teleport-to-vehicle button in one of the side huts. Max armour and Max Ammo sit in the arena corners and do not expire, unlike zombie drops, so save them. Heal Tessie by driving over green spore pods, and expect bears — Napalm Burst melts them.
Side Easter Eggs & extras
Everything beyond the main quest. Tap any entry to open the full how-and-where breakdown.
“Turn to Ashes”
Kevin Sherwood ft. Elena Siegman. 3 Mister Peeks headphones: on a server by Quick Revive (Server Room), on a beam above the VS Recon wall-buy in Ashwood's Judgment Square, and in the jeep by the Exit 115 pump station.
- Server Room, Janus Towers Plaza — on the server directly across from Quick Revive
- Ashwood, Judgment Square — upper level, on the beam above the VS Recon wall-buy (through the destroyed roof)
- Exit 115 — the jeep/4×4 by the pump station outside Reba's Diner, rear passenger side
- Interact with all three (a Mister Peeks laugh confirms each); once per match
Soda fountain Easter Eggs — “Mixologist”
Each perk has its own soda-fountain side quest that rewards a free perk; completing them all earns the Mixologist achievement.
- Each drink gives one free perk; only one drink per match (all four = four matches, and the Mixologist trophy). All are brewed at the glowing cup in Reba's Diner (Exit 115) — only touch the three correct ingredients or it fails
- Quick Revive: blue toilet cleaner (Server Room), the dead fish (Blackwater cabin dock), the stimshot (Cosmodrome Control Room)
- Jugger-Nog: a leaf (climbable broken road, Janus Plaza), the milk jug (Vandorn barn cellar), eggs (Reba's Diner kitchen shelf)
- Speed Cola: a leaf (behind the broken car at Blackwater exit, prone), a crate (left of the armour door in Hargrove's Mercantile), a green box (right of the drink machine)
- Stamin-Up: a crate (Vandorn cellar), a sack (Hargrove's shelf), a gas can (behind the Exit 115 station)
- Brew at the Reba's Diner cup to get the free perk
Jump Pad EE — free Ray Gun Mark II
Complete the jump pad Easter Egg between POIs to earn a free Ray Gun Mark II.
- Turn on power and open every area
- Ride all eight jump pads in one connected loop back to your start (~4,000 essence)
- Wait about four rounds, then watch the row of lights on the north side of the Janus Plaza lobby — the far-left light blinks a code (1-7, in order)
- Ride the jump pads in that numbered order
- A rift opens with loot including the free Ray Gun Mark II (more reliable after ~round 15-20)
Bear Tracks — permanent 2× melee points
Buy Death Perception, find the orange bear prints in the fog roads, interact with 5, then beat the secret bear boss using only your knife. Rewards permanent double points on melee kills for the rest of the game.
- Buy Death Perception (required to see the prints)
- Head into the fog roads: between Cosmodrome & Ashwood, or Exit 115 & Ashwood
- Interact with 5 sets of orange glowing bear prints on the ground
- You're teleported to the bear boss arena — KNIFE ONLY, so bring a melee build
- Kill it for permanent double points on melee kills for the rest of the game
“Good Soldiers” — Tank Dempsey
A story side quest following Dempsey; completing it unlocks the Good Soldiers achievement.
- Play as Tank Dempsey
- Drive Ol' Tessie from Ashwood toward the Cosmodrome and stop at the crashed rocket near the entrance
- Interact with Dempsey's dog tags by the three body bags to enter a Dark Aether realm
- Survive the horde as Veytharion accuses Dempsey; find the ruined temple where two zombies feed on a third and kill them
- Veytharion turns you into a Disciple — kill every zombie that spawns to finish and earn the Good Soldiers achievement
Vending machines
Crouch and melee the vending machines (Janus Tower Plaza, Exit 115) each round for random loot. Punching one with Melee Macchiato dumps a jackpot of rewards but breaks the machine for the rest of the game.
- Two machines: the Janus Plaza spawn room (NW corner) and Exit 115 (west of McDougal's station)
- Each round, crouch and melee a machine once for a random item (junk up to weapons or a Ray Gun) — once per machine per round
- For the jackpot, buy Melee Macchiato (Blackwater cabin, ~2,500)
- With its punch active, melee a machine to smash it open for a big loot dump — but it breaks that machine for the rest of the match
More extras
Lie down in front of any perk machine for 100 points (once each); ARC-XD racing course; Fumigator + Toxic Growth on plant spores for upgraded loot; upgrade Ol' Tessie with the Abomination beam; an angry T.E.D.D. if you attack him.
Interactive solvers
Every solver for Ashes of the Damned, in the order you meet them. Each also appears inside its step in the walkthrough above — use whichever is handier. Browse every Zombies solver →
Serum Symbol Matcher
Yuri's Lab — Zarya CosmodromeInteract with the Powder of the Forgotten (5th bowl) and three pigpen words appear on the chalkboard — top, middle and bottom, a different set each game. Each tile below shows an item's pigpen symbols; match the chalkboard words to the tiles and tap them in that order (you only need the first symbol to tell them apart). The bowl to use and where to collect each item show below.
Necrofluid Gauntlet Symbols
Aether Barrel cube — red eyeOn the jump-pad flight over Vandorn Farm, three red symbols appear on the rooftops — one for each cube face. At the Aether Barrel cube, click the symbol you saw on the Left, Right and Back faces; it lays out the cube and reminds you to confirm at the red eye in order Left → Right → Back. Which symbols appear is randomised per match — these are our own redrawn versions of the in-game glyphs, so match by eye.
Pigpen Cipher Decoder
Ashes rocket launch / Yuri's Lab / Buried mine signsThese all use the classic pigpen (tic-tac-toe) alphabet. Click the symbols you see in-game, left to right — the word builds below, and for the Ashes rocket-launch console the six-number code (each letter's alphabet position, A=00) builds alongside it. For Buried's mine signs you just need the word.
Recommended loadouts
Three strong picks for this map — the map's Wonder Weapon plus reliable box/wall options. Each weapon lists a full recommended attachment build and the perks to pair with it, every perk shown with its Major and Minor augment. Push weapons to Legendary rarity and Pack-a-Punch; augment/attachment metas shift with balance patches, so treat these as a strong current baseline.
Necrofluid Gauntlet (Wonder Weapon)
All-round / melee+The map's quest weapon and the best pick here. Built-in health siphon + explosive Spike Shots; pair with Melee Macchiato and the Claw Attack for a self-healing punch loop that never runs dry.
Attachments
- —Wonder Weapon — no Gunsmith attachments
Perks & augments
- Jugger-NogMajorTurtle Shell — back armour absorbs rear damageMinorDurable Plates — tougher armour
- Melee MacchiatoMajorExpresso — all melee attacks are fasterMinorStick 'n Move — faster backpedal after melee hits
- Stamin-UpMajorGuns Up — fire your weapon while sprintingMinorFootwork — faster non-forward sprint
- Speed ColaMajorClassic Formula — even faster reloadsMinorQuick Swap — faster weapon swaps
- Wisp TeaMajorMask of Salvation — the Fox revives you thriceMinorHaste — reduces the Wisp summon cooldown
- Quick ReviveMajorEquivalent Exchange — kill enemies to self-revive (x3)MinorSlow Death — longer last-stand timer
Akita (Akimbo shotgun)
Close-range farming+Blistering fire rate for point farming and crowd pressure. PaP + Legendary, extended mags; strong with Deadshot and Double Tap up close. Bring something ranged for the boss, though — MrRoflWaffles explicitly warns off shotguns on Veytharion, which sits at distance. The Novaline or any long-range bullet gun covers that gap.
Attachments
- MuzzleHKO Suppressor
- Barrel9.4" Phobos Heavy Barrel
- UnderbarrelStrider Handstop
- MagazineBulk Feed Extended II
- Fire ModsEnhanced Cycle System
- Rear GripPioneer Blaze Grip
- StockVagabond Stock
- LaserEAM ScatterLine Laser
Perks & augments
- Jugger-NogMajorTurtle Shell — back armour absorbs rear damageMinorDurable Plates — tougher armour
- Speed ColaMajorClassic Formula — even faster reloadsMinorQuick Swap — faster weapon swaps
- Deadshot DaiquiriMajorDead Head — bigger critical-damage bonusMinorDead Break — more damage to armour
- Double TapMajorDouble Dealer — every fourth bullet deals doubleMinorDouble Down — more penetration damage
- Stamin-UpMajorGuns Up — fire your weapon while sprintingMinorFootwork — faster non-forward sprint
- Quick ReviveMajorEquivalent Exchange — kill enemies to self-revive (x3)MinorSlow Death — longer last-stand timer
Ray Gun Mk I
Reliable backup+From the box on every BO7 map. Splash clears clusters and holds up at high rounds when your primary needs a breather.
Attachments
- —Wonder Weapon — no Gunsmith attachments
Perks & augments
- Jugger-NogMajorTurtle Shell — back armour absorbs rear damageMinorDurable Plates — tougher armour
- Speed ColaMajorClassic Formula — even faster reloadsMinorQuick Swap — faster weapon swaps
- Stamin-UpMajorGuns Up — fire your weapon while sprintingMinorFootwork — faster non-forward sprint
- Double TapMajorDouble Dealer — every fourth bullet deals doubleMinorDouble Down — more penetration damage
- Elemental PopMajorRainbow Pop — triggers the enemy's weakness elementMinorVulnera Bean — more elemental-weakness damage
- Quick ReviveMajorEquivalent Exchange — kill enemies to self-revive (x3)MinorSlow Death — longer last-stand timer
Recommended kit & gum picks
The recommended kit for this quest — Field Upgrade, Ammo Mods, equipment and the GobbleGums to bring, split by solo and co-op. Weapons are in Recommended loadouts above. Metas shift with balance patches, so treat these as a strong current baseline.

Aether Shroud
Afterimage augment drops a decoy — the go-to for setup and revives across the biggest map in the series.

Frenzied Guard
Pulls all aggro and repairs armour on kills — strong for holding the wisp defences and the final drive.

Napalm Burst
Burning area damage for packed lanes and the fire-tagged candle steps.

Dead Wire
Chain lightning to stun and strip Manglers, Doppelghasts and Ravager-round crowds.

Brain Rot
Turns a zombie into an ally to hold a lane while you set up the serum ingredients.

Cryo Freeze
MrRoflWaffles runs it all game — slowing the packed connecting-zone hordes makes the fetch steps far less punishing.
Molotov
A fire pool for chokepoints — reliable, cheap clear (and the tool for the candle steps).

Monkey Bomb
Distraction bait to buy space during the numeral-clock and wisp-drive steps.

Perkaholic
UltraEvery perk at once — the strongest solo opener on a very long run.

Aftertaste
RareKeep your perks after a revive — huge insurance over a 90-minute quest.

Armor Gettin'
LegendaryA full 3-plate armour vest with plates — instant survivability.

Free Fire
EpicNo ammo used for 60s — a clean DPS window on Veytharion.

Dead Drop
EpicMore salvage and equipment for ~5 min.

Shields Up
RareRefills armour at 2× strength for 3 min — the gum both creators bring on every map, and blue rarity so you will actually have it.

Near Death Experience
UltraRevive teammates from anywhere — MrDalekJD brings it for the Ashes finale.
Perkaholic
UltraFull perks for whoever pops it.

Nowhere But There
EpicTeleport to a downed team-mate and revive nearby — essential across Ashes' distances.
Aftertaste
RareKeep perks through a down during the boss.
Power Vacuum
EpicPower-ups spawn more often for ~5 min — keeps the team topped up.
Free Fire
EpicNo ammo for 60s on the final wisp defence.
Per-map augments
The Major + Minor augment to run on each core perk for this quest. BO7 gives 4 Major and 4 Minor options per perk — a different set from BO6, so don't cross them. Picks are tuned to this map's boss and steps; augments unlock at Level 11 and metas shift with patches, so treat as a strong baseline. Per-map augment recs are ground no competitor covers.
 Reactive ArmorMinor
 Durable Plates
 Guns UpMinor
 Hot Foot
 Phantom ReloadMinor
 Quick Swap
 Dead AgainMinor
 Dead Break
 PhD SliderMinor
 Tribologist
 Dying WishMinor
 Slow Death
Calling cards on this map
Cosmetic calling cards you can earn on this map. ⏳ marks time-limited main-Easter-Egg cards — miss the window and they're gone for good. Global Dark Ops challenge cards are in the reference section below.
Showboat
Map challengeComplete the Ashes of the Damned main quest at Round 100+.
Lucidity
Map challengeComplete the Tank Dempsey side quest on Ashes.
Reliquary
Map challengeCollect all Relics on Ashes of the Damned.
Hard Mode
Cursed ModeComplete the Ashes Cursed-Mode Easter egg with 3 Wicked/Cursed relics active.
Cursed-mode card; exact naming varies — verify.

Main-quest completion card
Main EEComplete the Ashes of the Damned main quest.
Exact card name not yet confirmed.
⏳ Time-limited — only awarded if you finish before Directed Mode is added for this map; permanently missable afterwards.
GobbleGum reference — Black Ops 7
Black Ops 7's 52 GobbleGums: the 11 BO7-only gums (tagged New in BO7) plus all 41 that carry over from Black Ops 6. Spare gums crush for Essence. Filter by rarity.
Aftertaste
RareKeep your perks after being revived.

Turncoat
RareNearby zombies are charmed. (Season 2 Reloaded)

Kill Joy
RareDrops an Insta-Kill.

Cache Back
RareDrops a Max Ammo.

Temporal Gift
RareYour next timed power-up lasts longer.

Stock Option
RareAmmo drawn from your stockpile for 60s.

Anywhere But Here
RareRandom teleport plus a concussive blast.

Arsenal Accelerator
RareFaster Field-Upgrade charge for 5 min.
Shields Up
RareRefill armour at 2× strength for 3 min.

Power Keg
RareDrops a Full Power power-up. (Season 1)

Tactical Diffusion
RareNext Nuke is disabled and pays +2,000 Essence. (Season 3)

Requipment
EpicEquipment slots refill over time for 5 min.
Power Vacuum
EpicPower-ups spawn more often for 5 min.

Elemental Exposure
EpicWeapons always hit the elemental weakness for 3 min. (Season 1)

Respin Cycle
EpicRespin the Mystery Box to an equal or higher rarity.

Who's Keeping Score?
EpicDrops Double Points.
Free Fire
EpicNo ammo consumed for 60s.

Exit Strategy
EpicInstant exfil vote with fewer spawns.

Profit Sharing
EpicShare Essence with nearby players for 2 min.

Soda Fountain
EpicYour next perk buy grants +1 random perk.
Nowhere But There
EpicTeleport to a downed player and revive nearby.
Dead Drop
EpicIncreased salvage and equipment drops for 5 min. (Season 2)

Explosive Flourish
EpicEach reload triggers an explosion for 2 min. (Season 4)

Round Off
LegendaryThe round can't advance for 2 rounds.
Armor Gettin'
LegendaryA 3-plate armour vest plus full plates.

Hellping Hound
LegendarySummons a friendly Hellhound that follows and fights alongside you for 5 min; in Dead Ops Arcade it spawns three Hellhounds to fight for you for one round. (Season 4 Reloaded)

Idle Eyes
LegendaryZombies idle for 30s.
Wall Power
LegendaryYour next wall-buy comes Pack-a-Punched.

Immolation Liquidation
LegendaryDrops a Fire Sale.

Phoenix Up
LegendaryRevive all downed players, perks kept.

On the House
LegendaryDrops a Random Perk power-up.

Wall To Wall Clearance
LegendaryWall-buys cost 10 Essence for 30s.

Crate Power
LegendaryYour next box gun comes Pack-a-Punched.

Modified Chaos
LegendaryReduced Ammo-Mod cooldowns for 2 min. (Season 2)

Support Group
LegendaryGrants an ARC-XD, Mangler Cannon, Sentry and Mutant Injection. (Season 3)

Flavor Hex
LegendaryGrants a random Ultra gum. (Season 4)

Gift Card
Ultra+30,000 Essence.

Fully Packed
UltraInstantly upgrades your current weapon to Pack-a-Punch Level III. In Dead Ops Arcade it grants a tactical armour vest with full plates instead. (Season 5 Reloaded)
Perkaholic
UltraEvery perk on the map at once.

Wonderbar!
UltraYour next box spin is a Wonder Weapon.
Near Death Experience
UltraProximity revive with perks for 3 min.

Reign Drops
UltraDrops all core power-ups at once.

Hidden Power
UltraYour held weapon becomes Legendary rarity.

Time Out
UltraClear all enemies and end the round for 3 min. (Season 1)

Slaylist
WhimsicalPlays a random Zombies song. (Season 1)
Newtonian Negation · Indiegestion · Holiday Cheer · Quacknarok · Die Pitched · Rainburps · Jacked Lanterns
Whimsical7 cosmetic seasonal gums — flair only, no gameplay effect.
Field Upgrade reference (Black Ops 7)
Black Ops 7's 9 Field Upgrades — charged by kills, each augmentable at Level 11 (one Major + one Minor, plus an extra Minor slot). Six shipped at launch; Tesla Storm, Frost Blast and Mister Peeks returned in Season 1. The carried-over field upgrades reuse and extend Black Ops 6's augment options (see the BO6 reference above); BO7's full, distinct per-augment names aren't yet reliably published, so they're not itemised here rather than shown incomplete (honesty over guesswork — §11).

Energy Mine
A proximity energy explosion.

Frost Blast
A frost AoE that slows enemies.

Healing Aura
Instant heal beams (also revives teammates in BO6/BO7).
Aether Shroud
Phase out of enemy detection.

Tesla Storm
Lightning links players, stunning and damaging enemies.
Frenzied Guard
Repair armour and taunt enemies; kills repair your armour.

Toxic Growth
Thorn vines that slow and damage.
Dark Flare
A penetrating shadow beam.

Mister Peeks
Summons a decoy that attracts and attacks enemies. (BO7 new)
Dark Ops & mastery cards (Black Ops 7)
Global ‘Dark Ops’ challenge cards plus mastery/prestige — earnable on any map. Filter by category.

Another Round
Dark OpsReach Round 100.
The One
Dark OpsReach Round 999.
Anathema
Dark OpsEliminate 1,000,000 zombies.
Social Distancing
Dark OpsReach Round 20 without taking damage.

Invincible
Dark OpsSurvive to Round 50 without going down.
Armed to the Teeth
Dark OpsHold 3 Pack-a-Punch-III Legendary weapons with ammo mods and 8 perks.
Box Addict
Dark OpsBuy 30 Mystery Box weapons in a single match.
Harbinger of Doom
Dark OpsKill 100 zombies with a single Scorestreak.

The Usual, Please
Dark OpsDrink Jugger-Nog 20 times in a single match.

New Main
Dark OpsKill 1,000 zombies with each of the 8 dedicated Crew Operators.
Action Hero
Dark OpsKill 100 zombies without reloading.
Martial Artist
Dark OpsReach Round 50 using only melee and Combat Axes.

Ready for Publishing
Dark OpsFully research all Augments.

Countdown
Dark OpsKill an Elite by launching it with a jump pad.
Ingenuity
Dark OpsReach Round 50 with the Dragon Wings + Lawyer's Pen relics active.
Zombies Dark Ops Master
MasteryComplete 15 Zombies Dark Ops challenges.

Force Multiplier / Dead Set
PrestigeReach Prestige (harder at higher prestiges).
Intel
26 pieces — 14 Audio Logs, 6 Documents, 6 Artifacts. Each piece is 1,000 XP; collecting all 26 awards 10,000 XP and the Ol' Tessie Beams calling card. Seven pieces only appear after quest steps — the Farm ritual (Meat the Vandorns), the Serum puzzle (Ground Control, What Came After, Maintenance) and the Blackwater reel puzzle (the four film audio logs) — so sweep those spots as part of the step.
Audio Logs 14
#1 · Tilling the Earth
Vandorn Farm — in the farmhouse kitchen, sitting in a pan (face south-east).
#2 · Meat the Vandorns
Vandorn Farm — barn cellar, on the south-west wall shelf. Only appears after the farm ritual step of the main quest. (gameranx places it on the farmhouse cellar shelf at the foot of the stairs — check both cellars)
#3 · Ground Control
Zarya Cosmodrome — Control Room, south-east wall. Available after the Serum puzzle.
#4 · What Came After
Zarya Cosmodrome — down in the Flame Trench, on a box (face north). After the Serum puzzle.
#5 · She Got Hers
Exit 115 — in the kitchen of Reba's Diner.
#6 · He Got His
Exit 115 — inside McDougal's Service Station, on a shelf (face north-east).
#7 · The Price You Pay
Ashwood — Tailor Shop (east side, by Vulture Aid), on the west wall.
#8 · Craftsmanship
Ashwood — the Ruby Rabbit (west side), upstairs on a shelf (face north).
#9 · Cold Blooded Thriller
Blackwater Lake — the fishing hut, on the north-west shelf.
#10 · The Fate of the Flock
Ashwood — Ol' Tessie garage, east wall shelf.
#11 · Scene 27: The Drowning
Blackwater Lake — behind the Cabin, on the railing by the ammo box (face north). After the film-reel puzzle.
#12 · Study Room Monologue Rehearsal
Blackwater Lake — look out the south window of the fishing hut. After the reel puzzle.
#13 · Confrontation in the Parlor (Camera B)
Blackwater Lake — Cabin upstairs, on a shelf by the projector reel (face east). After the reel puzzle.
#14 · Director's Notes: Improv Test
Blackwater Lake — Toolshed, on the shelf below the projector reel (face north-east). After the reel puzzle.
Documents 6
#1 · Cut
Blackwater Lake Toolshed — stand on the odd-coloured floorboard and shoot the dartboard bullseye to drop it.
#2 · Maintenance
Zarya Cosmodrome Control Room (behind Wisp Tea) — shoot the stack of papers on the north-east shelf.
#3 · Signal Fires
Ashwood — take the east zipline up, look back at the Ol' Tessie garage and drop right onto the platform.
#4 · Playmates
Vandorn Farm — reload-interact the haystacks and hay barrels until it pops (often the cart haystack just before the Barn).
#5 · Evidence
Exit 115 — inside McDougal's Service Station, under two spray cans (face north-west).
#6 · Good Game
Buy Melee Macchiato (Blackwater Cabin or Der Wunderfizz at Janus Plaza), then melee-punch the tank nearest the Jump Pad in Janus Towers Plaza.
Artifacts 6
#1 · T.E.D.D. Head
Spawn — open the Server Room, melee the floor grate and pick up T.E.D.D. (main quest, unmissable).
#2 · Mirror of the Forgotten
With Wisp Tea active, crack the Tailor Shop mirror then shoot it with the Gauntlet; picking up the Powder of the Forgotten grants it.
#3 · DG-2 Turret
After the Serum puzzle, pull the 3 Fog keys (Crashed Rocket, Orda Graveyard, Grounded Ship) with the Gauntlet and deliver them to the Rabbit Alley chest; spawns after a cutscene.
#4 · Seal of Sorrow
Awarded automatically during the main quest once the Rabbit Alley chest is opened (after all 3 keys are delivered).
#5 · Necrofluid Gauntlet
Granted automatically on completing the Gauntlet quest — which starts by freeing Klaus in the Ashwood Sheriff's Office.
#6 · Hellion Horn
Final main-quest step: after the Exit 115, Zarya, Vandorn and Blackwater trials, bring Klaus to the wisp-covered lockbox in the Cabin's upstairs (Speed Cola) room and ping it.
Cursed Mode relics
Nine relics on Ashes of the Damned — three Grim, three Sinister, three Wicked. Samantha's Drawing was the last to fall, found two months after the other eight.
Cursed is Black Ops 7's hardest mode, and it needs no unlock — anyone can load it. It strips the run back: you start with a 1911 and no loadout weapon, there is no minimap, no objective markers and no quest progress bars, and every Pack-a-Punch tier costs double — 10,000, 25,000 and 50,000 Essence. Points work the Black Ops III way: melee kills pay more than shots, and any non-lethal hit pays 10.
Relics are not buffs. Every one is a pure downside. What you get back is the Cursed Tier they add up to. A Grim relic fills a third of a tier bar, a Sinister two thirds, a Wicked a whole one — so Tier I is three Grims, or one Sinister plus one Grim, or a single Wicked. Tier I puts Golden Armor on sale after Tier III armor, for 45,000 Essence. Tier II unlocks Ultra rarity — 8,000 Salvage on top of Legendary, or 17,500 from Common. Tier III unlocks Pack-a-Punch IV, for 100,000 Essence. You can equip as many relics as you like, but nothing improves past Tier III.
To earn a relic you finish a hidden side quest, which spawns a Relic Portal, then clear the Relic Trial behind it. Two things catch people out. Relic progress is not saved — the side quest and its trial have to be done in one sitting. And you can only equip a map's relics once you have finished that map's main quest. Inside a trial your own relics are switched off, so the trial's rule is the only thing working against you. Every first-time clear pays 1,000 XP and a GobbleGum.
On this map: Relic Trials here lock you inside the POI the portal spawned in.
Lawyer's Pen
What it costs you: Shock Mimics infiltrate every map you play, disguised as ordinary props.
- 1The Fog — cabin nearest Ashwood
Light the candle in the fog cabin
Three unlit red candles sit around the map, and each is lit by shooting it with a Napalm Burst weapon or throwing a Molotov at it. This one is by the couch, in the cabin closest to Ashwood in the fog between Ashwood and Blackwater.
- 2Ashwood — the Jugger-Nog room
Light the Ashwood candle
On the shelf above the couch.
- 3Vandorn Farm — top of the house
Light the Farmhouse candle
On the nightstand to the left of the bed.
Confirmation cue: a Mister Peeks laugh once all three are lit.
PortalThe side of the barn at Vandorn Farm, once all three are lit.
Relic TrialFour waves of Shock Mimics at the Farm. Waves two and four bring HVT Shock Mimics. Brain Rot is their weakness.
First clear pays1,000 XP and a Respin Cycle GobbleGum.
Dragon Wings
What it costs you: Power-ups stop dropping from kills. GobbleGum and side-quest power-ups are unaffected.
- 1Vandorn Farm — the jump pad
Take the Jump Pad to Janus Towers Plaza
All three in one flight is doable, and a miss just means another jump — but know where you are looking before you launch.
- 2Over Janus Towers Plaza
Shoot three purple portals in mid-air
One on the power pylon to your left. One on Tower 1, in the middle of your flight path just above spawn. One on the ruins of Tower 3 to your right.
PortalThe south-east wall of the Farmhouse at Vandorn Farm. (One guide puts this on the Barn — that is the Lawyer's Pen portal; the wiki and three other guides say Farmhouse.)
Relic TrialFour waves at the Farm — zombies and Doppelghasts on one and three, HVTs on two and four. Power-ups still spawn but do nothing, and picking one up damages you.
First clear pays1,000 XP and a Free Fire GobbleGum.
Teddy Bear
What it costs you: Round-start delay cut by 75%. Zombies arrive at Rampage Inducer pace, without the extra speed and aggression.
Before you start: Save-and-quit resets the dolls, and the tenth only appears from round 20 — do it in one sitting. The Extension and Extra Charge augments on Aether Shroud help.
- 1Anywhere
Shroud up — they are invisible otherwise
The ten Mister Peeks toys can only be seen while Aether Shroud is active, and you shoot them with the Necrofluid Gauntlet.
- 2Map-wide
Shoot all ten Mister Peeks
- Left side of the archway in Janus Towers Plaza leading to the Monolith Forest
- The underside of the shipwreck
- A ladder platform on the grain silo, Vandorn Farm
- In a toilet behind a barrier, Blackwater Lake Cabin
- The broken-down side of the Ashwood church
- An inaccessible staircase just outside Rabbit Alley, Ashwood
- The first utility tower at Zarya Cosmodrome, next to the Ashwood gate
- Right side of Support Systems at the Cosmodrome, inside a barrier on top of a machine
- Top right of the cabin storage, Lost Cabins
- The freeway sign on the Exit 115 bridge — this one does not appear until round 20
PortalThe Garage at Vandorn Farm — the small shed with the Armour wall-buy, north wall. (Two guides say near Exfil or the Mystery Box cabin; the wiki and the two best guides agree on the Garage.)
Relic TrialFour waves of zombies at the Farm, and every shot you fire costs 100 Essence. Bank hard first, and lean on equipment and traps. You can still fire at zero — you just leave broke.
First clear pays1,000 XP and a Who's Keeping Score? GobbleGum.
Vril Sphere
What it costs you: You can only carry four perks. A fifth replaces whichever you have held longest — Quick Revive is never replaced. Random Perk power-ups, Mystery Perk and some GobbleGums get around the cap.
- 1Any jump pad
Kill a Doppelghast with a Jump Pad
From round 40 a Doppelghast spawns every round. Lead one onto a jump pad and let the pad do the killing.
Confirmation cue: Mister Peeks laughs.
Weaken it with bullets first — stand on the pad, let it hit you, then fire the pad so it is launched and killed by it.
PortalZarya Cosmodrome, by the rocket — the south-east wall, at the ramp.
Relic TrialFive waves at the Cosmodrome, two of them HVT waves. You cannot buy anything at all for the duration. Buy ammo, perks and plates before you step in; the Necrofluid Gauntlet's infinite ammo makes it comfortable.
First clear pays1,000 XP and an On The House GobbleGum.
Samantha's Drawing
What it costs you: Every weapon you are holding swaps for a different one at each round change. Pack-a-Punch level and rarity carry across.
- 1Chompy — the roaming bin
Feed Chompy one weapon of every rarity
Common, Uncommon, Rare, Epic and Legendary. Your starting Jäger 45 is the only Common you will get all match, so feed it early. Uncommon and Rare also stop being obtainable later on, so clear all five well before round 40. Ultra rarity is not needed.
Chompy need not be the same bin each time — any active spot counts. Sources agree on the six-rarity order; one guide lists only five tiers, so treat six as correct.
- 2Chompy
Feed him a Ray Gun on round 40 or later
A Ray Gun or Ray Gun Mark II specifically — no other Wonder Weapon does it.
PortalZarya Cosmodrome, outside Yuri's Lab.
Relic TrialFive waves of zombies and HVTs. Ammo Caches and Max Ammos are disabled throughout. Elites still drop ammo. War Machine and the Gauntlet recommended.
First clear pays1,000 XP and a Respin Cycle GobbleGum.
Focusing Stone
What it costs you: No craftable Self-Revive kits. Solo you are down to Quick Revive's augments and GobbleGums; in co-op a teammate can still pick you up.
- 1Blackwater Lake — the cabin bar
Interact with the bar to spawn three bottles
Three wine bottles appear. Two more have to be brought to them.
- 2Anywhere · round 40+
Melee-kill a Zursa for the fourth
Shoot it down first if you want, but the killing blow has to be a melee. It drops a bottle — carry it back and place it with the others.
Melee Macchiato plus a Pack-a-Punched Gauntlet and Aether Shroud makes the melee kill safe.
- 3T.E.D.D.
Complete a T.E.D.D. task for the fifth
The task has to pay a legendary reward; the fifth bottle drops alongside the reward box. Place it on the bar.
- 4The cabin bar
Shoot the five back in order
As the last bottle goes down the five smash one at a time in a random order — memorise it, then shoot them in that same order when they respawn.
PortalThe Flame Trench under the rocket at Zarya Cosmodrome — the west wall of the trench.
Relic TrialFive waves, HVTs on two and five, with your whole Essence balance forfeited for the duration. You can earn more inside the trial and the balance comes back when you finish — so go in fully stocked.
First clear pays1,000 XP — and, on the wiki's word alone, a Phoenix Up GobbleGum.
Bus
What it costs you: Enemy health slowly regenerates if you leave them alive.
Before you start: If the Necrofluid Gauntlet has been used against a Shock Mimic at any point this game, the relic becomes impossible. The Mimic disables the needles, and they stay on the map counting as fired projectiles for the rest of the run. Solo, save and reload to clear them off.
- 1Anywhere
Clear a whole round without firing or meleeing
Not one shot and not one melee, for an entire round. The reliable way is the Saw Blade trap on a Ravager round — it runs for the whole round and kills everything without you having to touch anything.
Two guides add that you must take no damage during the round either — play it as both. Running Ravagers over in Ol' Tessie is the other reported method; the Saw Blade in the Ashwood Shops, opposite the Ruby Rabbit, satisfies every wording. A laugh at round end confirms it.
PortalAgainst the boathouse at Blackwater Lake.
Relic TrialSix waves in which only zombies can kill zombies — every point of damage you deal is negated, so Brain Rot is required (Caustic Fumes and Super Serum augments recommended). HVT waves bring Zursas and Doppelghasts.
First clear pays1,000 XP and a Wonderbar! GobbleGum.
Dragon
What it costs you: Every Ammo Cache on the map is disabled.
- 1Map-wide
Finish Dust to Dust in this same run
The full Ashes of the Damned main quest, completed at round 60 or later in this Cursed game. The walkthrough for it is further up this page.
Beat Veytharion, press Continue on the end screen, and Mister Peeks laughs.
PortalThe west wall of the Cabin at Blackwater Lake, near the landing pad.
Relic TrialZombies can only be killed by explosives — Ray Gun, Kazimirs and the Necrofluid Gauntlet's detonated barbs all count. HVT Doppelghasts and Zursas on waves three and six.
First clear pays1,000 XP.
Blood Vials
What it costs you: All augments are switched off — perks, field upgrades and ammo mods alike.
- 1One of nine spots
Answer the ringing red phone on round 20
It rings loudly and for long enough to check everywhere, but you have to reach it before it goes. The nine possible spots — only one rings at a time: the Server Room at Janus Towers Plaza · the Control Room at Zarya Cosmodrome · the Toolshed at Blackwater Lake · a table on the first floor of the Farmhouse · Hargroves Mercantile in Ashwood · Market Square in Ashwood · the Service Station at Exit 115 · behind the counter in the Diner · one of the Lost Cabins between Ashwood and Blackwater.
- 2The same nine spots
Do it again every ten rounds, five times in all
It can come back to the same place or a new one. Miss one and you wait ten rounds for the next, which pushes the finish out to round 70, 80 or further.
Confirmation cue: Mister Peeks laughs each time, and after the fifth the phone stops disappearing.
PortalInside the Cabin at Blackwater Lake, west wall. (The wiki says Zarya Cosmodrome; three guides say the Cabin.)
Relic TrialYour weapon damage is halved for the duration; HVT Shock Mimics and Doppelghasts on waves three and six.
First clear pays1,000 XP.
When it isn't working
The stalls that actually cost people runs on this map, and what to do about each.
Doing everything right and nothing happens?
Common Ashes of the Damned questions
Direct answers to the specific things players look up mid-game — part locations, puzzle steps and more.
How do you kill the Uber Klaus on Ashes of the Damned?
How do you wake Klaus on Ashes of the Damned?
How do you pass the retina scan on Ashes of the Damned?
How does the ethereal clock work on Ashes of the Damned?
What are the four soul quests on Ashes of the Damned?
What is the Ashes of the Damned song?
How do you get the free Ray Gun Mark II on Ashes of the Damned?
Visual guides & sources
Screenshots and exact part locations live in these — open one on a second screen.
Map discussion
A shared community board for Ashes of the Damned — posts are public, saved on the server and visible to everyone across devices. Handy for strategies, spawn variations you've noticed, or steps to double-check. Please keep it civil and on-topic.