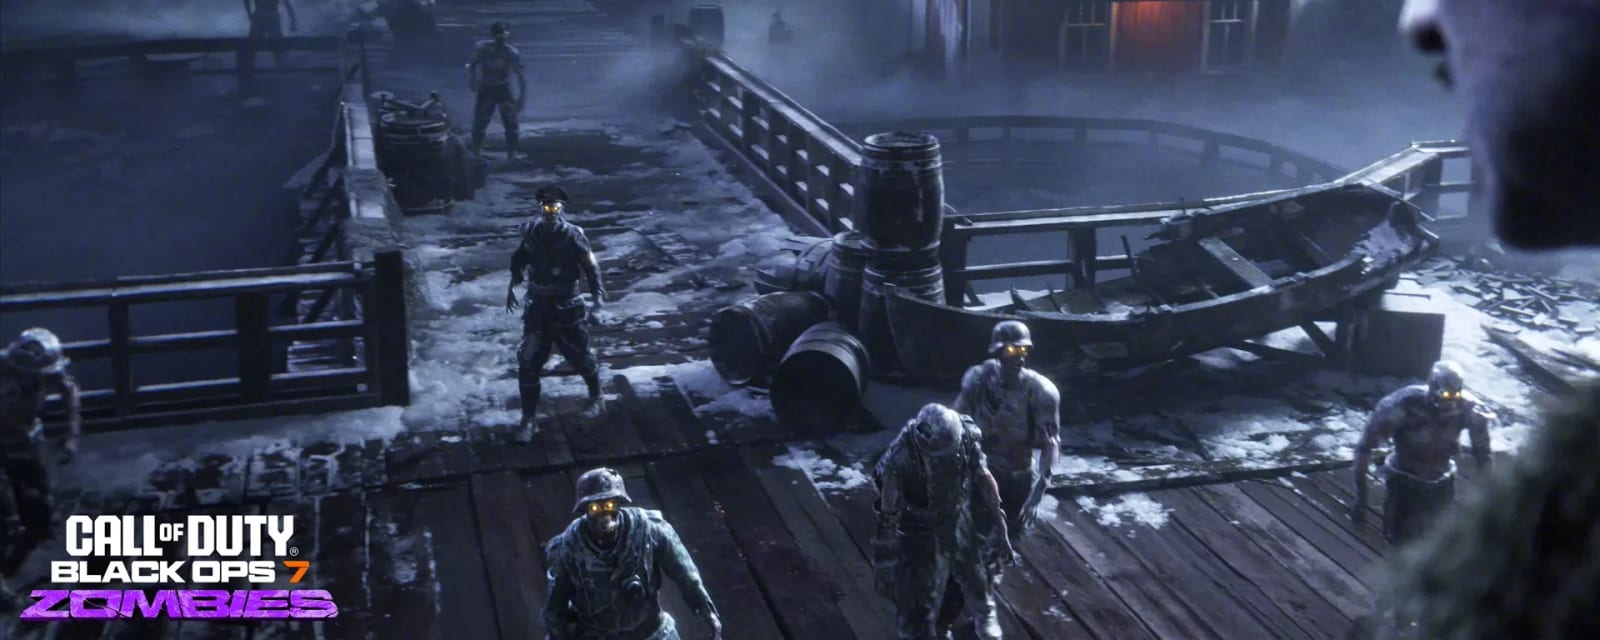
Totenreich
Eidskallen, a Norse fishing village frozen into the Dark Aether over a Group 935 site. Build the ice-flail Jotunn Star, power the Atomkraft Core, and free the Shadowsmith from the giant Dravakar.
Quick answers
Totenreich is a Black Ops 7 Zombies map set in Eidskallen, a Norse fishing village frozen into the Dark Aether over a Group 935 site. Its 11-step main quest has you build the ice-flail Jotunn Star, gather three uranium rods to power the Atomkraft Core, light three rune bonfires, and free the Shadowsmith by defeating the giant boss Dravakar. Rated Hard; solo-capable.
Where is Pack-a-Punch on Totenreich?
What is the Wonder Weapon on Totenreich?
Who is the boss of Totenreich?
How do you get the three uranium on Totenreich?
How many steps is the Totenreich main quest?
How do you complete the Totenreich Easter egg?
- Repair the power lines → Tyr's head → admin keycard → GobbleDrop → Pack-a-Punch
- Chain links from the Titan crane wall-jump, chili chunks from Storm Bridge
- Constellation shrine in order: left, right, back, front
- Fill Astrid's soul boxes → lighthouse parkour → Jotunn Star
- Crowbar + cargo manifest → open the matching crate for a flak round
- Fire the flak cannon at the robot head → transmitter into Tyr
- Read the blinking lights → oscilloscope amplitude and frequency
- Uranium 1 — RC-XD into the genetic lab, heads puzzle and lockpick
How long does the Totenreich Easter egg take?
Can you do the Totenreich Easter egg solo?
What are the main areas on Totenreich?
How many side Easter eggs are on Totenreich?
Are there solvers for the Totenreich puzzles?
When was Totenreich released?
Map & Key areas
The map layout first, then the areas worth knowing by name. Map imagery © Activision, self-hosted.
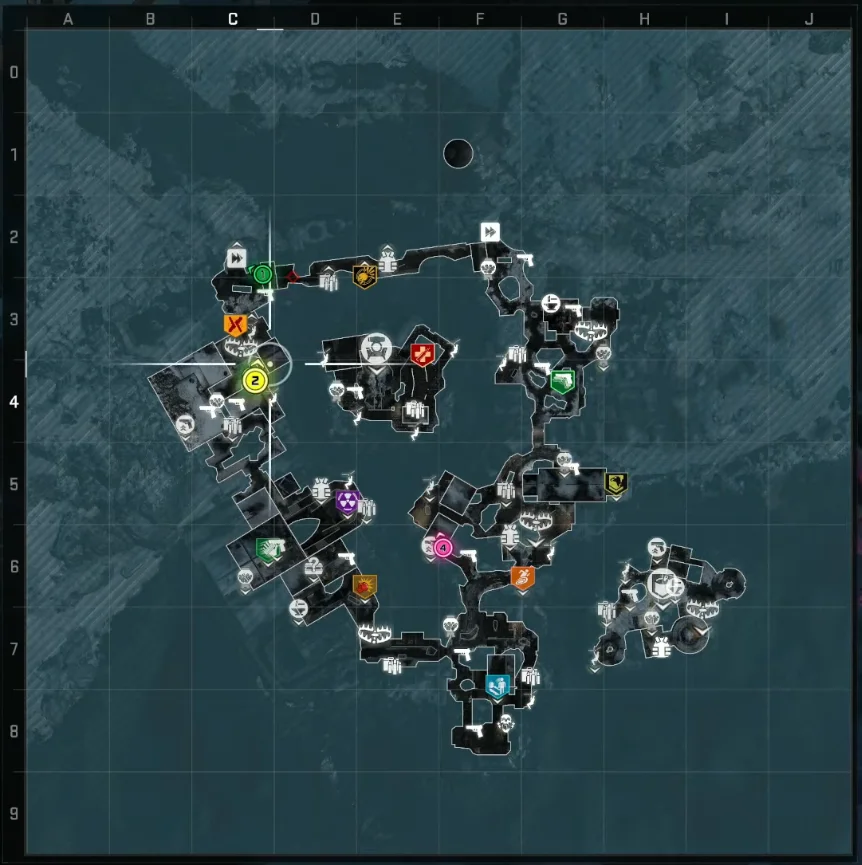
Pinch or double-tap to zoom in — the full map is a single image.
Fishery Island
Central hub — Pack-a-Punch lands here via the Glocke Drop.
Tyr's Head / Foot
The collapsed giant robot; Admin Keycard & the boss console.
Dry Docks
Titan Crane — the Jotunn Star chain.
Skallen Market / Burial Grounds
Chilli Chunks, Zursa HVT, constellation puzzle.
Lighthouse / Beacon Island
Jotunn Star pickup; Crowbar; the Flak cannon.
Blodheim Hall / Stave Church
Dravakar Shard bonfire; the rune sequence.
Steps at a glance
- Repair the power lines → Tyr's head → admin keycard → GobbleDrop → Pack-a-Punch
- Chain links from the Titan crane wall-jump, chili chunks from Storm Bridge
- Constellation shrine in order: left, right, back, front
- Fill Astrid's soul boxes → lighthouse parkour → Jotunn Star
- Crowbar + cargo manifest → open the matching crate for a flak round
- Fire the flak cannon at the robot head → transmitter into Tyr
- Read the blinking lights → oscilloscope amplitude and frequency
- Uranium 1 — RC-XD into the genetic lab, heads puzzle and lockpick
- Uranium 2 — fish the green fish, chase the ravager HVT across three spots
- Uranium 3 — GobbleDrop, kill only the floating zombies
- Claw machine → escort the Atomkraft core to Storm Bridge
- Dravakar shard → sunstone → light the three bonfires in rune order
- Boss: red weak spots, then Viking heads, then the eyes
Before you start
What to have in hand before step 1 — from the loadout notes, from the walkthrough itself, and from the map's own quest documentation where the gate is never stated in a step.
- Aether Shroud Field Upgrade — Setup & safety
Set aside 50–80 min · 1–4 (solo-capable) · the full loadout is further down this page
Full walkthrough
The quest in the order this guide runs it — tap any step to jump to it, and it fills in as you tick steps off.
Power and Pack-a-Punch
Standard mode prompts you through this. In Cursed mode there is no guidance, so the sequence is: repair the broken power lines on both sides of the map, then enter the robot’s head (Tyr) through the yellow suction circle top-left or top-right and hold interact on the centre console.
You are ejected — and so is a zombie, which splats and drops an admin keycard. Use it on the War Factory admin door on the west side, take the GobbleDrop controller inside, zipline to Fishery Island and sink the drop. Pack-a-Punch spawns a moment later.
Loadout: a Voyak or Novaline, and a hitscan AR for the boss — avoid the Ray Gun there, since projectile travel makes you miss. Akimbo M1911s are superb for wave-clear and one-shot the floating Viking heads. Solo, take Frenzied Guard: there are no max-armour drops in the boss fight.
Know your lantern early. The Jotunn Star melees in a double swing, charges from melee kills into a ranged fireball on left trigger, and — crucially — holding it out while charged keeps you and nearby teammates warm against freeze effects.
Quick win: Intel at spawn before you touch anything: Building Blocks on the barrel outside Lief's Boat Repair opposite Quick Revive, The Chair Incident in the small barrel right of the big one by the robot head (a message in a bottle), and the Max Armor statue behind the hanging basket inside Lief's — C4 it. Once Tyr's Head has been activated, the Talk audio log is on the control terminal by the robot head in the lower War Factory, and Priorities drops when you Semtex the open vent up the War Factory stairs facing the Arsenal.
Two Jotunn Star parts
Chain links. At Dry Dock, press the button in the Titan crane room to temporarily lower the crane-held wall. Then wall-jump off the middle of the wall and hold interact mid-air at the tip of the boat to grab the chains. Miss it and simply press the button again.
Chili chunks. Take the tin from the crate behind the truck in the middle of Storm Bridge, next to Deadshot, and place it on the table in Skalland Market.
The timing rule: place it before round 10 and the round-10 special round is your trigger; place it later and the next round becomes a special round. On that round a zursa HVT spawns — kill it for the lantern part.
Cursed only — The Dancing Arnie relic eats the same Chilly Chunks can. Put the first can in the Blodheim Hall stew pot, then explode the back of the truck for a second can for the Star.
The constellation shrine and Astrid
At the Burial Grounds, install the chains on the left side of the sealed door and hold interact to repair it — it takes a while — opening a secret basement. Place the lantern on the shrine and four constellations appear around its sides.
The order is strict: match each table constellation to the same one rotating around the walls, interacting left, right, back, then front as viewed from the stairs. A correct pick leaves the shrine constellations in place and sends an orb into the lantern. On a wrong pick the wall symbols vanish — interact with the symbol on the tabletop to send them back and restart.
The other guide: MrDalekJD instead reports the shrine symbols changing on a wrong pick, forcing a restart from the left.
Astrid. The ghost appears over the shrine. Follow her around the Burial Grounds edge; she relocates through Skalland Market and settles at soul-box stops, where you kill masses of zombies nearby to fill her meter. Her second stop is near the zipline toward the lighthouse.
Useful trick: keep one zombie alive to carry a fill across a round boundary.
The parkour — do not zipline. When her meter fills, floating platforms spawn. Start the jumping puzzle on the non-lighthouse side, climbing the rocks, with Kazimirs or Shroud ready for the heavy zombies. At the lighthouse, watch the ice giant rise from the ocean through the hole, then run onto the platform in front, drop down and wall-bounce across the course to the top. Inside and up the stairs there is a ladder into the lamp room — take the Jotunn Star off the table. The window is time-limited.
Quick win: In the lamp room, take Tyr's Bell off the table BEFORE the Jotunn Star — the room seals once you hold the Star. Radio Operator opens on the second floor afterwards, under the stairs by the crowbar cabinet, so grab it with the crowbar in the next step.
The flak cannon
Take the crowbar from the shelf on the second floor of the lighthouse, and the cargo manifest from the shelf back-right of the War Factory admin room.
Read the manifest before opening anything. Find the row with the three-bullets icon and note its ID code. That tells you which crate is safe — the wrong crates hit you with EMP and cough-gas effects.
Crowbar the crate matching that ID — they sit in the War Factory, the bottom of Core Foundry, under the boat in Dry Dock, and on Fjord Road — for a flak gun round.
Load it into the specific cannon pointing at spawn by the lighthouse, interacting at its very back — the other cannons do nothing — then melee the back of the cannon with the Jotunn Star. It fires at the robot head in spawn.
Quick win: The Bonus Points statue is behind the barbed-wire fence on the north-east side of the lighthouse, on a crate — Beacon Island needs power first. Fishing here is worth the rod: Olaf's Cod Cranker spawns between the two red barn-style houses by the artillery gun (sometimes on Fishery Island), any red clip is a fishing spot, and catches include essence, salvage, equipment and killstreaks — fish enough and a helmeted Olaf, Cranker of Cod zombie spawns wearing the Golden Tide Helm, which speeds up every later cast.
Flak Gun Crate Helper
War Factory manifest → 4 cratesThe Cargo Manifest in the War Factory Admin Room marks which crate holds the PZGR .39 (the Flak Gun Round). Pick the ID from the ammo-icon row to see where that crate is, or just tick crates off as you brute-force them — a wrong crate is only a ~30-second gas/EMP debuff.
The transmitter and the blinking lights
At the robot head, hold interact to search it — a big salvage payout — then interact again for the transmitter. Carry it into Tyr’s head and install it at the sparking panel up the ladder to the left.
Reading the code: standing at the panel, two white lights — LEFT and RIGHT — each flash two numbers across two sequences. Both flash in unison first, then each continues alone, and the total count per light per sequence is its number. Watch one light per pass if that is easier; there is no penalty for re-watching.
Molotov the frozen rope in Core Foundry and climb to the oscilloscope. Amplitude is the LEFT number, frequency is the RIGHT. Enter sequence one and you are kicked out as the Origins robot fires a rocket strike. Wait about thirty seconds for the console to reactivate, then enter sequence two for the second strike.
Fail state: a wrong entry locks you out for 60 seconds — no round skip needed. If you are unsure of a count, trialling one either side is faster than re-watching.
Finish: collect the Wunderbarrage controller from the newly opened box next door.
Quick win: Tyr's Head hands out a free power-up every round if you want it: the terminal inside shows map coordinates and a kill count — get the kills there, come back for green lights, and on the next round collect the power-up and a new set. Ten completed cycles (one guide says fifteen) award the Cointoss Helm, a coin-flip chance of a power-up on your next kill.
Console Tuning Helper
Tyr's Head → consolesCount how many times the lights blink inside Tyr's head. Left blinks set Amplitude, right blinks set Frequency — enter each sequence and the console settings show below.
Uranium 1 — the genetic lab
Take the free RC-XD from the crate in Eid Skalland Square. In Core Foundry, shoot the metal grate on the wall and deploy the RC-XD into the hole.
The drive: down the ramp, then jump the water gap aiming slightly right — the tilted ramp drifts you left, which is what sinks most attempts. Land by the little sailboat, drive into the room and detonate at the front door. That opens the Group 935 genetic lab, which you enter from beside Pack-a-Punch via zipline.
Heads in jars. Five jars labelled A to E sit around the lab, and through the window a corridor shows five numbered doors, two bearing radiation symbols, randomised per game. Convert those two numbers to letters — 1 is A through 5 is E — and place the matching two heads on the machine in order.
Confirmation cue: the third jar fills purple. Blue means wrong — return the heads and re-read the doors.
Interact with the crab claw on the opposite table; it dissolves into a necro spike lockpick. Rotate the pick until the shutter section glows white and lock it in, three times over, and the cell opens on uranium #1.
Quick win: Two intel pieces are in the lab: Limitations on the table immediately left of the entrance and the Anatomy Chart on the east wall. The free Disciple Injection in the stave church next to Skallen Market and the free ARC-XD on the crates by the burning vehicle in Eidskallen Square are both on your way.
Genetic Lab Jar Solver
Group 935 Genetic Lab — Fishery IslandIn the south corridor, two of the five numbered doors (1–5) have a radiation symbol. Tap those two — the jar letters to place populate live (1=A … 5=E).
Uranium 2 — the irradiated ravager
Fishing rods spawn all over — Dry Dock, Storm Bridge, Fishery Island, Beacon Island. Fish at the red metal clips: hold interact to cast, then interact again when the rod glows blue.
The green fish only appears once you own the Jotunn Star, so do not waste rounds hunting it early. Fish anyway though — it yields useful side loot regardless. There are around eleven spots: two at Eid Skalland Landing, three around Dry Dock, one on Tyr’s shoulder leaving the bridge, two at Eid Skalland Square, one immediately right off the Fishery Island zipline, and one in front of each flak cannon.
Catch it and an irradiated ravager crawls out, goes immune and despawns. The next round it returns as an HVT on your tac-map, roaming among the normal ravagers.
The chase: burn about a third of its health and it relocates — track the HVT icon. Repeat at the second spot, and kill it at the third for uranium #2.
Quick win: While fishing, a fish from the wall by the Beacon Island Arsenal plus a Shock Charge dropped on your next T.E.D.D. Task gives the parts for the Fishy Fish Bot trap, crafted in Loven's Antiquities — it is also the Fishy Fish Bot artifact.
Uranium 3 — the GobbleDrop
Call a GobbleDrop — craft one, fish one up, or use the Pack-a-Punch one if you still have it — with a large horde already gathered, because the horde is the whole mechanic.
Zombies near the drop float and glow orange. Kill only the floating zombies, around twenty of them; each batch lights one of the three side-lights green.
Progress cue: the three side-lights, not a counter. All three green and it departs, spewing rewards including uranium #3.
The claw machine and the core escort
Fire the Wunderbarrage at the ground in front of the blocked Dry Dock staircase door by the crafting table to clear the debris into the Machine Workshop. The doors can take up to a minute; re-barrage and wait if it seems stuck.
Load the three uraniums into the claw machine and drop the three rods onto the right-hand grid to push the meter into — not past — the green zone.
How the scoring works: an isolated rod with no neighbour adds a tiny charge; each yellow adjacency line adds a big one, and the target is usually seven or eight lines. Put the first rod into the biggest existing cluster for four or five lines, then adjust: need more, place adjacent; about to overshoot, place the last rods isolated in a corner touching only each other.
One attempt per round — plan the whole placement before you interact.
Carrying the core: no sprinting, you slowly lose health, and it auto-drops if you zipline, enter the robot head or go prone. Route accordingly.
Carry it to spawn, place it on the box right of Quick Revive, activate the generator in the shack behind and defend. The charge stalls twice — re-flip the shack switch each time and keep defending.
Then carry the charged core on foot to the black barrel with the yellow stripe mid-Storm Bridge, smashing or dodging the mini-icebergs that erupt on the way — a lantern melee destroys them. The robot’s claw takes the core, and the Origins robot fights the ice giant.
Quick win: Nuke statue: behind the Riesenroboter head in the War Factory, on the electrical box — shoot it as you leave. Full Power: on the stern of the Dry Dock ship opposite Speed Cola. Saboteur is on the barrel right of Speed Cola.
Claw Machine / Atomkraft Core — how it works
Machine WorkshopThis step is a randomised circuit puzzle, so there's no fixed answer to look up — but the rule is simple once you see it.
The sunstone and the bonfires
Pick up the Dravakar shard on the left side of the bridge near Tyr’s foot. Place it on the spit over the fire pit in Bloodhelm Hall, then fire a charged Jotunn Star shot at the meat to light a blue flame beneath it.
Take the free Disciple Injection from the church and use it in the hall to grab zombies and hurl them at the meat — about four clean hits starts the lockdown.
No round-waiting needed here despite the launch-day rumour — just keep throwing.
A named Necropincer HVT spawns and you are handed an insta-kill and max ammo. It drops the sunstone near where the meat cooked — not always at its feet, so sweep the area.
Place the sunstone on the church podium and melee it with the Jotunn Star. A rune compass appears in the sky above the church: the arrows with one, two and three slashes are your first, second and third symbols.
Strict order: light the bonfire mound matching arrow 1 with a charged lantern fireball, then arrow 2, then arrow 3. Mounds sit at the burial grounds, Eid Skalland Square, by the lighthouse, the spawn room and left of the bridge. A wrong fire re-scrambles the dial and you start over.
Confirmation cue: all arrows align one way, and the boss unlocks at the panel in the robot’s head.
Quick win: Insta-Kill statue on a gravestone through the break in the wall on the right of the Burial Grounds path; Double Points on the rock under Tyr's left claw, seen from Storm Bridge.
Fireplace Rune Order Tracker
Rune circleWhen the rune circle rises, arrows point to specific runes. Tap the rune each arrow points to, in arrow order — the shooting order builds below. Then shoot the wooden pile beneath each rune in that order. Match the runes by shape.
Boss fight — Dravakar
While the Origins robot brawls Dravakar, shoot the red weak spots that open on his body — he is a genuine bullet sponge, so sustained damage is the whole game.
When he goes immune, floating Viking ice-heads spawn — one, then two, then three across the fight. Charge the lantern and fireball each head’s open mouth to knock it down. Akimbo M1911s one-shot them. Take the heads fast: they drop ammo and armour, and they are the only armour source in the fight.
Free charge: the arena traps create a circle that refills the lantern’s ranged charge — stand in it and spam rather than hunting melee kills.
Hazards: an area-freeze that leaves one third of the arena safe — run to it, or hold the charged lantern out to keep yourself and nearby teammates warm. Ice meteors mean hiding behind pillars and peeking for crits. Red pulsing ground means leave that area. Floor geysers launch you — dodge or lantern-melee them. For ammo, melee the frozen middle ammo box with the Jotunn Star to unfreeze it, then buy.
Final phase: his glowing red eyes become the weak spot and he cages you into the middle arena, where a Max Ammo waits. He then rains meteors in set patterns — S-sweeps to weave through, V-shapes to stand in the gaps of, an arrow running back to front, and a ground-level horizontal line you must go prone under. Pop Near-Death Experience or Frenzied Guard and pour crit damage into the eyes. Downed solo players can shoot the eyes to self-revive with Equivalent Exchange.
Quick win: Playing Richtofen? After round 15 the Melee Macchiato punch on the barrel outside Core Foundry (south side) starts his side Easter egg: three radio codes in Von List's room — 01-01-05, 09-03-05, 07-00-04 — pay three audio logs, the three documents are unmissable on the way, and finishing it banks the Ritterkreuz artifact.
Side Easter Eggs & extras
Everything beyond the main quest. Tap any entry to open the full how-and-where breakdown.
“No One There”
3 Mister Peeks headphones — the first is in the Dry Dock, right of Speed Cola below the ship.
- Interact with 3 Mister Peeks headphones, in any order
- Dry Dock — under the boat on stilts; drop to the lower level, right of Speed Cola, on the stacked pallets
- Core Foundry — the small room opposite Double Tap, in the corner between the two doors
- Loven's Antiques, Eidskallen Square — in the cupboard behind the glass case, bottom row (across from the Tier-2 Armor wall-buy)
- 'No One There' by Kevin Sherwood & Vicky Psarakis plays
Hidden power-ups
Max Armor (Lief's Boat Repair basket), Max Ammo (Fishery Island by Juggernog), Full Power (Dry Dock ship stern), Insta-Kill (Burial Grounds gravestone), Nuke (War Factory behind the robot head), then Fire Sale (above Loven's Antiquities) and a Random Perk once the rest are collected.
- Collect the static hidden power-ups; the Fire Sale and Random Perk only appear after the rest
- Max Armor: Lief's Boat Repair, behind the hanging basket (north entrance). Max Ammo: Fishery Island, on the back of the ship opposite Speed Cola
- Full Power: Dry Dock ship. Nuke: War Factory, on an electrical box by the robot head. Double Points: Storm Bridge, under the giant's left hand
- Insta-Kill: a gravestone toward Burial Grounds. Bonus Points: Beacon Island, in a barbed-wire fence gap
- Fire Sale: above Loven's Antiquities (2nd floor of the burning Eidskallen Square building) once the rest are collected
- Random Perk: unlocks alongside the Fire Sale (its exact spot isn't documented yet)
Tyr coordinates — repeatable power-up
Inside Tyr, read the flashing letter+number screen, ping that grid square on the Tac Map, get that many kills there, and a random power-up spawns on Tyr's balcony. Repeatable every round; 10 completions unlocks a Viking helmet that boosts power-up drops.
- Turn on power and enter Tyr's Head to the terminal station
- The Gruppe 935 screen flashes a letter+number coordinate (e.g. E 2)
- On your Tac-Map, the letter is the X-axis and the number the Y-axis — that grid cell is your target zone
- A second number is the kills required there (roughly 5-95) — go and get exactly that many kills in that zone
- Return to the station for a free power-up; it's repeatable each round, and 10 completions unlock the Cointoss Helm (better power-up drops)
Fishing & Viking helmets
Grab a Fishing Rod (spawns near water/barrels) and fish at 11 spots. Enough catches reels in a zombie wearing the Golden Tide Helmet (better fishing loot, faster fishing). Four Viking helmets exist, each with its own unlock.
- Get a fishing rod from a barrel (reliable at Fishery Island)
- Cast at the 11 fishing spots — each cast can pull a boot instead of a fish
- A boot becomes Olaf, Cranker of Cod (a helmeted zombie); kill him and take the Golden Tide Helmet (better/faster fishing)
- The four Viking helmets: Golden Tide (beat Olaf), Cointoss (Tyr coordinates ×10), plus the Kneehigh and Icebane helms (further Easter eggs — exact steps not fully documented)
Richtofen's barrel
As Richtofen: buy Melee Macchiato, reach round 15, then punch the barrel at Core Foundry for his story scene.
- Play as Richtofen and buy Melee Macchiato (Dry Docks)
- Wait until round 15, then go to the barrel at Core Foundry (via Double Tap)
- Stand at the barrel facing the south wall and Melee Macchiato-punch the lid
- Interact with the meat inside to dig up Richtofen's medal
- Pick it up to teleport into a Gruppe 935 castle, where the story quest continues (documents, 115 crystals, Von List, a sword)
MWZ lore lab
Use an ARC-XD through the Core Foundry vent to open the Group 935 Genetic Lab — it recreates rooms from the MWZ cutscenes, Requiem crew included.
- Get an ARC-XD (free on a crate in Eidskallen Square, crafted at a table, or fished)
- At Core Foundry's VS Recon warehouse, go upstairs and shoot the vent in the NW bottom corner to open it
- Drive the ARC-XD through the vent and down the stairs (aim right on the ramp, don't boost or it falls in the water)
- Detonate it at the wood-panelled door with the explosive barrels at the back
- The Group 935 Genetic Lab is now accessible left of Pack-a-Punch on Fishery Island — inside is the lab puzzle for Uranium, the Necrospike and lore
Cursed mode Relic Trial
In Cursed Tier I+, reach round 40 with no perks to open a Relic Portal: a timed hunt for 4 hidden eggs, each spawning an HVT. Rewards a Cursed Relic.
- Start a Cursed Mode run (Tier 1+) and reach round 40 without ever gaining a perk (no machines, GobbleGums, trials or perk power-ups)
- The Stuffed Elephant Relic Portal spawns behind Juggernog on Fishery Island — buy perks now if you want, then enter
- You get 3 minutes to find and destroy a Mr. Peeks egg; each egg spawns an HVT whose kill adds +3 minutes
- Egg/HVT spots: Skallen Market (Necropincer), Tyr's Shoulder/Storm Bridge (Doppelghast), Dry Dock (Amalgam), Beacon Island lighthouse (Zursa Bear)
- Destroy all four eggs and kill their HVTs to earn the Stuffed Elephant Relic
Interactive solvers
Every solver for Totenreich, in the order you meet them. Each also appears inside its step in the walkthrough above — use whichever is handier. Browse every Zombies solver →
Flak Gun Crate Helper
War Factory manifest → 4 cratesThe Cargo Manifest in the War Factory Admin Room marks which crate holds the PZGR .39 (the Flak Gun Round). Pick the ID from the ammo-icon row to see where that crate is, or just tick crates off as you brute-force them — a wrong crate is only a ~30-second gas/EMP debuff.
Console Tuning Helper
Tyr's Head → consolesCount how many times the lights blink inside Tyr's head. Left blinks set Amplitude, right blinks set Frequency — enter each sequence and the console settings show below.
Genetic Lab Jar Solver
Group 935 Genetic Lab — Fishery IslandIn the south corridor, two of the five numbered doors (1–5) have a radiation symbol. Tap those two — the jar letters to place populate live (1=A … 5=E).
Claw Machine / Atomkraft Core — how it works
Machine WorkshopThis step is a randomised circuit puzzle, so there's no fixed answer to look up — but the rule is simple once you see it.
Fireplace Rune Order Tracker
Rune circleWhen the rune circle rises, arrows point to specific runes. Tap the rune each arrow points to, in arrow order — the shooting order builds below. Then shoot the wooden pile beneath each rune in that order. Match the runes by shape.
Recommended loadouts
Three strong picks for this map — the map's Wonder Weapon plus reliable box/wall options. Each weapon lists a full recommended attachment build and the perks to pair with it, every perk shown with its Major and Minor augment. Push weapons to Legendary rarity and Pack-a-Punch; augment/attachment metas shift with balance patches, so treat these as a strong current baseline.
Jotunn Star (Wonder Weapon)
Melee to ~R40+The quest weapon and the strongest melee option here — ice flail that freezes and shatters. Best with Melee Macchiato; damage tapers past round 40, so keep a ranged backup.
Attachments
- —Wonder Weapon — no Gunsmith attachments
Perks & augments
- Jugger-NogMajorTurtle Shell — back armour absorbs rear damageMinorDurable Plates — tougher armour
- Melee MacchiatoMajorExpresso — all melee attacks are fasterMinorStick 'n Move — faster backpedal after melee hits
- Stamin-UpMajorGuns Up — fire your weapon while sprintingMinorFootwork — faster non-forward sprint
- Speed ColaMajorClassic Formula — even faster reloadsMinorQuick Swap — faster weapon swaps
- Wisp TeaMajorMask of Salvation — the Fox revives you thriceMinorHaste — reduces the Wisp summon cooldown
- Quick ReviveMajorEquivalent Exchange — kill enemies to self-revive (x3)MinorSlow Death — longer last-stand timer
XR3 Ion (Legendary · PaP III)
High-round DPS+Carries you past the Jotunn Star's drop-off and is the standout Totenreich boss weapon — the Vulcan Minigun conversion melts Dravakar's weak spots. PaP + Legendary + a Deadshot crit build. Both creators run the Voyak AR or the Novaline as their bullet gun, with akimbo 1911s as a secondary — poor boss damage, but superb for thinning the arena.
Attachments
- MuzzleMFS 3x3 Compensator
- Barrel15" Fringe Barrel
- UnderbarrelXR-3 Ion Vulcan Minigun (conversion)
- Fire ModsAccelerated Recoil System
- Rear GripXR-Initialize Grip
- StockExposed-73 Stock
- LaserConvergence Box Laser
Perks & augments
- Jugger-NogMajorTurtle Shell — back armour absorbs rear damageMinorDurable Plates — tougher armour
- Speed ColaMajorClassic Formula — even faster reloadsMinorQuick Swap — faster weapon swaps
- Deadshot DaiquiriMajorDead Head — bigger critical-damage bonusMinorDead Break — more damage to armour
- Double TapMajorDouble Dealer — every fourth bullet deals doubleMinorDouble Down — more penetration damage
- Stamin-UpMajorGuns Up — fire your weapon while sprintingMinorFootwork — faster non-forward sprint
- Death PerceptionMajorSixth Sense — see enemies behind, less rear damageMinorHidden Gems — see nearby loot through surfaces
Ray Gun Mk I
Reliable splash+Box pickup; consistent horde clear when the flail's charge is down.
Attachments
- —Wonder Weapon — no Gunsmith attachments
Perks & augments
- Jugger-NogMajorTurtle Shell — back armour absorbs rear damageMinorDurable Plates — tougher armour
- Speed ColaMajorClassic Formula — even faster reloadsMinorQuick Swap — faster weapon swaps
- Stamin-UpMajorGuns Up — fire your weapon while sprintingMinorFootwork — faster non-forward sprint
- Double TapMajorDouble Dealer — every fourth bullet deals doubleMinorDouble Down — more penetration damage
- Elemental PopMajorRainbow Pop — triggers the enemy's weakness elementMinorVulnera Bean — more elemental-weakness damage
- Quick ReviveMajorEquivalent Exchange — kill enemies to self-revive (x3)MinorSlow Death — longer last-stand timer
Recommended kit & gum picks
The recommended kit for this quest. Armour is scarce in the Dravakar fight — there are no max-armour drops, and the floating Viking heads are your only real source, so take them the moment they spawn. MrDalekJD splits the Field Upgrade by mode: Frenzied Guard solo to re-armour, Aether Shroud in co-op. Weapons are in Recommended loadouts above.

Aether Shroud
Cover for the Glocke Drop, the Flak-cannon transmitter and the Dravakar fight.

Frenzied Guard
Pull aggro and repair armour on kills for the Uranium and rune steps.
Dead Wire
Stuns and strips the crowds during the Wunderbarrage and core steps.

Napalm Burst
Burning area damage for the packed lanes.
Shatter Blast
Explosive shrapnel chews armour on Dravakar and the Tyr robot.
Molotov
A fire pool for chokepoints and the core defences.

Monkey Bomb
Distraction bait during the transmitter and Sunstone steps.

Perkaholic
UltraEvery perk at once.
Aftertaste
RareKeep your perks after a revive.

Armor Gettin'
LegendaryFull 3-plate armour vest with plates.

Free Fire
EpicNo ammo for 60s on Dravakar.
Dead Drop
EpicMore salvage and equipment for ~5 min.

Shields Up
RareRefills armour at 2× strength for 3 min — the gum both creators bring on every map, and blue rarity so you will actually have it.

Idle Eyes
LegendaryZombies idle for 30s — buys you a clean run at the Viking heads when the arena gets away from you.
Near Death Experience
UltraMrRoflWaffles puts one co-op player on this; armour is scarce in the Dravakar fight and downs are common.
Perkaholic
UltraFull perks for whoever pops it.

Nowhere But There
EpicTeleport to a downed team-mate and revive nearby.
Aftertaste
RareKeep perks through a down.
Power Vacuum
EpicPower-ups spawn more often for ~5 min.
Free Fire
EpicNo ammo for 60s on the boss.
Per-map augments
The Major + Minor augment to run on each core perk for this quest. BO7 gives 4 Major and 4 Minor options per perk — a different set from BO6, so don't cross them. Picks are tuned to this map's boss and steps; augments unlock at Level 11 and metas shift with patches, so treat as a strong baseline. Per-map augment recs are ground no competitor covers.
 Reactive ArmorMinor
 Durable Plates
 Phantom ReloadMinor
 Quick Swap
 Dead AgainMinor
 Dead Break
 Guns UpMinor
 Hot Foot
 PhD SliderMinor
 Tribologist
 Dying WishMinor
 Slow Death
Calling cards on this map
Cosmetic calling cards you can earn on this map. ⏳ marks time-limited main-Easter-Egg cards — miss the window and they're gone for good. Global Dark Ops challenge cards are in the reference section below.
Main-quest completion card
Main EEComplete the Totenreich main quest.
Exact card name not yet confirmed.
⏳ Time-limited — only awarded if you finish before Directed Mode is added for this map; permanently missable afterwards.
GobbleGum reference — Black Ops 7
Black Ops 7's 52 GobbleGums: the 11 BO7-only gums (tagged New in BO7) plus all 41 that carry over from Black Ops 6. Spare gums crush for Essence. Filter by rarity.
Aftertaste
RareKeep your perks after being revived.

Turncoat
RareNearby zombies are charmed. (Season 2 Reloaded)

Kill Joy
RareDrops an Insta-Kill.

Cache Back
RareDrops a Max Ammo.

Temporal Gift
RareYour next timed power-up lasts longer.

Stock Option
RareAmmo drawn from your stockpile for 60s.

Anywhere But Here
RareRandom teleport plus a concussive blast.
Arsenal Accelerator
RareFaster Field-Upgrade charge for 5 min.
Shields Up
RareRefill armour at 2× strength for 3 min.

Power Keg
RareDrops a Full Power power-up. (Season 1)
Tactical Diffusion
RareNext Nuke is disabled and pays +2,000 Essence. (Season 3)
Requipment
EpicEquipment slots refill over time for 5 min.
Power Vacuum
EpicPower-ups spawn more often for 5 min.
Elemental Exposure
EpicWeapons always hit the elemental weakness for 3 min. (Season 1)
Respin Cycle
EpicRespin the Mystery Box to an equal or higher rarity.
Who's Keeping Score?
EpicDrops Double Points.
Free Fire
EpicNo ammo consumed for 60s.

Exit Strategy
EpicInstant exfil vote with fewer spawns.
Profit Sharing
EpicShare Essence with nearby players for 2 min.
Soda Fountain
EpicYour next perk buy grants +1 random perk.
Nowhere But There
EpicTeleport to a downed player and revive nearby.
Dead Drop
EpicIncreased salvage and equipment drops for 5 min. (Season 2)
Explosive Flourish
EpicEach reload triggers an explosion for 2 min. (Season 4)

Round Off
LegendaryThe round can't advance for 2 rounds.
Armor Gettin'
LegendaryA 3-plate armour vest plus full plates.

Hellping Hound
LegendarySummons a friendly Hellhound that follows and fights alongside you for 5 min; in Dead Ops Arcade it spawns three Hellhounds to fight for you for one round. (Season 4 Reloaded)
Idle Eyes
LegendaryZombies idle for 30s.
Wall Power
LegendaryYour next wall-buy comes Pack-a-Punched.

Immolation Liquidation
LegendaryDrops a Fire Sale.

Phoenix Up
LegendaryRevive all downed players, perks kept.

On the House
LegendaryDrops a Random Perk power-up.
Wall To Wall Clearance
LegendaryWall-buys cost 10 Essence for 30s.

Crate Power
LegendaryYour next box gun comes Pack-a-Punched.

Modified Chaos
LegendaryReduced Ammo-Mod cooldowns for 2 min. (Season 2)
Support Group
LegendaryGrants an ARC-XD, Mangler Cannon, Sentry and Mutant Injection. (Season 3)

Flavor Hex
LegendaryGrants a random Ultra gum. (Season 4)

Gift Card
Ultra+30,000 Essence.

Fully Packed
UltraInstantly upgrades your current weapon to Pack-a-Punch Level III. In Dead Ops Arcade it grants a tactical armour vest with full plates instead. (Season 5 Reloaded)
Perkaholic
UltraEvery perk on the map at once.

Wonderbar!
UltraYour next box spin is a Wonder Weapon.
Near Death Experience
UltraProximity revive with perks for 3 min.

Reign Drops
UltraDrops all core power-ups at once.

Hidden Power
UltraYour held weapon becomes Legendary rarity.
Time Out
UltraClear all enemies and end the round for 3 min. (Season 1)
Slaylist
WhimsicalPlays a random Zombies song. (Season 1)
Newtonian Negation · Indiegestion · Holiday Cheer · Quacknarok · Die Pitched · Rainburps · Jacked Lanterns
Whimsical7 cosmetic seasonal gums — flair only, no gameplay effect.
Field Upgrade reference (Black Ops 7)
Black Ops 7's 9 Field Upgrades — charged by kills, each augmentable at Level 11 (one Major + one Minor, plus an extra Minor slot). Six shipped at launch; Tesla Storm, Frost Blast and Mister Peeks returned in Season 1. The carried-over field upgrades reuse and extend Black Ops 6's augment options (see the BO6 reference above); BO7's full, distinct per-augment names aren't yet reliably published, so they're not itemised here rather than shown incomplete (honesty over guesswork — §11).

Energy Mine
A proximity energy explosion.

Frost Blast
A frost AoE that slows enemies.
Healing Aura
Instant heal beams (also revives teammates in BO6/BO7).
Aether Shroud
Phase out of enemy detection.
Tesla Storm
Lightning links players, stunning and damaging enemies.
Frenzied Guard
Repair armour and taunt enemies; kills repair your armour.
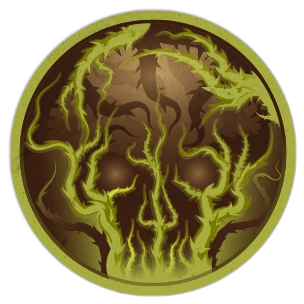
Toxic Growth
Thorn vines that slow and damage.
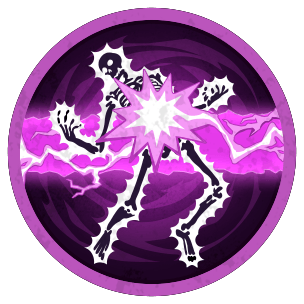
Dark Flare
A penetrating shadow beam.
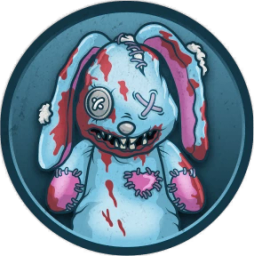
Mister Peeks
Summons a decoy that attracts and attacks enemies. (BO7 new)
Dark Ops & mastery cards (Black Ops 7)
Global ‘Dark Ops’ challenge cards plus mastery/prestige — earnable on any map. Filter by category.
Another Round
Dark OpsReach Round 100.
The One
Dark OpsReach Round 999.
Anathema
Dark OpsEliminate 1,000,000 zombies.
Social Distancing
Dark OpsReach Round 20 without taking damage.
Invincible
Dark OpsSurvive to Round 50 without going down.
Armed to the Teeth
Dark OpsHold 3 Pack-a-Punch-III Legendary weapons with ammo mods and 8 perks.
Box Addict
Dark OpsBuy 30 Mystery Box weapons in a single match.
Harbinger of Doom
Dark OpsKill 100 zombies with a single Scorestreak.
The Usual, Please
Dark OpsDrink Jugger-Nog 20 times in a single match.

New Main
Dark OpsKill 1,000 zombies with each of the 8 dedicated Crew Operators.
Action Hero
Dark OpsKill 100 zombies without reloading.
Martial Artist
Dark OpsReach Round 50 using only melee and Combat Axes.

Ready for Publishing
Dark OpsFully research all Augments.

Countdown
Dark OpsKill an Elite by launching it with a jump pad.
Ingenuity
Dark OpsReach Round 50 with the Dragon Wings + Lawyer's Pen relics active.
Zombies Dark Ops Master
MasteryComplete 15 Zombies Dark Ops challenges.
Force Multiplier / Dead Set
PrestigeReach Prestige (harder at higher prestiges).
Intel
25 pieces — 9 Audio Logs, 11 Documents, 5 Artifacts. Each piece is 1,000 XP; all 25 award 10,000 XP and the Totenreich Intel calling card.
Audio Logs 9
Building Blocks (hint: “Barrels of Fun!”)
Eidskallen Landing — on a barrel outside Lief's Boat Repair, opposite Quick Revive.
Limitations (hint: “Cage Match”)
Group 935 Genetic Lab (open it via the ARC-XD vent run in the Core Factory) — on the first table on your left as you enter.
The Chair Incident (hint: “Holey Buckets”)
Eidskallen Landing — the small barrel right of the big one by the robot's head; a message in a bottle.
The Serpent's Head (hint: “All ashore”)
Eidskallen Square — on the boat docked on the shore.
Talk (hint: “Control Issues”)
War Factory — on the control terminal by the robot head (after activating Tyr's Head in the power quest).
Problems (hint: “Progress through Side Quest”)
Richtofen side EE — the radio in Von List's room, code 01-01-05.
Solutions (hint: “Progress through Side Quest”)
Richtofen side EE — same radio, code 09-03-05.
Counting the Cost (hint: “Progress through Side Quest”)
Richtofen side EE — same radio, code 07-00-04.
He Left Us (hint: “Mixed Signals”)
Core Foundry — metal table on the SE wall of the small warehouse opposite Double Tap.
Documents 11
Little Fishes (hint: “Craft services”)
Skallen Market (Mule Kick) — in the crate behind the crashed cart by the electrical pole.
Saboteur (hint: “Refueling”)
Dry Dock — on a barrel on the east wall, right of Speed Cola.
Rezoning (hint: “Fresh Buns”)
Eidskallen Square — on a box right of Nordvik's Bakery front door.
Secret and Safe (hint: “Another Round?”)
Eidskallen Square, Arsenal building — on the white SE wall, before the shore stairs.
Beneath the Boards (hint: “Over packed”)
Fishery Island red building left of PaP — face east and jump-interact to grab it from the boards above.
Priorities (hint: “Can I vent?”)
War Factory — up the stairs facing back down to the Arsenal; throw a grenade or Semtex into the open vent to knock it loose.
Radio Operator (hint: “Don't stair”)
Lighthouse second floor (after the Jotunn Star quest) — under the stairs by the crowbar cabinet.
Tyr's Bell (hint: “Lightkeeper”)
Top of the Lighthouse — grab during the Jotunn Star quest (lost if you finish the quest first). Take it BEFORE you pick up the Jotunn Star — once the Star is in hand the lamp room closes and only a new game reopens it.
Dossier (hint: “Progress through Side Quest”)
Richtofen side EE — picked up automatically as you progress.
Report (hint: “Progress through Side Quest”)
Richtofen side EE — picked up automatically as you progress.
Telegram (hint: “Progress through Side Quest”)
Richtofen side EE — picked up automatically as you progress.
Artifacts 5
Fishy Fish Bot (hint: “Progress through Side Quest”)
Beacon Island side quest — place a fish on a T.E.D.D. Task and throw a Shock Charge, then craft it at the Eidskallen Square antique store.
Jotunn Star (hint: “Progress through Main Quest”)
Automatic once you get the Jotunn Star wonder weapon (main quest).
Ritterkreuz (hint: “Progress through Side Quest”)
Automatic on finishing the Richtofen side EE (start the game as Richtofen).
Anatomy Chart (hint: “Meat Locker”)
Group 935 Genetic Lab (same room as Limitations) — on the east wall.
Blueprint (hint: “We are all his slaves.”)
Core Foundry warehouse (GobbleGum Machine + Mystery Box) — on the SE wall.
Cursed Mode relics
Six relics on Totenreich — two Grim, two Sinister, two Wicked. Five fell in the first fortnight; the Wrestler's Belt has never been solved — Treyarch confirmed on 4 June 2026 that it is not bugged, and as of 8 September 2026 no published guide lists a method.
Cursed is Black Ops 7's hardest mode, and it needs no unlock — anyone can load it. It strips the run back: you start with a 1911 and no loadout weapon, there is no minimap, no objective markers and no quest progress bars, and every Pack-a-Punch tier costs double — 10,000, 25,000 and 50,000 Essence. Points work the Black Ops III way: melee kills pay more than shots, and any non-lethal hit pays 10.
Relics are not buffs. Every one is a pure downside. What you get back is the Cursed Tier they add up to. A Grim relic fills a third of a tier bar, a Sinister two thirds, a Wicked a whole one — so Tier I is three Grims, or one Sinister plus one Grim, or a single Wicked. Tier I puts Golden Armor on sale after Tier III armor, for 45,000 Essence. Tier II unlocks Ultra rarity — 8,000 Salvage on top of Legendary, or 17,500 from Common. Tier III unlocks Pack-a-Punch IV, for 100,000 Essence. You can equip as many relics as you like, but nothing improves past Tier III.
To earn a relic you finish a hidden side quest, which spawns a Relic Portal, then clear the Relic Trial behind it. Two things catch people out. Relic progress is not saved — the side quest and its trial have to be done in one sitting. And you can only equip a map's relics once you have finished that map's main quest. Inside a trial your own relics are switched off, so the trial's rule is the only thing working against you. Every first-time clear pays 1,000 XP and a GobbleGum.
Power Switch
What it costs you: Your tactical and lethal equipment randomises every round.
- 1Four viewpoints around the map
Count the deer heads on four out-of-map statues
These sit well outside the playable space, which is why you want a scope. Eidskallen Landing — look south across the water behind spawn, best seen from the zombie spawn window. Core Foundry — on top of the mountain, far left side. Tyr's Foot — north-west, on the left of the road. Burial Grounds — on a rock formation behind the tomb entrance. Note how many deer heads each one carries.
The skull counts re-roll every game.
- 2Blodheim Hall
Match each statue to its pelt
Four deer pelts hang in the centre of the hall, and each maps to one statue by compass position: Eidskallen Landing → the south-east pelt · Core Foundry → south-west · Tyr's Foot → north-west · Burial Grounds → north-east.
- 3Blodheim Hall
Axe them fewest heads first
Throw the Combat Axe at the pelts in order, from the statue with the fewest deer heads to the one with the most.
A wrong order resets the pelts.
PortalBlodheim Hall, between the south pelts.
Relic TrialThree waves, no HVTs, where enemies can only be damaged by traps — the fire traps at Eidskallen Square and Beacon Island. Bring about 10,000 Essence for activations.
First clear pays1,000 XP and a Profit Sharing GobbleGum.
Wrestler's Belt
What it costs you: Weapon wall buys randomise every round.
Nobody has found this one. The relic is real and its effect is known, but its side quest has never been cracked — it outlasted Kowakujō's entire relic set and was still missing when Rex Infernus launched. Treyarch confirmed on 4 June 2026 that it is not bugged and gave no hints. Dataminers report its trial removes every weapon at the end of each wave, but nobody has found what spawns the portal; the only partial lead is a Mister Peeks magazine that can be picked up in the lighthouse after the main quest — not a solution. Its description was briefly visible in the relic menu during Season Four before Treyarch hid it again. As of 8 September 2026 no published guide or relic-tracking site lists a method, and we would rather say so than print a guess.
Stuffed Elephant
What it costs you: The delay before your health starts regenerating is longer.
- 1The whole run
Reach round 40 with no perks at all
Not one Perk-a-Cola, bought or otherwise, from round 1 through round 40.
No perk from any source — no machines, no Wunderfizz, no gums (Perkaholic included), no T.E.D.D. Task perks, no Mister Peeks eggs, no Random Perk power-ups. Pack-a-Punch, Golden Armour, Disciple Injections and Field Upgrades are all fine. Camp the Lighthouse second floor or the Beacon Island fire trap with the Jotunn Star and Toxic Growth. The portal spawns on round 40, and you may buy every perk before you enter the trial.
PortalA wall behind Jugger-Nog on Fishery Island.
Relic TrialThree minutes to find and shoot four Mister Peeks eggs, each of which spawns an HVT you must kill — every HVT kill adds three minutes. Skallen Market: the broken roof / east windowsill of the white house behind Mule Kick (Necropincer). Storm Bridge: on Tyr's knee, opposite Deadshot (Doppelghast). Dry Dock: a steel beam in the south-west corner of the Mystery Box warehouse (Amalgam). Beacon Island: the lighthouse ledge — look up from the Flammenfalle trap (Zursa). War Machine or Pack-a-Punched Mustang & Sally for the HVTs; ignore the zombies.
First clear pays1,000 XP and a Modified Chaos GobbleGum.
Dancing Arnie
What it costs you: Every Perk-a-Cola machine hands out a random perk instead of its own. It randomises Der Wunderfizz too.
- 1Skallen Market → Blodheim Hall
Get the pot onto the fire
The pot is under a wooden table behind the Mule Kick machine in Skallen Market. Put it on the fire in the centre of Blodheim Hall.
Go prone under the stall table to reach it.
- 2Eidskallen Square
Pour in the beer
The beer mug sits on a wooden barrel near the barge, between Loven's Antiquities and the Arsenal. Carry it back and pour it in.
- 3Storm Bridge
Add the Chilly Chunks
Straight into the pot.
While you are at Storm Bridge, shoot the truck with an explosive weapon to drop another fish can toward building the Jotunn Star — you need it for the last step.
The can is in the crate behind the truck, right of Deadshot — and it must go into the pot BEFORE you start the Jotunn Star, which needs the second can.
- 4Wherever you can trap a Necropincer
Add the red lobster
Kill a Necropincer with the Flammenfalle trap. It drops a red lobster; into the pot it goes.
- 5Round 41+, on a Special Round
Fish the unique fish
From round 41, wait for a Special Round and fish out the unique fish. That is the last ingredient.
It is the red fish, caught with Olaf's Cod Cranker on a Frost Zombie special round from round 40 (Gamerant: 39+).
- 6Blodheim Hall
Feed Mister Peeks 100 Jotunn Star kills
He appears on top of the pot. Kill 100 zombies with the Jotunn Star to satisfy him.
Gamerant and games.gg put it at about 75, codcentral and the wiki at 100 — guns do not count — so keep going until he laughs.
PortalA wall above Pack-a-Punch on Fishery Island.
Relic TrialFive waves of zombies and HVTs that can only be hurt by melee — a Berserker on wave two, a Berserker plus two Necropincers on five. A Pack-a-Punch IV Jotunn Star with Melee Macchiato makes it easy; Toxic Zombies explode on death, so keep your distance.
First clear pays1,000 XP and a Flavor Hex GobbleGum.
Agarthan Device
What it costs you: A different type of zombie spawns at the start of every round.
Before you start: At least one player has to be Edward Richtofen. The Mocha Maul augment must be off, and never save-and-quit mid-chain.
- 1Tyr's Head — the Liberty Falls room
Take the Mister Peeks plushie
Under the bed, in the Liberty Falls room you reach when ejecting from Tyr's Head.
Use the launch chutes in Tyr's Head every round — at random you are dropped into one of the two secret rooms.
- 2Tyr's Head — the Urzikstan room
Take the military helmet
On a crate at the bottom of a shelf.
Crouch at the bottom shelf on the south wall.
- 3Group 935 Genetic Lab
Take the radio
Under the bench inside the cell.
Getting in: ARC-XD through the north-east vent in Core Foundry, detonate at the barrels, enter beside Pack-a-Punch, solve the heads-in-jars puzzle (radiation-marked door numbers → letters A–E), make the purple serum, turn the crab claw into a Necrospike and pick the cell lock — the walkie-talkie is under the bench on the left of the cell.
- 4Richtofen's Echoes of the Damned quest
Place all three on the throne
Start the quest at round 15 or higher, and set the three items down on the seat after the echo of Wulfrun Von List has left it.
As Richtofen, with Melee Macchiato and the Jotunn Star, punch the barrel outside Core Foundry (south side) on round 15+ and dig out the Ritterkreuz to start the quest; place the three items once Wulfrun Von List's apparition vanishes after the weighing-scale step.
PortalDry Dock, above and to the right of PhD Flopper. It is red.
Relic TrialSix waves scaled to round 60, HVTs on three and six, where enemies can only be damaged while you are indoors — the Lighthouse second floor with Toxic Growth and a Pack-a-Punch IV Jotunn Star is the standard answer.
First clear pays1,000 XP and a Near Death Experience GobbleGum.
Music Box
What it costs you: Enemies only take critical damage — headshots, on a standard zombie.
- 1Tyr's Head
Five critical kills from the bay window
Get inside Tyr's Head and take five critical kills shooting out through the bay window.
A sniper off the Tyr's Shoulder wall buy makes this quick; an Insta-Kill window from Temporal Gift or Kill Joy makes it quicker still.
The wiki says the five must be consecutive, Gamerant says they need not be in a row. A Shadow SK from Tyr's Shoulder plus Temporal Gift and Kill Joy gums makes it trivial — look down at Skallen Market and pick heads.
PortalDry Dock — the south-west wall of the building opposite Melee Macchiato, near the Flammenfalle trap. It is red.
Relic TrialSix holdouts in sequence — Fishery Island, Tyr's Foot, Dry Dock, Beacon Island, Eidskallen Square, Skallen Market — each marked by a purple pillar of light. You have roughly 25–30 seconds to reach Mister Peeks and start each one before purple gas starts hurting you, and each safe circle is smaller than the last. No HVTs, but Necropincers in the later ones; Kazimirs and the Jotunn Star.
First clear pays1,000 XP and a Near Death Experience GobbleGum.
When it isn't working
The stalls that actually cost people runs on this map, and what to do about each.
Stuck on step 9 — The claw machine and the core escort?
Doing everything right and nothing happens?
Copied an answer from another guide and it did not work?
Common Totenreich questions
Direct answers to the specific things players look up mid-game — part locations, puzzle steps and more.
Where are the Jotunn Star parts on Totenreich?
How do you solve the constellation shrine on Totenreich?
How do you read the blinking lights on Totenreich?
How does the flak cannon work on Totenreich?
How do you solve the claw machine on Totenreich?
How do the rune bonfires work on Totenreich?
What is the Totenreich song?
Visual guides & sources
Screenshots and exact part locations live in these — open one on a second screen.
Map discussion
A shared community board for Totenreich — posts are public, saved on the server and visible to everyone across devices. Handy for strategies, spawn variations you've noticed, or steps to double-check. Please keep it civil and on-topic.