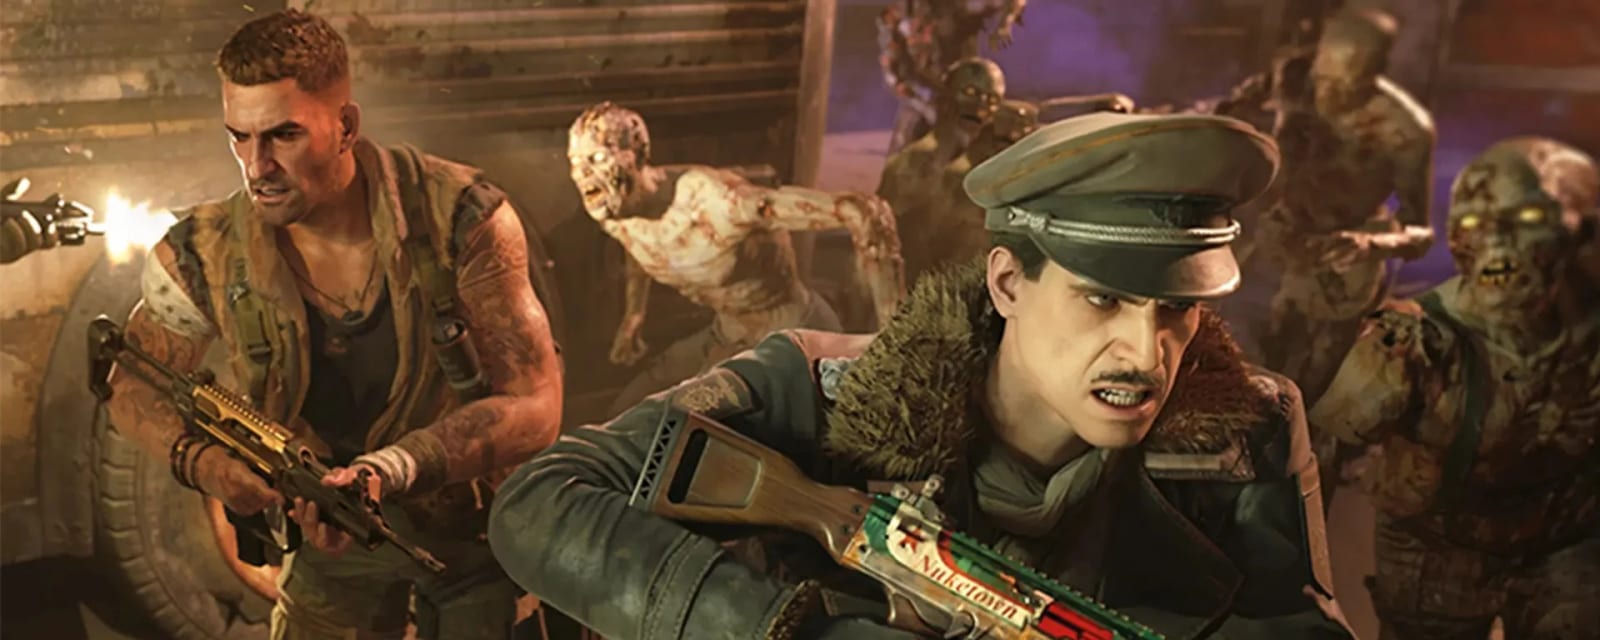
Paradox Junction
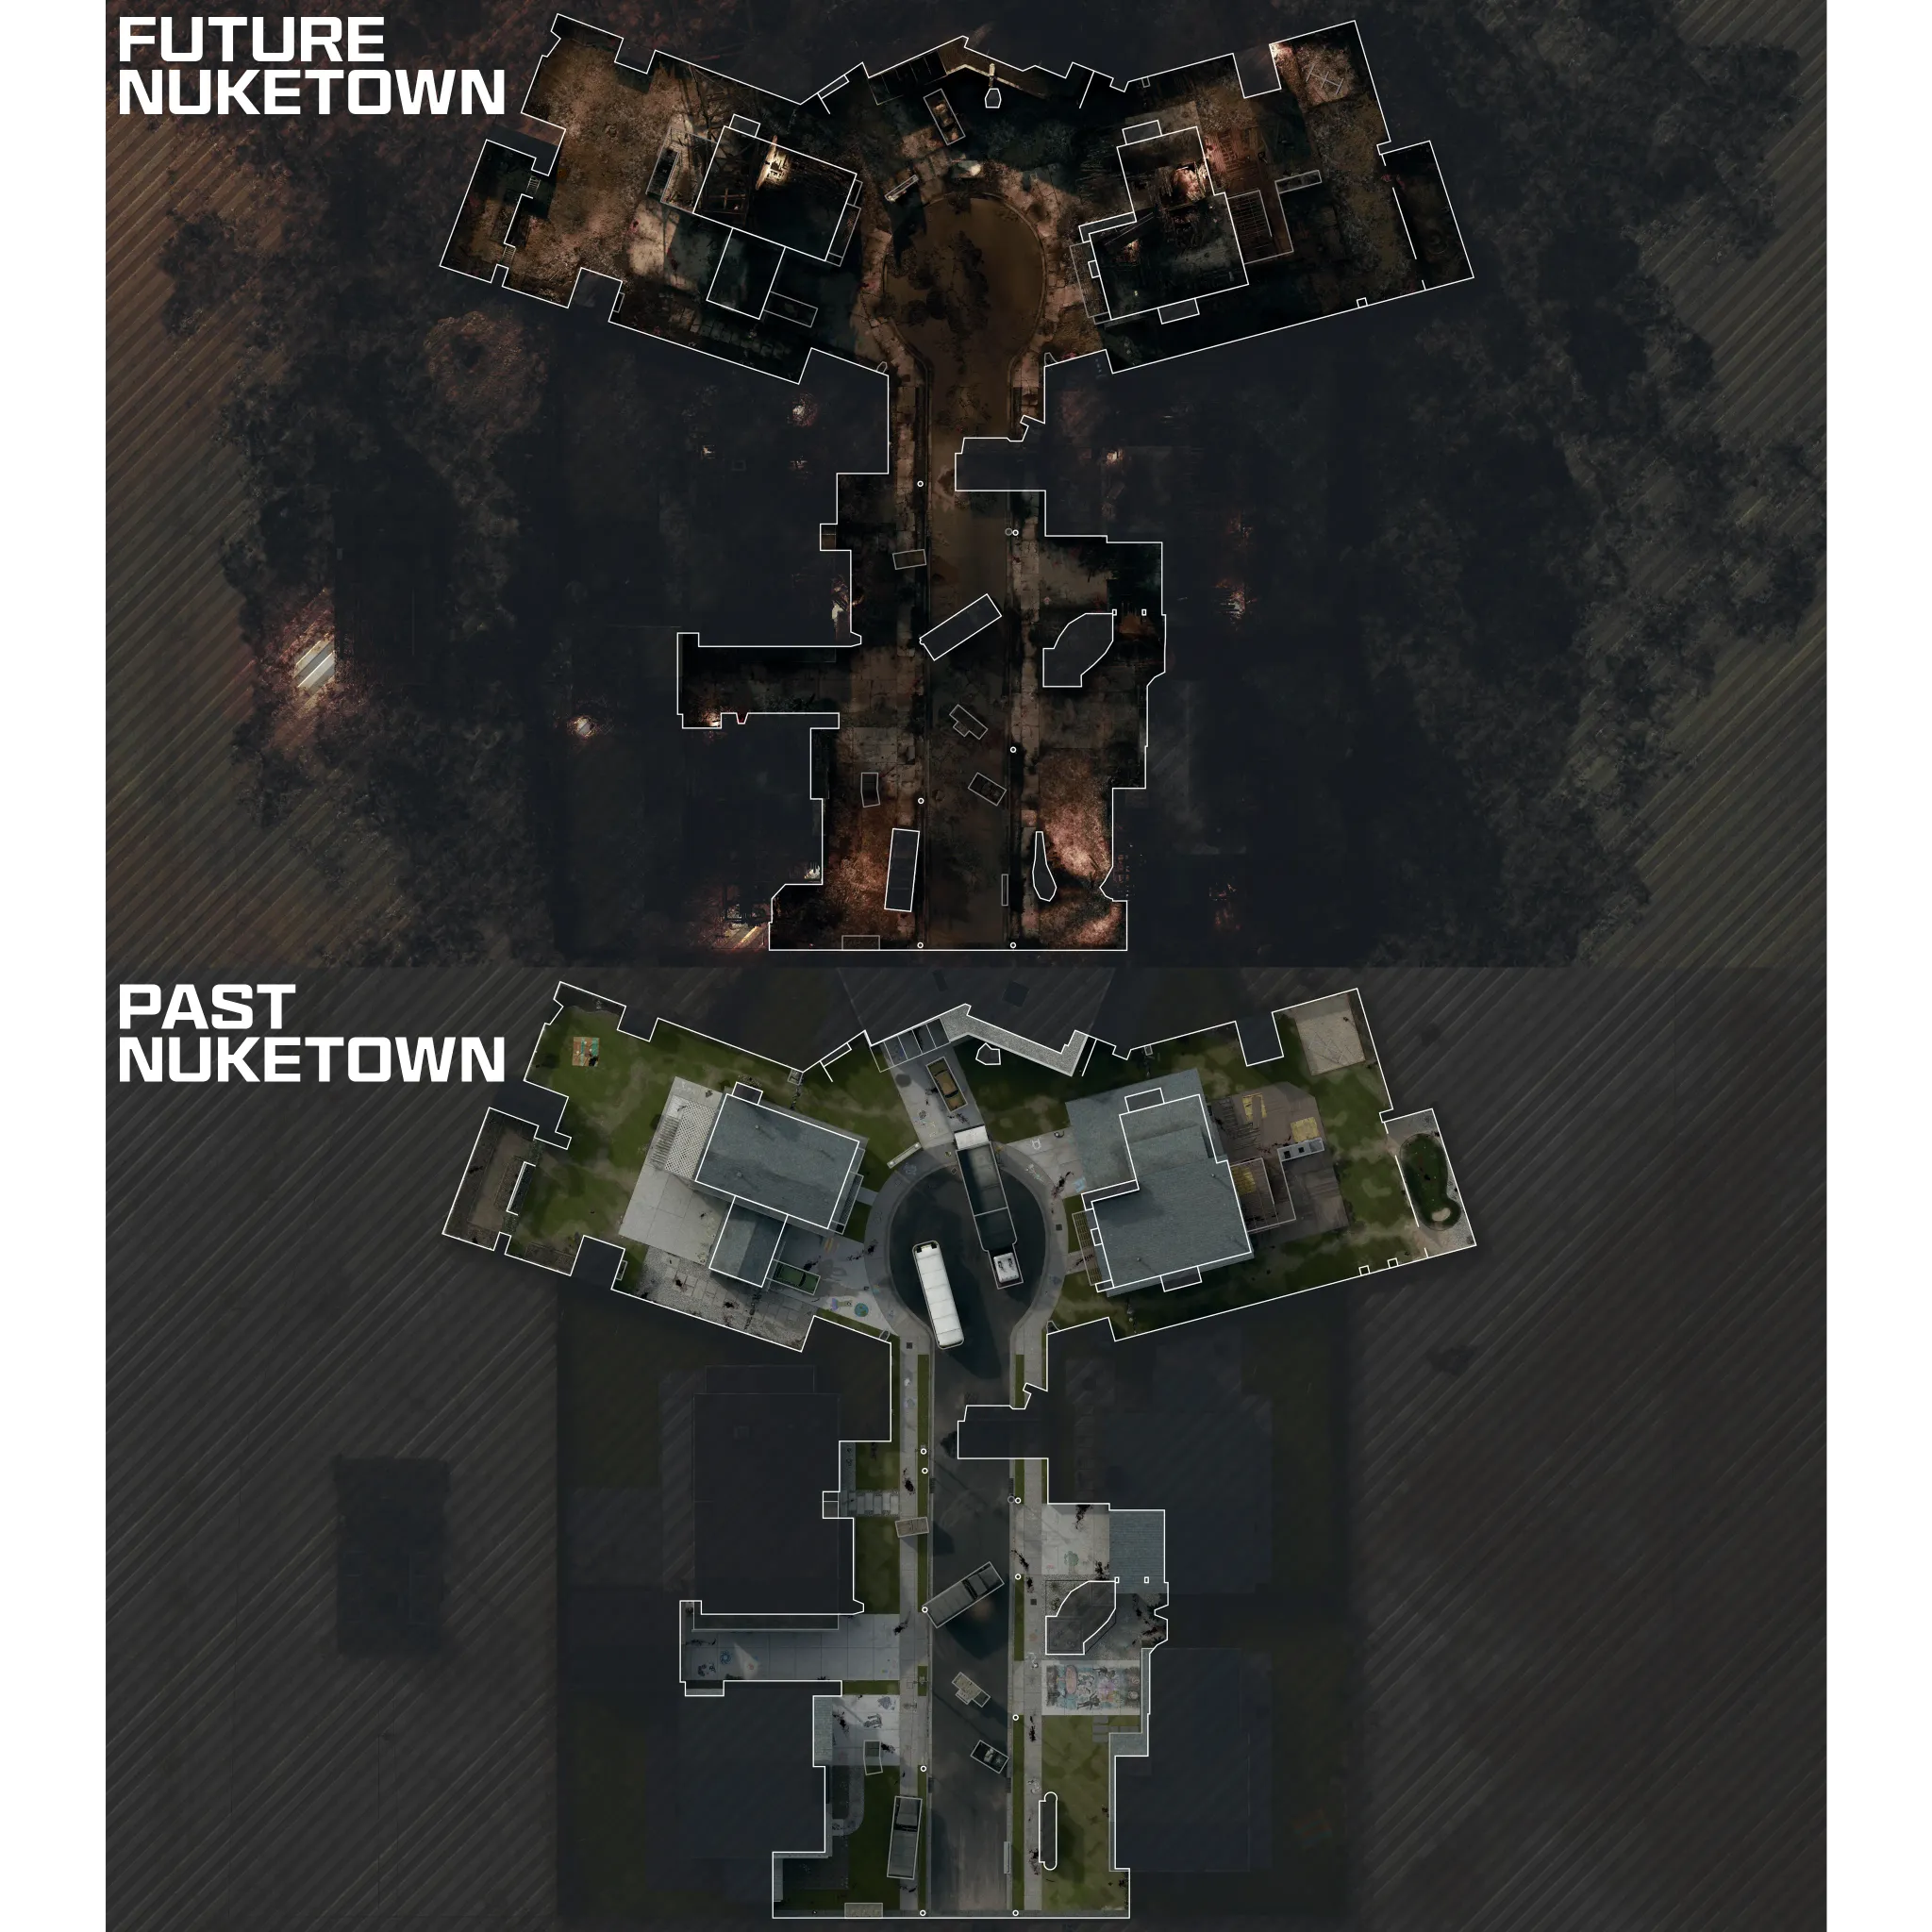
Nuketown split across two timelines — a sunny 1950s 'past' and a nuked 'future'. Warp between them to build the Sundergat, help the Twins, and destroy the Dark Heart.
Quick answers
Paradox Junction is a Black Ops 7 Zombies map — Nuketown split across two timelines, a sunny 1950s past and a nuked future you warp between. The 12-step main quest has you build the Blundergat, upgrade it to the Sundergat, help the ghostly Twins through three children's games, and destroy the Dark Heart boss. Rated Hard; solo-capable.
Where is Pack-a-Punch on Paradox Junction?
What is the Wonder Weapon on Paradox Junction?
Who is the boss of Paradox Junction?
How do the two timelines work on Paradox Junction?
How many steps is the Paradox Junction Easter egg?
How do you complete the Paradox Junction Easter egg?
- Two timelines: Destroyed and Past — every step names which one it needs
- Truck keys from the golf-club zombie → open Trinity Avenue in the Past
- Destroy the space-time knots around PaP → Pack-a-Punch lands
- Build the Blundergat from 4 parts at the van workbench
- Kill 3 tortured zombies at the bench → Sundergat upgrade
- RC car the garage door → chalk + swing seat → the twins appear
- Brain Rot the piano teacher → follow her to the Past
- Seeds → grow the tree → 3 tomahawks → burn the firewood
How long does the Paradox Junction Easter egg take?
Can you do the Paradox Junction Easter egg solo?
How many side Easter eggs are on Paradox Junction?
Are there solvers for the Paradox Junction puzzles?
When was Paradox Junction released?
Map & Key areas
The map layout first, then the areas worth knowing by name. Map imagery © Activision, self-hosted.
 Arsenal
 Electric TrapElectric Trap
 GobbleGum Machine
 Exfil
Exfil Pack-A-Punch
 Mystery BoxMystery BoxMystery Box
 Quick Revive
 Perk-A-ColaPerk-A-ColaPerk-A-ColaPerk-A-Cola
 Door BuyDoor BuyDoor BuyDoor BuyDoor BuyDoor BuyDoor BuyDoor BuyDoor BuyDoor BuyDoor BuyDoor BuyDoor BuyDoor BuyDoor BuyDoor BuyDoor Buy
 Ammo CacheAmmo CacheAmmo CacheAmmo Cache
 Armor VestArmor Vest
 Wall Buy (Velox 5.7)M10 BreacherRazor 9mmVS ReconM8A1MXR-17ArsenalElectric TrapElectric TrapPack-A-PunchExfilGobbleGum Machine
 Crafting TableCrafting Table
 Jugger-NogPerk-A-ColaPerk-A-ColaPerk-A-ColaPerk-A-ColaDoor BuyDoor BuyDoor BuyDoor BuyDoor BuyDoor BuyDoor BuyDoor BuyDoor BuyDoor BuyDoor BuyDoor BuyDoor BuyDoor BuyDoor BuyDoor BuyDoor BuyDoor BuyAmmo CacheAmmo CacheAmmo CacheAmmo CacheArmor VestArmor VestWall Buy (Echo 12)CODA 9Dravec 45MK. 78XR-3 IONCarbon 57Mystery BoxMystery BoxMystery Box
Tap a category to show or hide it. Pinch or double-tap to zoom in — marker positions come from the official Call of Duty map data.
Steps at a glance
- Two timelines: Destroyed and Past — every step names which one it needs
- Truck keys from the golf-club zombie → open Trinity Avenue in the Past
- Destroy the space-time knots around PaP → Pack-a-Punch lands
- Build the Blundergat from 4 parts at the van workbench
- Kill 3 tortured zombies at the bench → Sundergat upgrade
- RC car the garage door → chalk + swing seat → the twins appear
- Brain Rot the piano teacher → follow her to the Past
- Seeds → grow the tree → 3 tomahawks → burn the firewood
- Goggles and headset into the toy box
- Three children's games: hopscotch, four square and jacks
- Clock step: white hand to 12, red hand to 12, then nudge mid-teleport
- Boss: break 3 goo blobs, hold 3 defences, burst the heart's cracks
Before you start
What to have in hand before step 1 — from the loadout notes, from the walkthrough itself, and from the map's own quest documentation where the gate is never stated in a step.
- “Perks you will need later: Wisp Tea and Death Perception.” step 1
- Aether Shroud Field Upgrade — Setup & safety
Set aside 45–75 min · 1–4 (solo-capable) · the full loadout is further down this page
Where your run will differ
Gathered here so you meet them before they cost you a run rather than after — quoted word for word from the guide below, or researched from the map's own quest documentation.
What changes with your player count. The rest of the guide is the same either way.
- “Solo, you run to the opposite square yourself, about fifteen seconds…” step 9
- “Line them up for collaterals; in co-op split the lanes.” step 10
- “Dump everything: Idle Eyes in co-op, Aether Shroud otherwise, Kazimirs during the defences.” step 12
- “Clear space — Decoys or Ether Shroud solo, a teammate holding zombies in co-op” Mini golf
Full walkthrough
The quest in the order this guide runs it — tap any step to jump to it, and it fills in as you tick steps off.
Open the map and land Pack-a-Punch
Read this first — it governs the whole quest. The map has two Nuketown timelines: Destroyed (where you start) and Past (pre-nuke). It flips automatically at every dog round, the first around round 5 or 6; otherwise use the portal, which costs points and needs a round flip to recharge if it says regenerating. Some steps refuse to run on dog rounds, and every step below names the timeline it needs — match it or nothing happens.
(Destroyed) Open toward the back of the yellow house and take the truck keys from the zombie stabbed with a golf club. While you are there, grab the SO3 vial from the desk upstairs and fill it with acid at the greenhouse kitchen sink — interact with the sink, then the acid pool.
(Past) Use the keys on the truck to roll it aside and open Trinity Avenue. Then destroy the space-time knots around Pack-a-Punch: shoot a knot, kill the tethered zombies that drop from the sky, and the knot reappears elsewhere. Three or four cycles and Pack-a-Punch lands.
Grab while you are in the Past: the sealant from the upstairs shelves in the yellow house, and the swing seat from the swing set behind it.
Perks you will need later: Wisp Tea and Death Perception. Machine locations are randomised between the two timelines, so buy them wherever you find them, with WunderFizz as the fallback.
Quick win: The Nuketown clock pays loot at any round: shoot its hands (the clock is knocked down near spawn) until it reads 1:15, then when you next change timeline collect the drop at the clock — a Mystery Perk can, salvage, an Aether Tool and a Pack-a-Punch crystal are all reported, and it scales with the round. While you are in the Yellow House backyard for the keys, the mini-golf course is right there in the Clean timeline: shoot or melee a ball into the white-flag hole in one and it drops Bonus Points, Insta-Kill and Max Armor (a second sink a round or two later pays another Bonus Points). No explosives — they launch the ball out of the court.
Quick win: Intel on the doorstep: Helpful Information on the Yellow House kitchen table (Clean), Live Air on the brick-oven slab in the Yellow House backyard (Clean), The Search Begins on the broken bunk bed upstairs in the Destroyed Yellow House, Run Aground in the upstairs cabinet of the Destroyed Green House, Dead Air on its deck railing, Paper Hearts on the living-room table by its stairs.
Cursed only — The Rocket relic's dog-petting and the Summoning Key's collar and ball can all be done before round 20/40 — only the final pet and the gravestone step are gated.
Build the Blundergat
Four parts in any order, then build in Destroyed at the van in the middle of the map. Melee the workbench first — there is no prompt at all until you do — then interact to craft, and remember to take the weapon off the bench.
Worth doing anyway: fill every soul-cyst you find, not just the ringing one. They drop loot, and at high rounds tier-3 Pack-a-Punch crystals.
Quick win: While you are pouring acid: melt all twelve mannequins (three per vial, refill at the sink) — the last one you melt leaves a free Random Perk power-up where it stood when you return to the future, and the other spots pay about 1,200 essence between them. Mannequins: Green House kitchen, behind the backyard fence, the back deck and the garage; Cul-de-Sac north-east corner left of the Yellow House and before the truck to Trinity Avenue; Yellow House by the stairs, backyard by the swings and behind the house left of the garage; Trinity Avenue by the right-hand garage door, near the M8A1 wall-buy and far right of Pack-a-Punch.
- Barrel — in Destroyed, one yellow soul-cyst emits a ringing tone. Kill zombies beside it until it bursts
- Mannequin part — in Destroyed, find the one ringing mannequin (they stand in the greenhouse, yellow house, spawn and Trinity Avenue) and memorise which. In the Past, interact with that same mannequin to pour the acid on its head — a twins quote confirms a correct guess, and you get three tries. Return to Destroyed and the part lies where it stood
- Wall part — in Destroyed, find the ringing black-goo wall mark (top of the greenhouse stairs on the right, the yellow-house garage, or the corridor entering Trinity Avenue). In the Past, throw an explosive at that exact spot; back in Destroyed the opened wall holds the part
- Sealant — the upstairs shelf in the yellow house in the Past, bottom shelf by the window
Upgrade to the Sundergat
Spend a full round in Destroyed, and at the next round start a tortured zombie spawns held inside a small fire tornado — behind the yellow house, behind the greenhouse, or on Trinity Avenue near Pack-a-Punch. It stays put until you approach.
Do it at the end of a round. When you approach it follows you, and purple-eyed zombies spawn that chain fire into it and drain its life — kill those off it as you go.
Lead it to the Blundergat van and kill it with the Blundergat right in front of the bench so its soul is drawn in. Repeat on two later rounds; missing a round is fine, a fresh tornado appears each time.
The third one is different: it transforms into a shock mimic as you approach, with far more health. Pack-a-Punch the Blundergat before you attempt it.
Finish: in the Past, melee the bench flap open and insert the Blundergat. Return to Destroyed, melee the bench, and collect the Sundergat.
Quick win: Collecting the Sundergat from the truck also banks the Sundergat artifact; Head Cannon sits on the truck bonnet right of Pack-a-Punch in the Clean timeline and Makin' It Right on the car bonnet opposite Pack-a-Punch in the Destroyed one.
Summon the twins
(Destroyed) From around round 8, with all doors open in both timelines, find the ARC-XD remote — right of Pack-a-Punch behind the crates, on the broken shelf in the yellow-house garage, or in the greenhouse back-garden soil bed. Interact to become the RC car.
The route: up the box ramp, along, left, then up the second ramp facing the boxes. Build momentum and jump early to clear them, through the crack, then drive to the garage door and detonate. Fail it and you find another remote next round.
Inside the opened garage a stone zombie fades away — pick up the head and then the chalk piece on the floor.
(Destroyed) Interact with the swing to fit the seat, then again to place the chalk.
Confirmation cue: a white flash and a vision of the twins on the swings. Every later interaction with the girls requires this step first.
Quick win: The stone corpse in the opened garage also hands you the Sidewalk Chalk artifact. Now start the chalk chain: interact twice with the drawing on the yellow shed in the Destroyed Yellow House backyard (Before Times), the drawing on the white fence in the Clean Green House garden (Storm Coming), then the Trinity Avenue street drawing in Destroyed (Trickery) and finally the one behind the Welcome to Nuketown sign in Clean (Aftermath) — each only appears after the one before.
The piano teacher
Do this as soon as the twins appear — it gates the jacks game later and it is pure waiting, so start the clock on it early.
(Destroyed) Wait around the greenhouse backyard watching the back-left arch with the flower bed. Toward the end of a round the piano teacher shuffles in through the fences. Do not kill her. If she does not appear, spend the whole next round there.
Turn her with Brain Rot or a psych grenade and she runs to the piano inside the greenhouse and stands at it.
Now move fast: while she stands there you have limited time to reach the portal and teleport to the Past. In the Past she has opened the piano, plays briefly and leaves.
Confirmation cue: blue note symbols spawn around Destroyed.
Piano Melody Trainer
Green House piano — Clean NuketownThe notes are the same every match, so the difficulty is not knowing them — it is playing them cleanly while a horde closes in, because a fumble resets the whole thing. Hear it, then play it back here until it is muscle memory.
Seeds, the tree and the fireplace
(Destroyed) In the yellow-house garage, crouch and interact with the red box on the shelf — it only opens after the twins step — for the irradiated seeds.
(Past) Plant them in the dirt pile left of Pack-a-Punch. A glowing plant appears and acts as a soul box: kill zombies with the Blundergat beside it — the base version is fine here, and it takes plenty of kills. White flash and a Max Ammo confirm it.
(Destroyed) The tree is now huge. Hit it with three tomahawks for three strange firewood logs — the quote is “that’s plenty of wood”. Craft more tomahawks at the bench as needed.
(Past) Place the firewood in the yellow-house fireplace and Molotov it. A completion quote plays, and back in Destroyed the wood has burned away.
Goggles, headset and the toy box
Goggles (Destroyed): shoot the goggles on top of the telephone pole left of Pack-a-Punch — aim the very top — and they fall out of bounds. Activate Wisp Tea and the wisp carries them back through the fence for you to collect.
Headset (Destroyed): you need Death Perception to even see it. It spawns on the greenhouse upstairs shelf, in the trash bins by the wall-buy fence, or behind the yellow house in the mannequin’s hand near the golf-bag body.
(Past) Open the toy box at the Trinity Avenue entrance — interact once to open, again to load — and place both items. That unlocks the third children’s game.
Quick win: Both pick-ups are intel artifacts (Goggles, Headset) — nothing extra to do.
Children's game — hopscotch
(Destroyed) Stand on the chalk X in Trinity Avenue near Pack-a-Punch until it glows blue and stays lit, then get to the Past.
At the X the twins draw a hopscotch grid. Interact with the white orb over square 1 to start a third-person mini-game: jump square by square 1 to 12 and back to 1, dodging the moving black smoke square.
The rhythm that works: hop the black square as it passes, then follow it home — it wraps from your start straight back to 11.
Fail cooldown is 60 seconds, regardless of the round, so a botched attempt does not cost you a full round.
Finish: a gold music box appears. Escort it with Sundergat kills only — no other weapon fills it — all the way to the fireplace in the yellow house, the long way round through the garden and back kitchen. Max Ammo on arrival.
Quick win: The gold music box you escort is the Music Box artifact once it reaches the fireplace.
Children's game — four square
(Destroyed) Find the red ball phasing in and out of reality — in the Trinity Avenue rafters, on the yellow-house roof, or on the stacked ammo crates in the backyard. If it is not there, flip the round. A PhD Flopper slide-explosion knocks it down nicely.
Shoot the ball along the ground all the way to the X behind the greenhouse until the X glows, then leave it and teleport to the Past.
The twins draw a four-square grid with a floating blue ball. Melee it so it bounces into a different square each time — never twice into the same square. Solo, you run to the opposite square yourself, about fifteen seconds; in co-op a partner returns it and it runs about thirty. Shrouds and decoys make it trivial.
Finish: a gold symbols item — Sundergat-escort it to the toy box in Trinity Avenue. Max Ammo and a white flash.
Children's game — jacks
Needs the piano teacher done first — if the notes are not interactable at all, your tree soul-box is unfinished.
(Destroyed) Eight blue notes sit at fixed spawns: behind the bunker at the greenhouse, behind the yellow-house fence, the spawn-area fence, the side of the yellow bus, and several around Trinity Avenue including the wooden panel by the phone box and behind the rock near the tree. Each blinks between one and eight times.
Count all eight first, then interact in blink order 1 to 8. Get it wrong and you wait for the next round.
(Past) At the greenhouse piano, eight glowing notes are marked on the wall. The tune is the same every game — A (high), F, G, E, F, E, C, E. Wrong notes reset after roughly thirty to sixty seconds.
(Destroyed) Find the floating sideways zombies around the map edges and kill three; their souls fly to Trinity Avenue. Go to the Past, the souls sink, and the twins draw jacks.
The game: the ball bounces and each bounce flings a wave of one-hit-kill zombies into the air — kill every airborne zombie before the ball lands. Line them up for collaterals; in co-op split the lanes. Several waves, 60-second retry on failure.
Finish: Sundergat-escort the gold item through the greenhouse garage, round the back, through the kitchen and onto the piano.
The clock step
(Destroyed) From the top of the bus by the Blundergat van, shoot the big clock above the greenhouse: white hand to 12 first, then the red hand to 12.
The bit everyone misses: start the teleport to the Past and, during the teleport animation, shoot the red hand once more — nudging it to 12:05. It has to happen mid-teleport.
Confirmation cue: you arrive in the Past to music, with the twins at the greenhouse piano. Follow their orb through piano, toy box, fireplace, swing set, listening at each stop. At the swings it becomes a yellow orb — the boss vote.
Boss fight — the Dark Heart
Prep: triple Pack-a-Punch, max rarity, purple or better armour and 15,000+ points spare. Bring Kazimirs and monkeys for the defences.
Each cycle runs the same shape: break three black-goo blobs, hold three 60-second concentration-field defences, then get a damage window on the spinning heart — shoot the glowing cracks top and bottom. Max armour and Max Ammo drop after each third of its health.
Navigating the defences: the blue orb flying onward shows which site is next. Failing a defence only restarts that defence, not the cycle.
Cycle 1: the blobs carry soul cysts needing eight to ten kills each beside them. The boss throws missiles and fire tornadoes — keep moving, and you can damage it from anywhere in the arena.
Cycle 2: blobs are fed by a yellow sky-vortex dropping tethered zombies, just like the Pack-a-Punch knots — kill the tethered zombies to break each blob. Meteors mark the floor with orange circles, and hellhounds join the defences.
Cycle 3: a tortured zombie spawns centre-arena. Escort it to each blob — killing its purple-eyed drainers on the way — and once it tethers itself, shoot the tortured zombie to break the blob. Three times, then the defences again, then the final damage phase with the heart spinning fastest. Dump everything: Idle Eyes in co-op, Aether Shroud otherwise, Kazimirs during the defences.
Needs confirming: the blob-to-location mapping. MrDalekJD names fireplace at Trinity Avenue, toy box at the greenhouse and piano at the yellow house — but the main quest escorts deliver to the opposite pairings, so cross-check in game.
Side Easter Eggs & extras
Everything beyond the main quest. Tap any entry to open the full how-and-where breakdown.
“Come Back Down”
Kevin Sherwood ft. Megan Rice. 3 headphones: behind the blue house fence gap in past Trinity Ave, the past Yellow House upstairs bedroom, and the back of the wrecked truck in future Trinity Ave.
- Interact with 3 Mister Peeks headphones (needs Pack-a-Punch and past/future access first)
- Past — Yellow House upstairs bedroom, on the round table in the corner (very dark)
- Past — Trinity Ave alley, back-left corner, outside the boundary (reach through the fence gap)
- Future (nuked) — Trinity Ave, at the back corner of the wrecked truck's bed
- 'Come Back Down' by Kevin Sherwood & Megan Rice plays
Mannequin acid melt
During the Blundergat Hammer step, keep melting mannequins with the acid vial (Yellow House vial + Green House sink). Melt them all and a free Random Perk power-up spawns where the last one stood, back in the future.
- In the future/destroyed Nuketown, grab the empty vial upstairs in the Yellow House
- Fill it with acid at the Green House sink
- Teleport to the past and melt mannequins (the Blundergat ones) — the vial melts three before running dry
- Refill at the Green House sink and repeat until all 12 are melted
- Return to the future — a free Random Perk spawns where the last mannequin stood
Open the bunker
Lure the mannequin to the Green House bunker across the timelines, then use Brain Rot or Psych Grenades so turned zombies knock on the door (9 knocks). The opened bunker in the future holds a present: random weapon, random perk and 2,000 Essence.
- Build the Blundergat first (gatekeeper for this quest)
- Future: note the cooker in the Yellow House kitchen → hop past → return: a mannequin appears → hop again: frying pan
- Guide the mannequin to the Green House backyard bunker across timeline hops
- Use Brain Rot ammo or Psych Grenades: turned zombies knock on the door (3 zombies × 3 knocks)
- Teleport to the future — the present at the open bunker holds a random weapon, a perk and 2,000 Essence
Mini golf
On the past Yellow House putting green, sink the ball first try (one attempt per match) for a triple power-up reward; miss and you get consolation Bonus Points.
- Teleport to Clean (past) Nuketown from Round 7
- Find the putting green in the Yellow House backyard
- Clear space — Decoys or Ether Shroud solo, a teammate holding zombies in co-op
- One ball, one attempt per match: sink it first try into the white-flag hole
- First-try success = triple power-up drop; a miss pays consolation Bonus Points
1:15 clock
From the Cul-de-Sac bus, shoot the burned house's roof clock hands to 1:15. Loot drops when you first teleport to the past — reportedly scaling with the round.
- In Normal/past Nuketown, find the blast-toppled clock near spawn
- Shoot the clock hand to rotate it one step per shot until it reads 1:15
- After the first dog round (~round 7), teleport to collect the drop
- Rewards: free ether tools, Pack-a-Punch crystals and free perks
The stalking mannequin
Stare at the backwards-headed mannequin in future Trinity Avenue until it snaps position — it then teleports after you all game. Shoot it in the head in the past to end the haunting and collect loot.
- Build the Blundergat first
- In the destroyed version, go to the far-right end of the Trinity Ave alley and stare at the backwards-headed mannequin until it snaps around
- It now follows you when your back is turned (and shocks you if too close)
- Teleport to the past, where it hides in one of a few spots (Green House chimney, behind the PaP fence, Blue House chimney, or the Cul-de-Sac truck)
- Find and approach it for a Random Perk, a PaP crystal, a Rare Aether Tool, a Legendary weapon and a scorestreak
Floating Head & Loot Cyst
With the Blundergat built: follow the masked mannequin head to a soul box for big loot (PaP crystals, legendary tools). Separately, feed the Green House Loot Cyst its Head/Bone/Guts/Ham fetch items to summon the HVT Zynvara, who drops loot including a Deadshot Daiquiri can.
- In past Nuketown, interact with the masked mannequin head on the Green House second floor
- It levitates out to the backyard and stops, spawning zombies
- Kill the ones with purple glowing eyes to charge the head
- Reward (the map's richest): PaP-3 crystals, Legendary Ether Tools and perks
- (Guides don't cleanly separate this from a purple 'loot cyst' that gives a free PaP crystal — treat as the same chain until confirmed)
Frying pan steak
Cooker → mannequin → frying pan across timeline hops; fill the pan with a soul, Molotov the steak, and hop timelines for a Bonus Points drop at the table.
- This is a step in the bunker-opening chain, not a standalone reward
- In the past, turn on the Yellow House stove and kill a zombie by it (the Blundergat helps) so its soul makes a raw steak in the pan
- Molotov the pan to cook the steak
- Hop to the future (the mannequin moves to the dining table), then hop again — it relocates to the Green House bunker
- Open the bunker (turned zombies knock) for a random weapon, a random perk and 2,000 essence
Interactive solvers
Every solver for Paradox Junction, in the order you meet them. Each also appears inside its step in the walkthrough above — use whichever is handier. Browse every Zombies solver →
Piano Melody Trainer
Green House piano — Clean NuketownThe notes are the same every match, so the difficulty is not knowing them — it is playing them cleanly while a horde closes in, because a fumble resets the whole thing. Hear it, then play it back here until it is muscle memory.
Recommended loadouts
Three strong picks for this map — the map's Wonder Weapon plus reliable box/wall options. Each weapon lists a full recommended attachment build and the perks to pair with it, every perk shown with its Major and Minor augment. Push weapons to Legendary rarity and Pack-a-Punch; augment/attachment metas shift with balance patches, so treat these as a strong current baseline.
Sundergat (upgraded Blundergat)
High-round wipe+Upgrade the Blundergat via the quest. Fires on a beat — release on the marker to send a round that penetrates an entire horde (Mimics excepted). The premier Paradox high-round tool.
Attachments
- —Wonder Weapon — no Gunsmith attachments
Perks & augments
- Jugger-NogMajorTurtle Shell — back armour absorbs rear damageMinorDurable Plates — tougher armour
- Speed ColaMajorClassic Formula — even faster reloadsMinorQuick Swap — faster weapon swaps
- Stamin-UpMajorGuns Up — fire your weapon while sprintingMinorFootwork — faster non-forward sprint
- Double TapMajorDouble Dealer — every fourth bullet deals doubleMinorDouble Down — more penetration damage
- Elemental PopMajorRainbow Pop — triggers the enemy's weakness elementMinorVulnera Bean — more elemental-weakness damage
- Quick ReviveMajorEquivalent Exchange — kill enemies to self-revive (x3)MinorSlow Death — longer last-stand timer
Kogot-7 (Akimbo SMG)
Farming & bosses+The akimbo meta SMG handles point farming and the Dark Heart boss — PaP + Legendary with Deadshot and Double Tap. (Akita akimbo is an equally strong shotgun alternative.) Both creators’ headline pick on Paradox is the Novaline marksman rifle — MrRoflWaffles calls it such a good all-round weapon, and it suits the long Nuketown sightlines. Triple-Pack-a-Punch it at max rarity for the boss.
Attachments
- OpticEAM Dyad xL
- MuzzleHawker Ported Comp
- Barrel10.2" TZ-Incisor Barrel
- MagazineVex Expanse Mag
- Fire ModsBuffer Spring
- Rear GripRhinebeck Grip
- StockMFS Kogot-7 Akimbo
- LaserConvergence Box Laser
Perks & augments
- Jugger-NogMajorTurtle Shell — back armour absorbs rear damageMinorDurable Plates — tougher armour
- Speed ColaMajorClassic Formula — even faster reloadsMinorQuick Swap — faster weapon swaps
- Deadshot DaiquiriMajorDead Head — bigger critical-damage bonusMinorDead Break — more damage to armour
- Double TapMajorDouble Dealer — every fourth bullet deals doubleMinorDouble Down — more penetration damage
- Stamin-UpMajorGuns Up — fire your weapon while sprintingMinorFootwork — faster non-forward sprint
- Death PerceptionMajorSixth Sense — see enemies behind, less rear damageMinorHidden Gems — see nearby loot through surfaces
Ray Gun Mk I
Backup splash+Box weapon, always useful for cluster clears while you reposition across the timelines.
Attachments
- —Wonder Weapon — no Gunsmith attachments
Perks & augments
- Jugger-NogMajorTurtle Shell — back armour absorbs rear damageMinorDurable Plates — tougher armour
- Speed ColaMajorClassic Formula — even faster reloadsMinorQuick Swap — faster weapon swaps
- Stamin-UpMajorGuns Up — fire your weapon while sprintingMinorFootwork — faster non-forward sprint
- Double TapMajorDouble Dealer — every fourth bullet deals doubleMinorDouble Down — more penetration damage
- Elemental PopMajorRainbow Pop — triggers the enemy's weakness elementMinorVulnera Bean — more elemental-weakness damage
- Quick ReviveMajorEquivalent Exchange — kill enemies to self-revive (x3)MinorSlow Death — longer last-stand timer
Recommended kit & gum picks
Paradox Junction runs across two timelines (Clean/Past and Destroyed/Future Nuketown) — carry a Field Upgrade that recharges fast so you're covered on both halves. Weapons and the Sundergat are in Recommended loadouts above.

Aether Shroud
Cover for the Blundergat build across both timelines and the Dark Heart fight.

Energy Mine
Lane control for the firepit and Four-Square steps.

Napalm Burst
Burning area damage for the tight Nuketown lanes.
Dead Wire
Stuns and strips the Rad-Hounds, Shock Mimics and Doppelghasts.

Brain Rot
Turns a zombie into an ally during the Hopscotch and clock steps.
Frag Grenade
Reliable clear for both Nuketown halves.

Monkey Bomb
Distraction bait during the Twins and Cymbals steps.
Decoy Grenade
MrRoflWaffles runs decoys over monkeys here. Pair with Kazimirs for the Dark Heart — MrDalekJD calls them a definite want, since they work on the hellhounds too.

Perkaholic
UltraEvery perk at once.

Aftertaste
RareKeep your perks after a revive.

Armor Gettin'
LegendaryFull 3-plate armour vest with plates.

Free Fire
EpicNo ammo for 60s on the Dark Heart.

Dead Drop
EpicMore salvage and equipment for ~5 min.

Shields Up
RareRefills armour at 2× strength for 3 min — the gum both creators bring on every map, and blue rarity so you will actually have it.

Power Keg
RareMrDalekJD brings it for the Dark Heart; blue rarity, so you will realistically have it.
Perkaholic
UltraFull perks for whoever pops it.

Nowhere But There
EpicTeleport to a downed team-mate and revive nearby — handy across the two timelines.
Aftertaste
RareKeep perks through a down.

Power Vacuum
EpicPower-ups spawn more often for ~5 min.
Free Fire
EpicNo ammo for 60s on the boss.
Per-map augments
The Major + Minor augment to run on each core perk for this quest. BO7 gives 4 Major and 4 Minor options per perk — a different set from BO6, so don't cross them. Picks are tuned to this map's boss and steps; augments unlock at Level 11 and metas shift with patches, so treat as a strong baseline. Per-map augment recs are ground no competitor covers.
 Reactive ArmorMinor
 Durable Plates
 Phantom ReloadMinor
 Quick Swap
 Dead AgainMinor
 Dead Break
 Guns UpMinor
 Hot Foot
 PhD SliderMinor
 Tribologist
 Dying WishMinor
 Slow Death
Calling cards on this map
Cosmetic calling cards you can earn on this map. ⏳ marks time-limited main-Easter-Egg cards — miss the window and they're gone for good. Global Dark Ops challenge cards are in the reference section below.
The Bomba
Map challengeComplete the Paradox Junction main quest with all Mantis Relics active.

Main-quest completion card
Main EEComplete the Paradox Junction main quest.
Exact card name not yet confirmed.
⏳ Time-limited — only awarded if you finish before Directed Mode is added for this map; permanently missable afterwards.
GobbleGum reference — Black Ops 7
Black Ops 7's 52 GobbleGums: the 11 BO7-only gums (tagged New in BO7) plus all 41 that carry over from Black Ops 6. Spare gums crush for Essence. Filter by rarity.
Aftertaste
RareKeep your perks after being revived.

Turncoat
RareNearby zombies are charmed. (Season 2 Reloaded)

Kill Joy
RareDrops an Insta-Kill.

Cache Back
RareDrops a Max Ammo.

Temporal Gift
RareYour next timed power-up lasts longer.

Stock Option
RareAmmo drawn from your stockpile for 60s.

Anywhere But Here
RareRandom teleport plus a concussive blast.

Arsenal Accelerator
RareFaster Field-Upgrade charge for 5 min.
Shields Up
RareRefill armour at 2× strength for 3 min.
Power Keg
RareDrops a Full Power power-up. (Season 1)

Tactical Diffusion
RareNext Nuke is disabled and pays +2,000 Essence. (Season 3)

Requipment
EpicEquipment slots refill over time for 5 min.
Power Vacuum
EpicPower-ups spawn more often for 5 min.

Elemental Exposure
EpicWeapons always hit the elemental weakness for 3 min. (Season 1)

Respin Cycle
EpicRespin the Mystery Box to an equal or higher rarity.
Who's Keeping Score?
EpicDrops Double Points.
Free Fire
EpicNo ammo consumed for 60s.

Exit Strategy
EpicInstant exfil vote with fewer spawns.

Profit Sharing
EpicShare Essence with nearby players for 2 min.

Soda Fountain
EpicYour next perk buy grants +1 random perk.
Nowhere But There
EpicTeleport to a downed player and revive nearby.
Dead Drop
EpicIncreased salvage and equipment drops for 5 min. (Season 2)

Explosive Flourish
EpicEach reload triggers an explosion for 2 min. (Season 4)

Round Off
LegendaryThe round can't advance for 2 rounds.
Armor Gettin'
LegendaryA 3-plate armour vest plus full plates.

Hellping Hound
LegendarySummons a friendly Hellhound that follows and fights alongside you for 5 min; in Dead Ops Arcade it spawns three Hellhounds to fight for you for one round. (Season 4 Reloaded)

Idle Eyes
LegendaryZombies idle for 30s.

Wall Power
LegendaryYour next wall-buy comes Pack-a-Punched.

Immolation Liquidation
LegendaryDrops a Fire Sale.

Phoenix Up
LegendaryRevive all downed players, perks kept.

On the House
LegendaryDrops a Random Perk power-up.

Wall To Wall Clearance
LegendaryWall-buys cost 10 Essence for 30s.

Crate Power
LegendaryYour next box gun comes Pack-a-Punched.

Modified Chaos
LegendaryReduced Ammo-Mod cooldowns for 2 min. (Season 2)

Support Group
LegendaryGrants an ARC-XD, Mangler Cannon, Sentry and Mutant Injection. (Season 3)

Flavor Hex
LegendaryGrants a random Ultra gum. (Season 4)

Gift Card
Ultra+30,000 Essence.

Fully Packed
UltraInstantly upgrades your current weapon to Pack-a-Punch Level III. In Dead Ops Arcade it grants a tactical armour vest with full plates instead. (Season 5 Reloaded)
Perkaholic
UltraEvery perk on the map at once.

Wonderbar!
UltraYour next box spin is a Wonder Weapon.

Near Death Experience
UltraProximity revive with perks for 3 min.

Reign Drops
UltraDrops all core power-ups at once.

Hidden Power
UltraYour held weapon becomes Legendary rarity.

Time Out
UltraClear all enemies and end the round for 3 min. (Season 1)

Slaylist
WhimsicalPlays a random Zombies song. (Season 1)
Newtonian Negation · Indiegestion · Holiday Cheer · Quacknarok · Die Pitched · Rainburps · Jacked Lanterns
Whimsical7 cosmetic seasonal gums — flair only, no gameplay effect.
Field Upgrade reference (Black Ops 7)
Black Ops 7's 9 Field Upgrades — charged by kills, each augmentable at Level 11 (one Major + one Minor, plus an extra Minor slot). Six shipped at launch; Tesla Storm, Frost Blast and Mister Peeks returned in Season 1. The carried-over field upgrades reuse and extend Black Ops 6's augment options (see the BO6 reference above); BO7's full, distinct per-augment names aren't yet reliably published, so they're not itemised here rather than shown incomplete (honesty over guesswork — §11).
Energy Mine
A proximity energy explosion.

Frost Blast
A frost AoE that slows enemies.
Healing Aura
Instant heal beams (also revives teammates in BO6/BO7).
Aether Shroud
Phase out of enemy detection.

Tesla Storm
Lightning links players, stunning and damaging enemies.

Frenzied Guard
Repair armour and taunt enemies; kills repair your armour.

Toxic Growth
Thorn vines that slow and damage.
Dark Flare
A penetrating shadow beam.

Mister Peeks
Summons a decoy that attracts and attacks enemies. (BO7 new)
Dark Ops & mastery cards (Black Ops 7)
Global ‘Dark Ops’ challenge cards plus mastery/prestige — earnable on any map. Filter by category.

Another Round
Dark OpsReach Round 100.

The One
Dark OpsReach Round 999.
Anathema
Dark OpsEliminate 1,000,000 zombies.
Social Distancing
Dark OpsReach Round 20 without taking damage.

Invincible
Dark OpsSurvive to Round 50 without going down.
Armed to the Teeth
Dark OpsHold 3 Pack-a-Punch-III Legendary weapons with ammo mods and 8 perks.
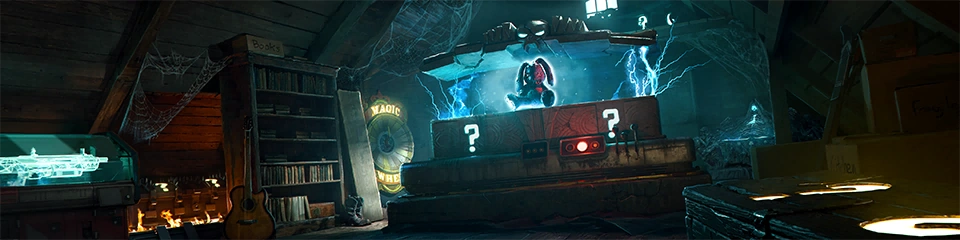
Box Addict
Dark OpsBuy 30 Mystery Box weapons in a single match.
Harbinger of Doom
Dark OpsKill 100 zombies with a single Scorestreak.

The Usual, Please
Dark OpsDrink Jugger-Nog 20 times in a single match.

New Main
Dark OpsKill 1,000 zombies with each of the 8 dedicated Crew Operators.
Action Hero
Dark OpsKill 100 zombies without reloading.
Martial Artist
Dark OpsReach Round 50 using only melee and Combat Axes.

Ready for Publishing
Dark OpsFully research all Augments.

Countdown
Dark OpsKill an Elite by launching it with a jump pad.
Ingenuity
Dark OpsReach Round 50 with the Dragon Wings + Lawyer's Pen relics active.

Zombies Dark Ops Master
MasteryComplete 15 Zombies Dark Ops challenges.

Force Multiplier / Dead Set
PrestigeReach Prestige (harder at higher prestiges).
Intel
18 pieces — 10 Audio Logs, 3 Documents, 5 Artifacts. Each piece is 1,000 XP; all 18 award 10,000 XP and the Paradox Junction Intel calling card.
Audio Logs 10
The Search Begins (hint: “Top bunk taken.”)
Destroyed Nuketown — Yellow House top-floor bedroom, at the broken bunk bed.
Run Aground (hint: “Campers delight.”)
Destroyed Nuketown — Green House top-floor bedroom, cabinet by the window.
Live Air (hint: “Pizza Party!”)
Clean Nuketown — Yellow House Backyard, on the stone tablet at the brick oven.
Dead Air (hint: “Viewing deck.”)
Destroyed Nuketown — Green House Deck, on the wooden railing.
Head Cannon (hint: “Supply drop.”)
Clean Nuketown — Trinity Avenue, on the truck hood right of Pack-a-Punch.
Makin' It Right (hint: “Gold star driving.”)
Destroyed Nuketown — Trinity Avenue, on a car hood opposite Pack-a-Punch.
Before Times (hint: “Check the shed.”)
Destroyed Nuketown — Yellow House Backyard; interact with the chalk drawing on the yellow shed, then again for the log.
Storm Coming (hint: “Plant life.”)
Clean Nuketown — Green House Backyard garden; chalk drawing on the white fence.
Trickery (hint: “Attempted Delivery.”)
Destroyed Nuketown — Trinity Avenue chalk drawing (only appears after Before Times and Storm Coming).
Aftermath (hint: “Pop. 4.”)
Clean Nuketown — Cul-De-Sac; chalk drawing behind the "Welcome to Nuketown" sign (only after the previous three chalk logs).
Documents 3
Paper Hearts (hint: “Stop Stairing.”)
Destroyed Nuketown — Green House, on the living-room table by the stairs.
Helpful Information (hint: “Can we get a booth?”)
Clean Nuketown — on the Yellow House kitchen table.
Wanted Man (hint: “Picketer.”)
Clean Nuketown — Trinity Avenue (via the PaP unlock); wanted poster on the fence immediately left.
Artifacts 5
Sidewalk Chalk
Open the secret Trinity Avenue garage in Destroyed Nuketown with an ARC-XD, then interact with the corpse inside to spawn the chalk.
Sundergat
Claim the Sundergat from the Truck Interior — upgrade the Blundergat via the fire-tornado zombie across 3 rounds, then use the Clean Nuketown workbench.
Music Box
Main quest — grow the tree, light the Yellow House fireplace, then complete the hopscotch to follow the floating music box to the fireplace.
Headset
Main quest (needs Death Perception) — aim at one of three Destroyed-Nuketown spots (Cul-De-Sac bins, Green House upstairs NW wall, or Yellow House Backyard SE corner) to reveal it. Three possible spots — the Cul-de-Sac bins near the Green House, inside the Green House upstairs north-west wall, or the fenced south-east corner of the Yellow House backyard.
Goggles
Main quest — on Trinity Avenue (Destroyed), left of PaP, shoot the speakers on the wooden pole, then use Wisp Tea to fetch them.
Cursed Mode relics
Three relics on Paradox Junction — one Grim, one Sinister, one Wicked, spread across both Nuketowns. All three were found within a week of release; the Rocket was first triggered by accident.
Cursed is Black Ops 7's hardest mode, and it needs no unlock — anyone can load it. It strips the run back: you start with a 1911 and no loadout weapon, there is no minimap, no objective markers and no quest progress bars, and every Pack-a-Punch tier costs double — 10,000, 25,000 and 50,000 Essence. Points work the Black Ops III way: melee kills pay more than shots, and any non-lethal hit pays 10.
Relics are not buffs. Every one is a pure downside. What you get back is the Cursed Tier they add up to. A Grim relic fills a third of a tier bar, a Sinister two thirds, a Wicked a whole one — so Tier I is three Grims, or one Sinister plus one Grim, or a single Wicked. Tier I puts Golden Armor on sale after Tier III armor, for 45,000 Essence. Tier II unlocks Ultra rarity — 8,000 Salvage on top of Legendary, or 17,500 from Common. Tier III unlocks Pack-a-Punch IV, for 100,000 Essence. You can equip as many relics as you like, but nothing improves past Tier III.
To earn a relic you finish a hidden side quest, which spawns a Relic Portal, then clear the Relic Trial behind it. Two things catch people out. Relic progress is not saved — the side quest and its trial have to be done in one sitting. And you can only equip a map's relics once you have finished that map's main quest. Inside a trial your own relics are switched off, so the trial's rule is the only thing working against you. Every first-time clear pays 1,000 XP and a GobbleGum.
On this map: Relic Trials here leave the map open, but lock you to whichever timeline the trial started in.
Rocket
What it costs you: No scorestreaks for the run.
- 1Normal / pre-nuke Nuketown
Pet a Rad-Hound on the clean Nuketown
Turn one friendly with Brain Rot or a Psych Grenade, then interact with it to pet it.
It only works at the end of a round — save the last dog of a Max Ammo round.
- 2Destroyed Nuketown
Pet a D.A.W.G. on the nuked Nuketown
Call in a D.A.W.G. scorestreak, set it to sentry mode, then pet that too.
Order does not matter, and one of the two may be petted before round 20 — but the other has to come after it.
The D.A.W.G. costs 2,250 Salvage.
PortalThe Green House on the clean Nuketown — upstairs bedroom, south wall.
Relic TrialWaves of enemies that only die to their own elemental weakness — Toxic Zombies and Rad-Hounds to Shadow Rift, Doppelghasts to Light Mend, Shock Mimics to Brain Rot. Mule Kick lets you carry more than one ammo mod. Rainbow Pop and the Elemental Exposure GobbleGum are both disabled in here. Mule Kick and three guns, one mod each. Do not run the Mangler Helmet relic while attempting this — it removes the Arsenal you need for the mods.
First clear pays1,000 XP and a Soda Fountain GobbleGum.
Summoning Key
What it costs you: Zombies explode when they die, damaging anyone standing near them.
Before you start: Use Aftertaste so you keep your perks when you go down, carry a Self-Revive solo, and do not buy Quick Revive with the Dying Wish augment — the deliberate down burns it.
- 1Nuked Nuketown — Green House
Blow the dog collar out of the chimney
Throw a grenade into the broken chimney of the Green House. A dog collar shoots out; pick it up.
From the Cul-de-Sac, face the right side of the Green House — the broken chimney by the clock tower.
- 2Normal Nuketown — Yellow House
Have a Rad-Hound dig up the ball
Brain Rot a Rad-Hound near the Yellow House. It runs into the back garden and digs up a ball — interact with the hound to take it.
- 3Nuked Nuketown — Green House back garden · round 40+
Go down on the gravestone spot
You have to down yourself there deliberately. Your perks and loadout are not protected, so arrange the pickup first — a teammate, or a GobbleGum that hands your perks back. A gravestone rises out of the garden; interact with it.
Go down against the back fence, facing west.
PortalThe right-hand side of the Yellow House, seen from the Cul-de-Sac. (The backyard wall.)
Relic TrialFive waves, and you have 1 minute 30 seconds to clear each one. HVTs on two and five — War Machine, the Sundergat and Kazimirs.
First clear pays1,000 XP and a Round Off GobbleGum.
Mangler Helmet
What it costs you: The Arsenal is removed from the map entirely.
Before you start: Two things break this before you even load in. The Mister Peeks augment that grants free box spins stops him picking up the box one — turn it off. And the Seed relic cannot be equipped, because it removes the Mystery Box and a Fire Sale box will not roll Mister Peeks.
- 1Either Nuketown — Mystery Box
Have Mister Peeks fetch the box Mister Peeks
Spin the box until the Mister Peeks weapon comes up. Activate your Mister Peeks Field Upgrade in front of the box and he grabs it. When the field upgrade runs out you can pick it up.
- 2The other timeline
Do the same on the other Nuketown
One from each version of the map.
- 3Both Nuketowns — outside the Yellow House
Put one on each Yellow House mailbox
One Mister Peeks per mailbox, one per timeline.
- 4Round 60
Kill the red-mouthed Shock Mimic with the knife
On round 60 an Ultra rarity knife spawns, not Pack-a-Punched — you can Pack-a-Punch it freely with no penalty. Equip it, find the Shock Mimic with a red mouth, and kill that specific one with the knife.
If round 60 is a dog round and you take the knife on 61, the Mimic comes on 62.
PortalThe balcony of the Green House on the nuked Nuketown, above the front door. It is red.
Relic TrialSix waves of enemies and HVTs (on three and six) with no armour plates and 50 max health removed — guides disagree whether that is 50 points or 50%; either way you are a two-hit down without Iron Core on Juggernog. Aether Shroud plus a War Machine.
First clear pays1,000 XP and a Perkaholic GobbleGum.
When it isn't working
The stalls that actually cost people runs on this map, and what to do about each.
Stuck on step 1 — Open the map and land Pack-a-Punch?
Stuck on step 5 — The piano teacher?
Copied an answer from another guide and it did not work?
Common Paradox Junction questions
Direct answers to the specific things players look up mid-game — part locations, puzzle steps and more.
Where are the Blundergat parts on Paradox Junction?
What is the piano melody on Paradox Junction?
How do you summon the twins on Paradox Junction?
What are the three children's games on Paradox Junction?
How does the clock step work on Paradox Junction?
What is the Paradox Junction song?
How do you upgrade to the Sundergat on Paradox Junction?
Visual guides & sources
Screenshots and exact part locations live in these — open one on a second screen.
Map discussion
A shared community board for Paradox Junction — posts are public, saved on the server and visible to everyone across devices. Handy for strategies, spawn variations you've noticed, or steps to double-check. Please keep it civil and on-topic.